Tissue paper butterfly craft for kids
Easy butterfly craft idea using tissue paper and pipe cleaner for kids
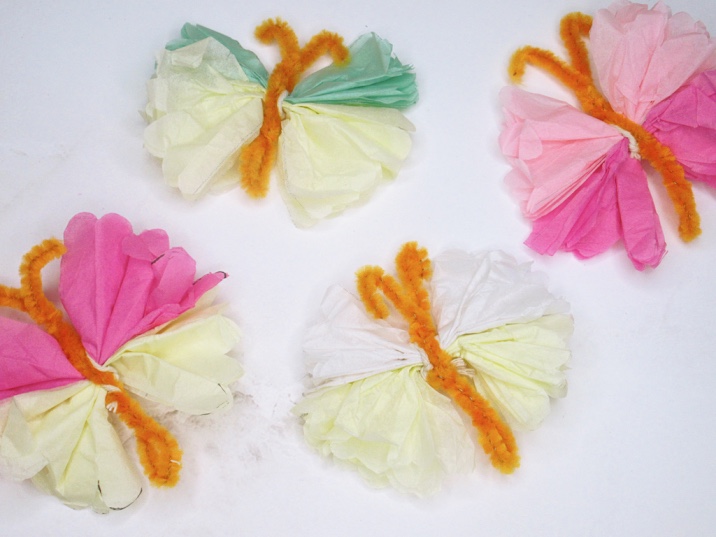
If you are looking to do an easy tissue papercraft with kids, here is an easy butterfly craft idea.
This craft is apt to do during spring. You can also make kids make some tissue paper flowers to bring the spring effect in full swing.
You don’t need many supplies to make this tissue paper butterfly. That makes this craft much simpler.
So, without much ado, let’s move on to the craft.
But before moving on to the craft, we would appreciate it very much if you will check out our Youtube channel and subscribe to it. We upload new easy craft tutorials every week there that are different from what we publish on the blog. Thank you!
So, let’s start!
Some of the links in this post are affiliate links, which simply means that if you happen to purchase something, I get a small commission at NO extra cost to you.
Materials Required
- Tissue papers
- Pipe cleaner
- Ruler and pencil
- Scissors
- Cotton twine (or any thread available to you)
Step 1: Making the wings of butterfly with tissue paper

Here we are using two coloured tissue papers – cream and pink. We will need to cut 4 rectangular pieces from each piece of tissue paper.
So let’s start measuring and drawing outlines. First, draw 4 rectangles of size 9 cm * 6 cm on a tissue sheet with your preferred colour. And cut them out.

From the second sheet, we need to cut larger rectangles than from the first.
So, on the second sheet, draw 4 rectangles of size 10 cm * 6 cm.


Cut the rectangles out.
As the next step, stack the four rectangles on top of each other. And then make an accordion fold (zig-zag fold).


Now, repeat the same steps with the second set of rectangles too (here, the cream coloured ones), and make an accordion fold as shown in the first picture in the above collage.
The next step is to shape the corners of the folded papers. Cut along the corners and make them more rounded.

And place the shorter fold on the longer one neatly, one fold perfectly aligning over the other (remember we made one set of rectangles smaller than the other one, so one fold is shorter than the other).
And make a crease in the middle as shown in the pic and fold the stack in half.
Now, using a cotton twine (or using whatever thread that is available to you), tie the paper folds together and secure them in place.

Cut the extra length off. And slowly separate the sheets of the folds to open the wings of the butterfly.
Step 2 : Making the body of the tissue paper butterfly

Here, we are making the body of the butterfly using a pipe cleaner.
For that, first, make a V-shape and place the butterfly wings inside the V-shape (see the first pic in the collage above).
Now, by pressing the middle portion of the pipe cleaner onto the centre portion of the butterfly wings, start twisting the pipe cleaner. You can twist from bottom to top (if you have doubts, watch the video tutorial below).
Cut the extra length off from the top. And curl the ends of the pipe cleaner to form feelers.

And our tissue paper butterfly is ready! Feel free to shape the edges of the butterfly wings as your kids wish.
Video tutorial to make tissue paper butterfly step-by-step
More crafts:
- Popsicle Stick Dragonfly Craft for Preschoolers
- Paper Cup House Craft
- Paper plate monster craft for kids
- Toilet paper roll Rocket craft for kids
- Easy bookmark idea with Popsicle stick for kids(Step-by-step pictures)
- Simple paper house Coloring activity for kindergarteners (with free colouring Page)
- DIY Paper flower bouquet craft for kids


