
Angel suncatcher craft for kids (free template)
There is something so magical about watching light pass through a suncatcher and spill colours across the wall.
This angel suncatcher craft is one of those projects that looks absolutely gorgeous and at the same time, is actually very simple to put together.
Kids love tearing up the little paper pieces and filling in that colourful window, and the result is something they will surely want to display.
We used a free printable angel template, some scraps of crepe paper, a transparent sheet, and a glue stick. That is really all you need.
If you have contact paper at home, that works too, and skips a few steps since the adhesive does the sticking for you. But the transparent sheet method we used here is just as easy and gives a beautiful and clean finish.
This craft works well for kids aged 5 and up, with a little help on the cutting parts. Older kids can handle most of it independently.
It makes a lovely summer craft, Christmas craft, a Sunday school activity, or just a fun afternoon project at home.
Before moving on to the craft, we would appreciate it very much if you would check out our YouTube channel and subscribe to it.
We upload new easy craft tutorials there that are different from what we publish on the blog. Thank you!
What you need:
- Template #31 – Angel suncatcher template (available in our free resource library – get the password by signing up using the form in step 1)
- White paper for printing the template
- Coloured construction papers in peach/skin tone, brown, and yellow (for the face, hair, and wings)
- Crepe paper or tissue paper in multiple colours
- Two pieces of clear transparent sheet (cut to size) OR Contact paper
- Glue stick
- Scissors
- Hole punch
- String or yarn for hanging
- Yellow foil or yellow papers (for the halo)
- Pencil
A few tips before you start
Pre-tear the tissue paper pieces ahead of time if you are crafting with younger kids.
The filling step is the most exciting part, so let them take the lead on that. For the cutting steps, especially trimming out the inner dotted window, an adult or older sibling can step in to help.
How to Make the Angel Suncatcher (step-by-step tutorial)
Step 1: Gather your materials and print the template
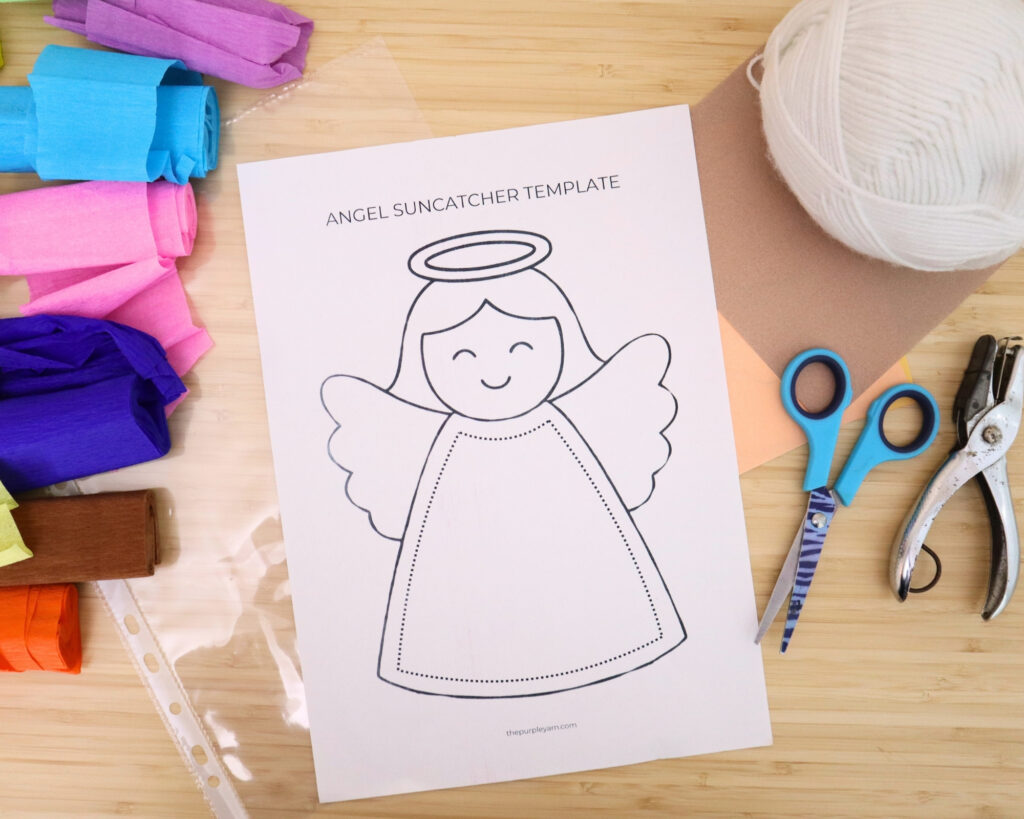
Start by downloading and printing the free angel suncatcher template onto plain white paper.
Lay out all your materials before you begin – construction paper in skin tone, brown, and yellow, tissue paper in lots of colours, a transparent sheet, scissors, a hole punch, a glue stick, and some string.
Having everything ready before you start makes the whole process much smoother, especially if you are doing this with kids.
Free Printable Template for Angel Suncatcher Craft
Grab the free printable template by filling out the form below.
Once you sign up, you will get access to our resource library, where the template is waiting for you, along with lots of other free printables for kids. The password will arrive in your inbox within 1 to 2 minutes – if you do not see it, make sure to check your promotions, spam or junk folder just in case.
Once you have the password, head to the library, download the template, print it on plain white paper, and you can start crafting.
Step 2: Cut out the angel shape and the inner window
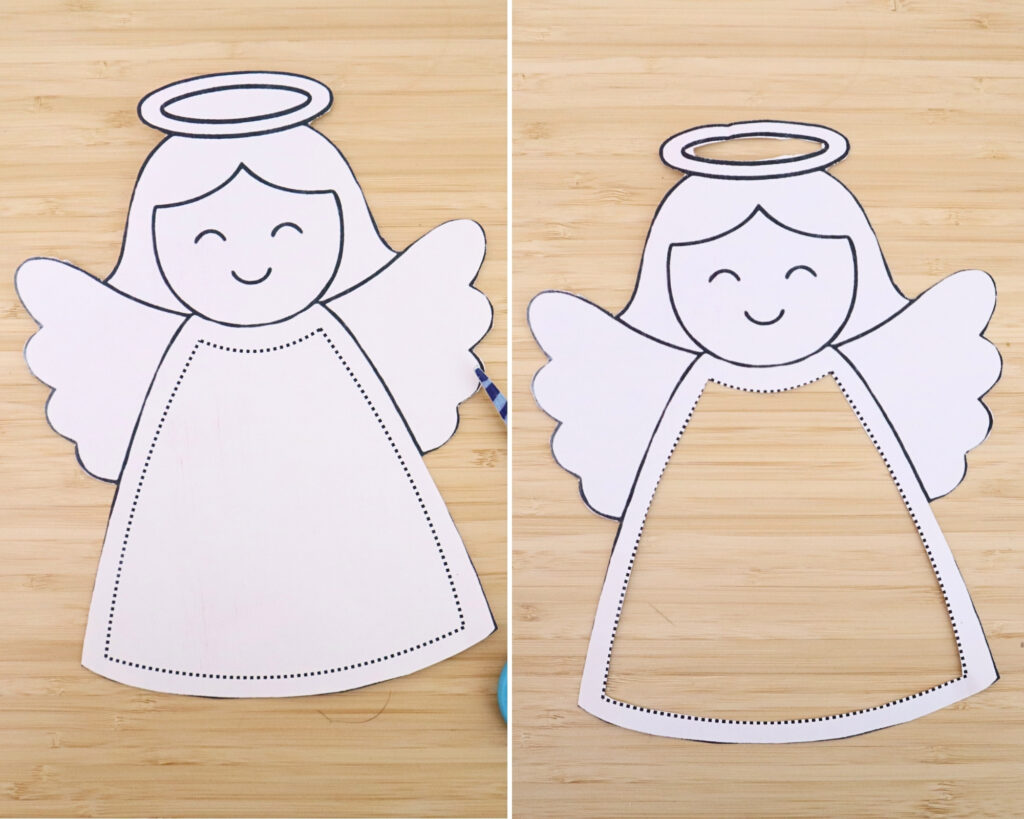
Cut carefully around the outer edge of the printed angel to get the full shape. Once that is done, look for the dotted line inside the body of the angel.
Cut along that line too to remove the centre section.
This open window is where all the beautiful tissue paper colours will show through, so take your time cutting it out neatly, and help kids with this part, if you are working with small kids.
Step 3: Trace and cut the face, hair, and wing pieces

Now trace the face, hair, and wing sections onto your construction paper.
If your construction paper is thin, you can simply place it over the template and trace along the lines directly – the outline will show through.
If your paper is a little thicker, just lay the template on top and trace around each section.
And then cut the face shape from skin-tone paper, the hair from brown, and the wings from yellow. Cut all three pieces out and set them aside.
Step 4: Glue the pieces onto the angel frame
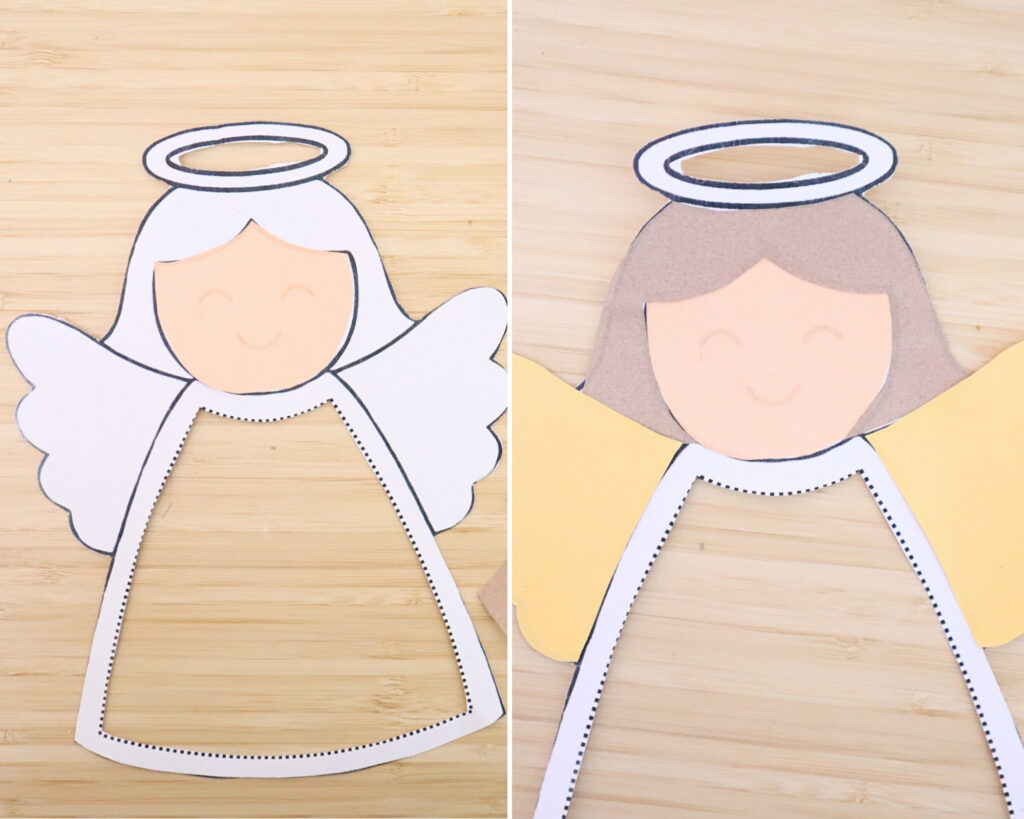
Using your glue stick, attach the skin-tone face piece to the angel frame first.
Then layer the brown hair shape over it and press it down firmly. Finally, tuck the yellow wings behind the angel on either side and glue them in place. You can see here how the angel starts to take shape with all the pieces coming together.
Once the face, hair, and wings are all glued on, set the angel aside and let it dry while you prepare the suncatcher body.
Step 5: Attach the first transparent sheet and prepare the tissue paper
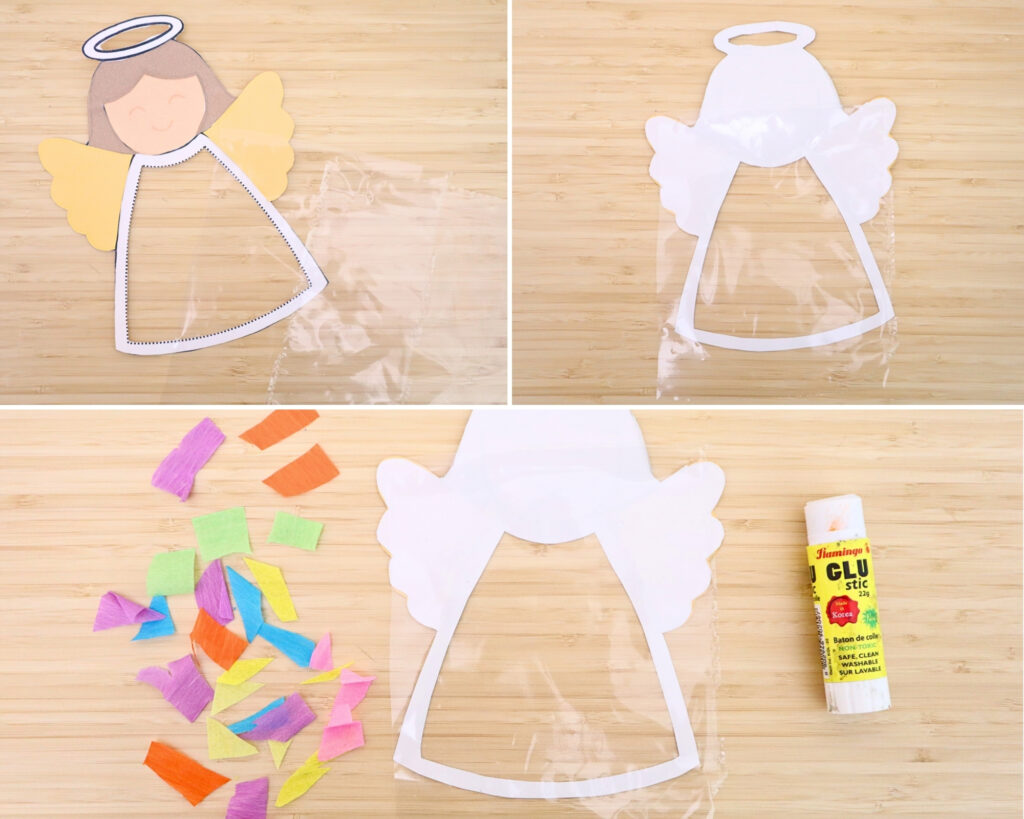
Place one piece of a clear, transparent sheet behind the angel, positioning it so it completely covers the open window in the body. This is your base layer.
While that is in place, go ahead and tear your tissue paper into small pieces. Mix up as many colours as you like – the more the better. We used crepe paper for this craft, but tissue paper works beautifully and is what we would recommend if you have it at home.
Step 6: Fill the window with colour
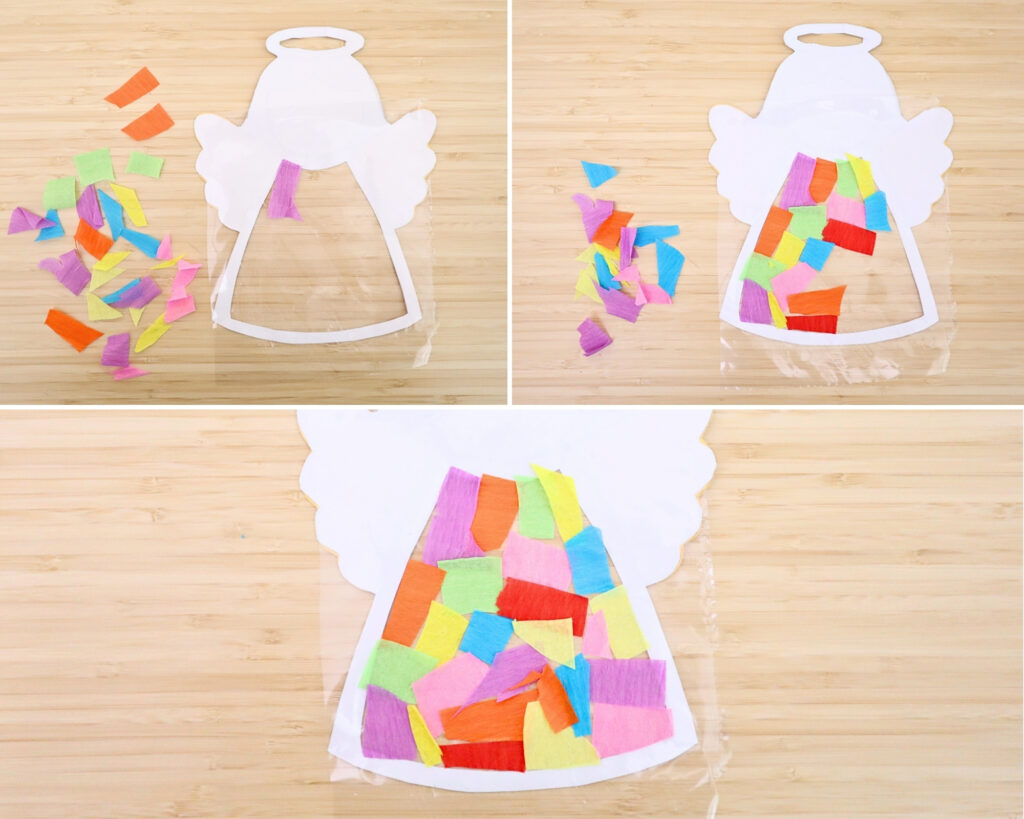
Now comes the most fun part!
Apply glue onto the open window part and press the tissue paper pieces onto the transparent sheet. Start from one end and work your way across, layering and overlapping the pieces as you go.
Keep going until the entire window is packed with colour.
Step 7: Apply glue over the tissue paper
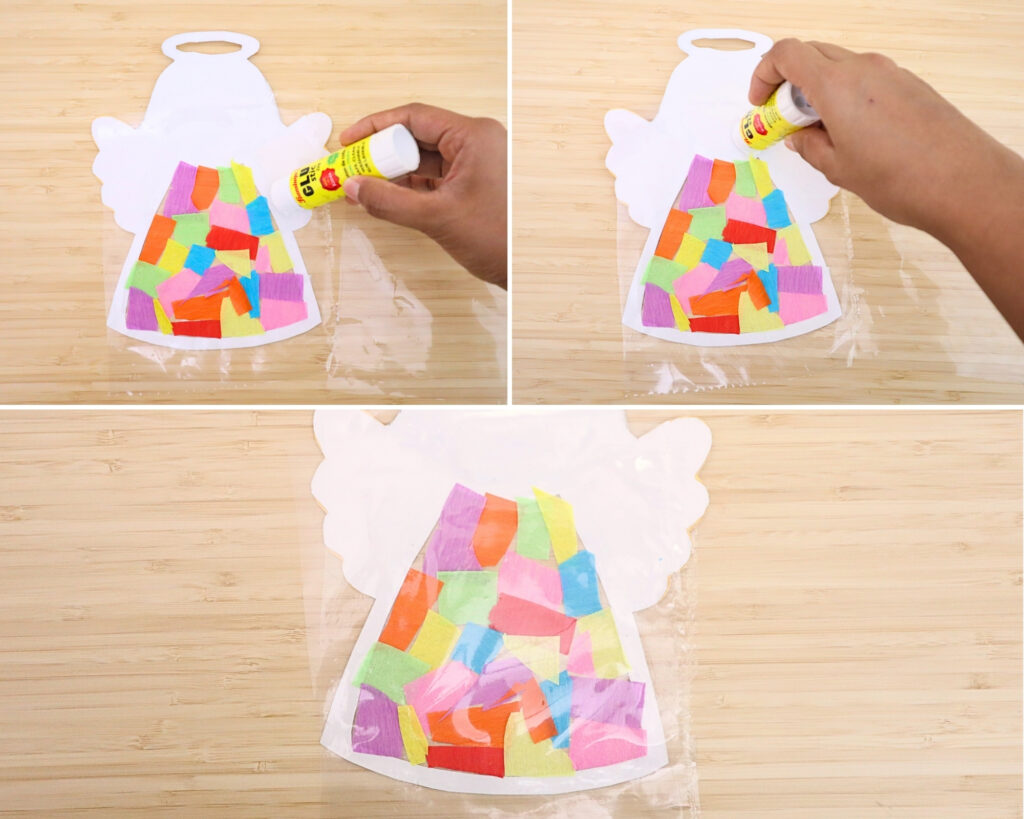
Once the window is fully filled with tissue paper, apply glue around the border of the angel body frame.
You do not need to glue the tissue paper pieces themselves; just run the glue stick along the edges of the window opening so the second transparent sheet has something to stick to.
Now, press a second piece of clear transparent sheet firmly on top, sticking it to the glued border. This seals all the tissue paper pieces between the two layers, giving it that proper suncatcher look.
Step 8: Trim the edges
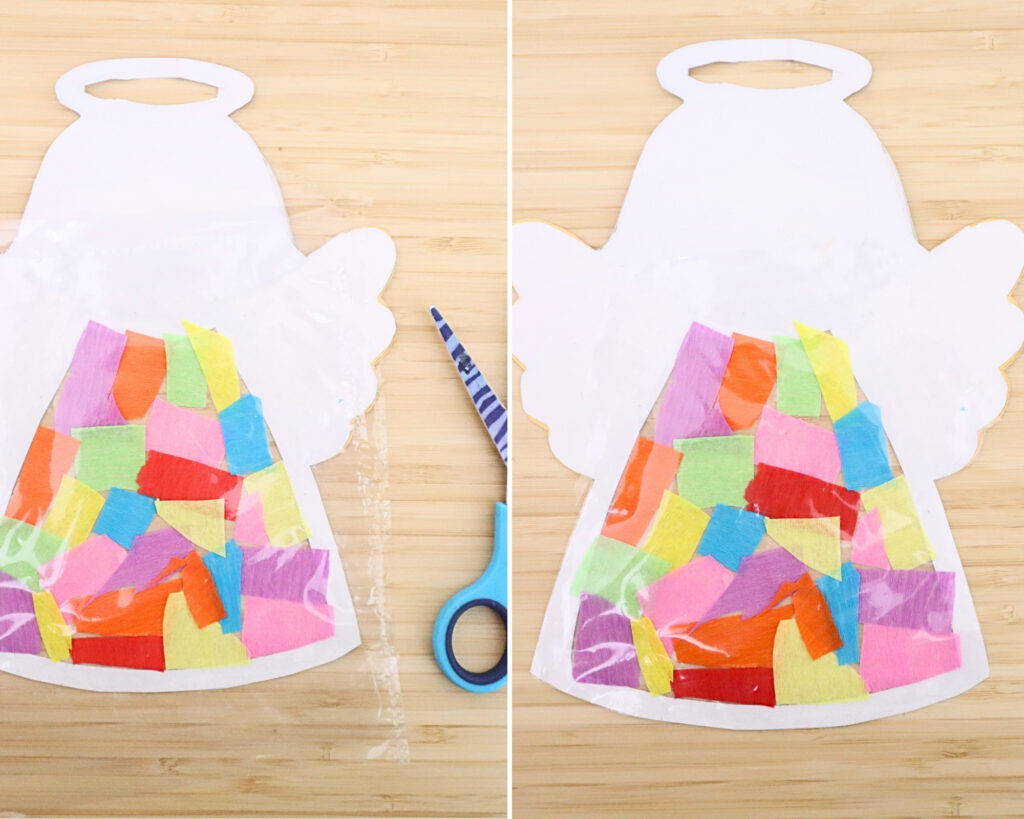
Once the glue is set, use scissors to trim off any excess transparent sheet sticking out around the edges.
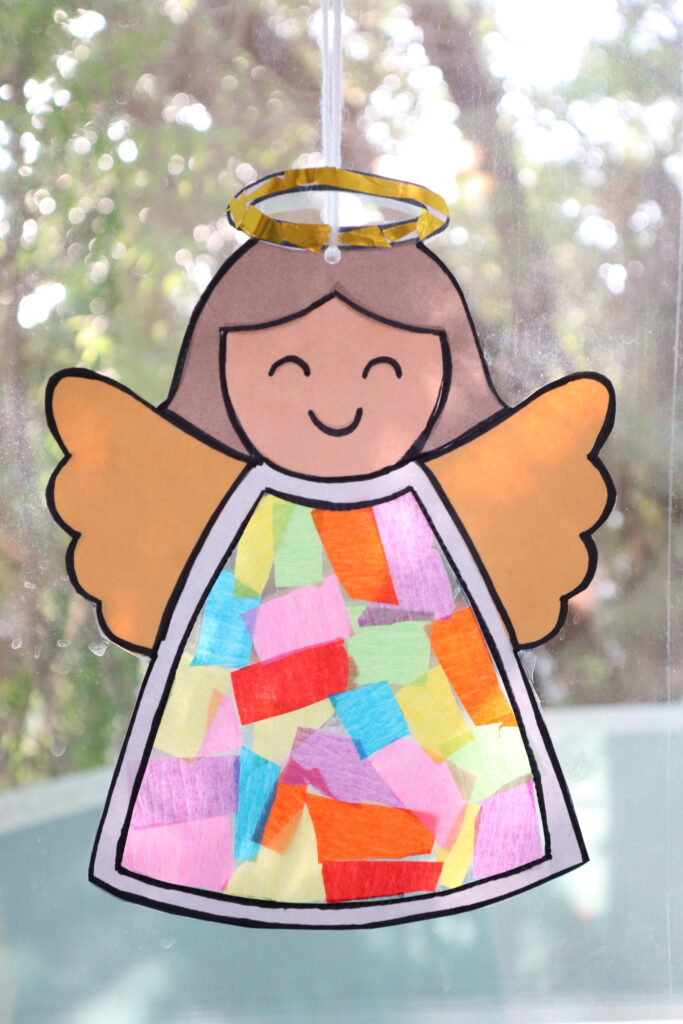
Step 9: Your angel suncatcher is complete
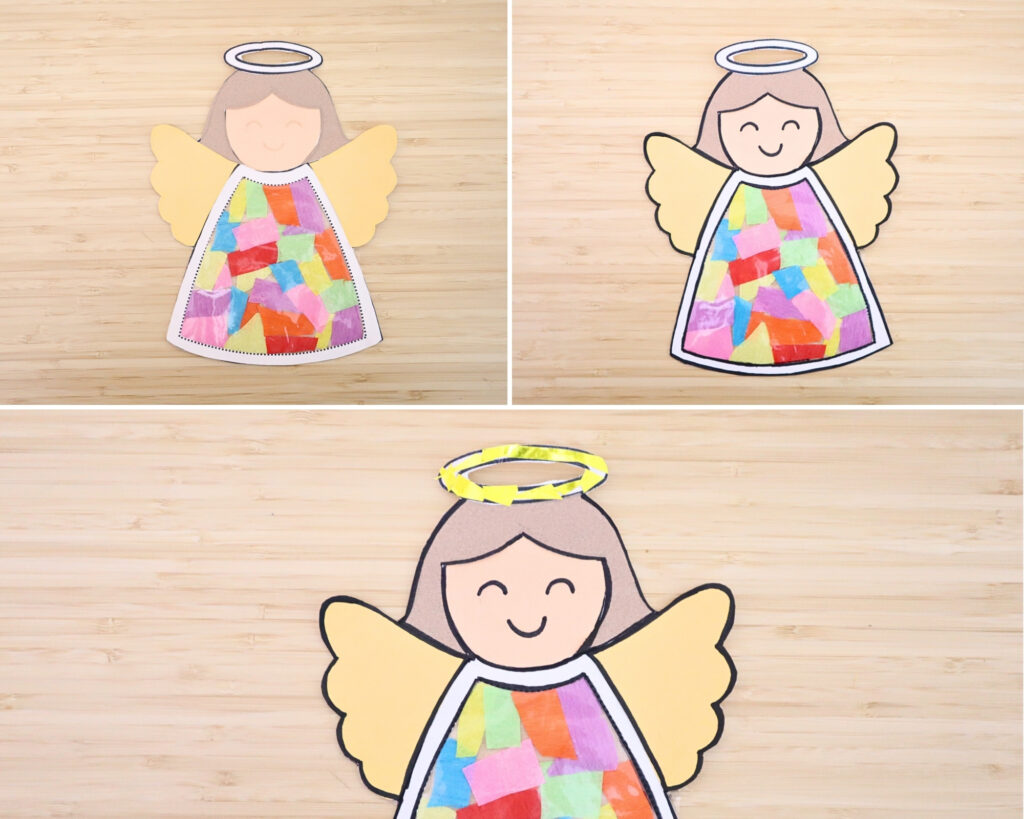
And just like that, your angel is done!
The colourful tissue paper body glows beautifully against the light.
For the halo, we wrapped it with golden foil paper to give it a shiny finish, but use whatever you have at home.
Yellow washi tape, yellow paper, or even a strip of aluminium foil all work just as well.
Step 10: Punch a hole and hang your angel
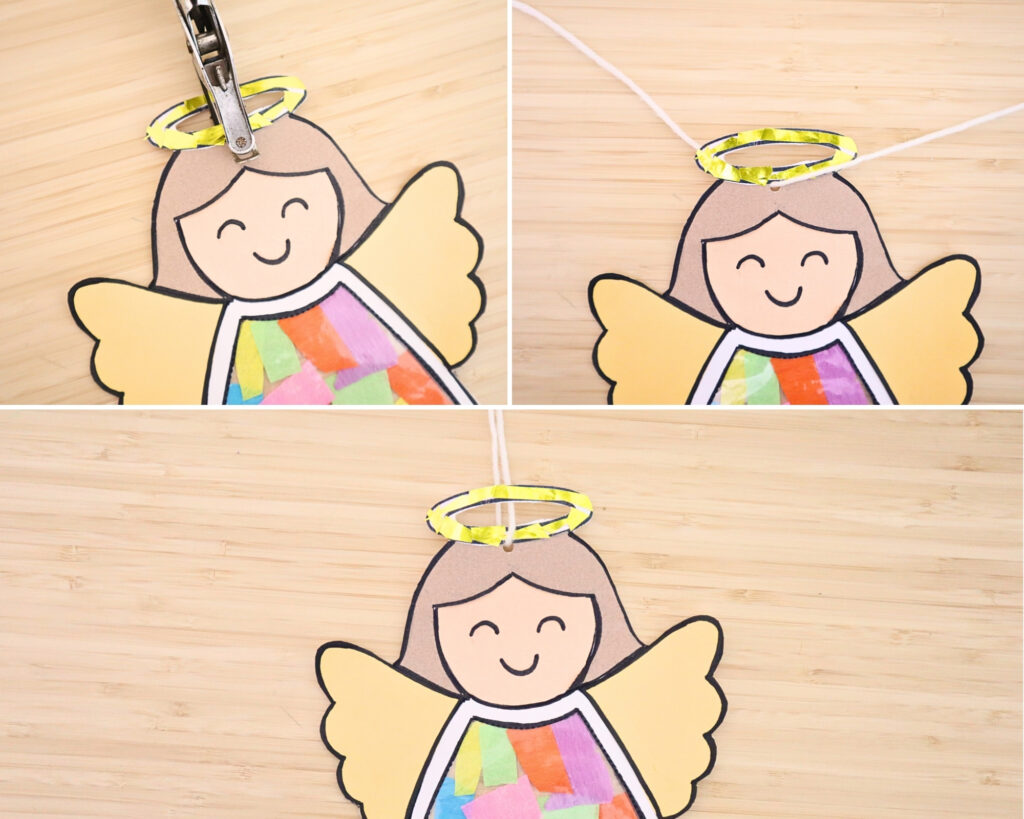
Use a hole punch to make a hole through the halo at the top of the angel. Thread a piece of white string or yarn through the hole and tie it off. Now, go hang it in a sunny window and watch the colours come to life!
A note on contact paper
If you have contact paper at home, you can use it in place of the transparent sheets.
Peel back the backing to reveal the sticky side, lay it adhesive side up, and press your tissue paper pieces directly onto it. Seal with a second piece of contact paper on top. It works just as well and skips the glue step entirely.