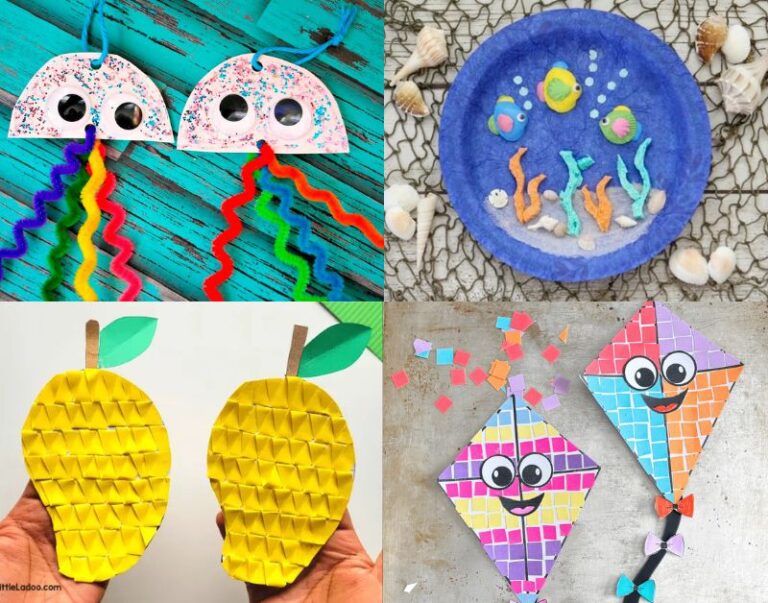

Jellyfish suncatcher craft for kids
Kids and jellyfish go together in the most magical way.
There’s something about those wobbly, colorful creatures that little ones just can’t get enough of.
This jellyfish suncatcher craft brings that magic right into your home, and the best part is how easy it is to put together with supplies you probably already have.
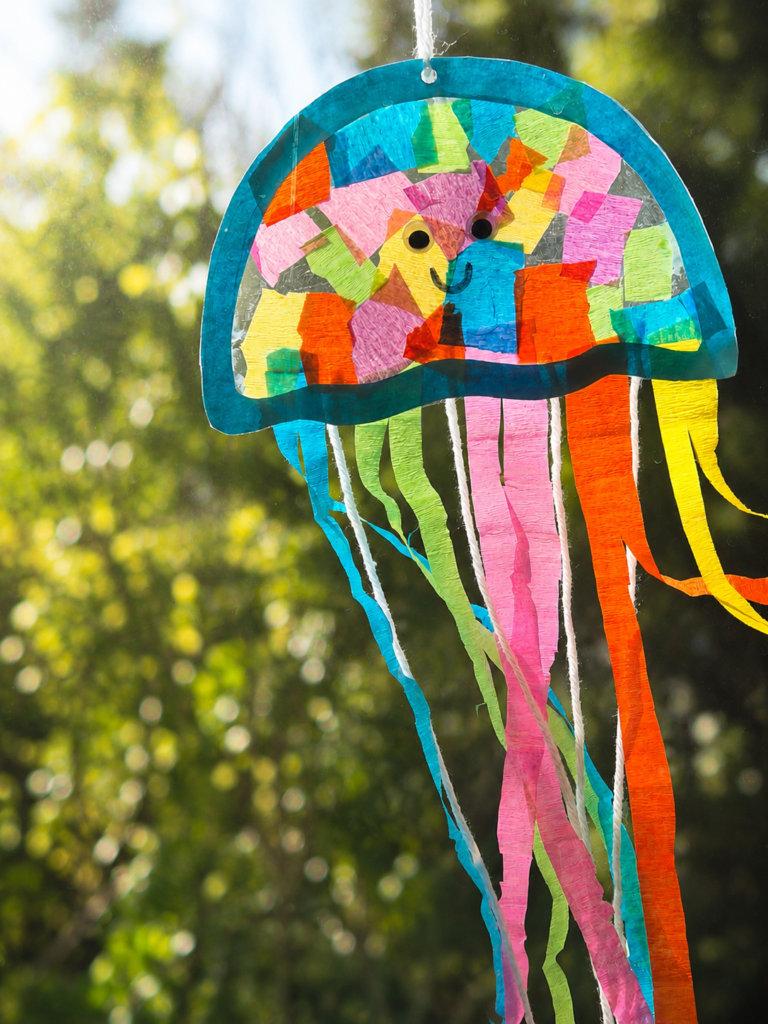
The tissue paper pieces layer together beautifully behind the transparent sheet, and when you hold the finished suncatcher up to a window, the colors just glow.
This jellyfish craft is totally doable even for younger kids.
This is a great one for a rainy afternoon, as a summer ocean-themed craft, a classroom activity, or just a fun weekend project with the little ones.
So shall we go to the craft?
Before moving on to the craft, we would appreciate it very much if you would check out our YouTube channel and subscribe to it.
We upload new easy craft tutorials there that are different from what we publish on the blog. Thank you!
What you’ll need:
- Blue cardstock or construction paper
- Clear contact paper or lamination sheet (can use self-adhesive ones if you want)
- Tissue paper in multiple colors
- A yarn or string
- White glue
- Glue stick
- Scissors
- Pencil
- Googly eyes
- Black marker
Jellyfish Suncatcher Craft (step-by-step tutorial)
Step 1: Gather your materials
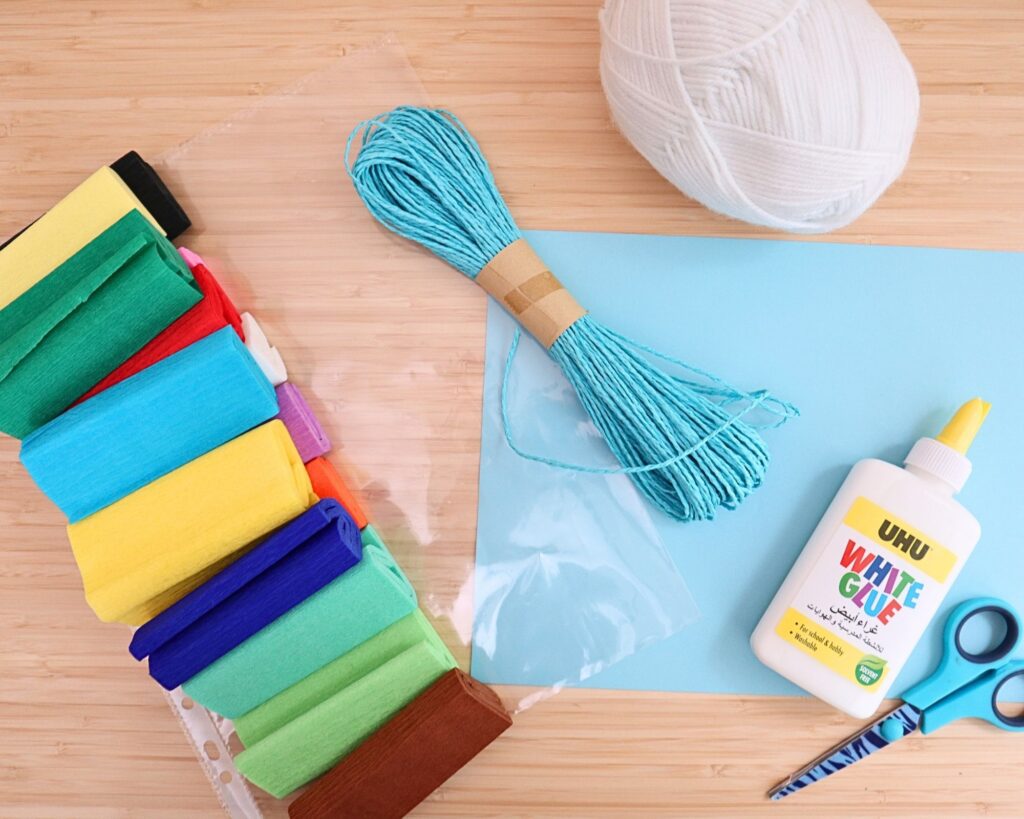
Lay out everything you need before you start.
You’ll need colorful tissue paper rolls, a sheet of blue cardstock, a transparent sheet, a yarn, a bottle of white glue, and a pair of scissors. Having it all in one place before starting makes it much easier to manage.
Step 2: Draw and cut out the jellyfish bell
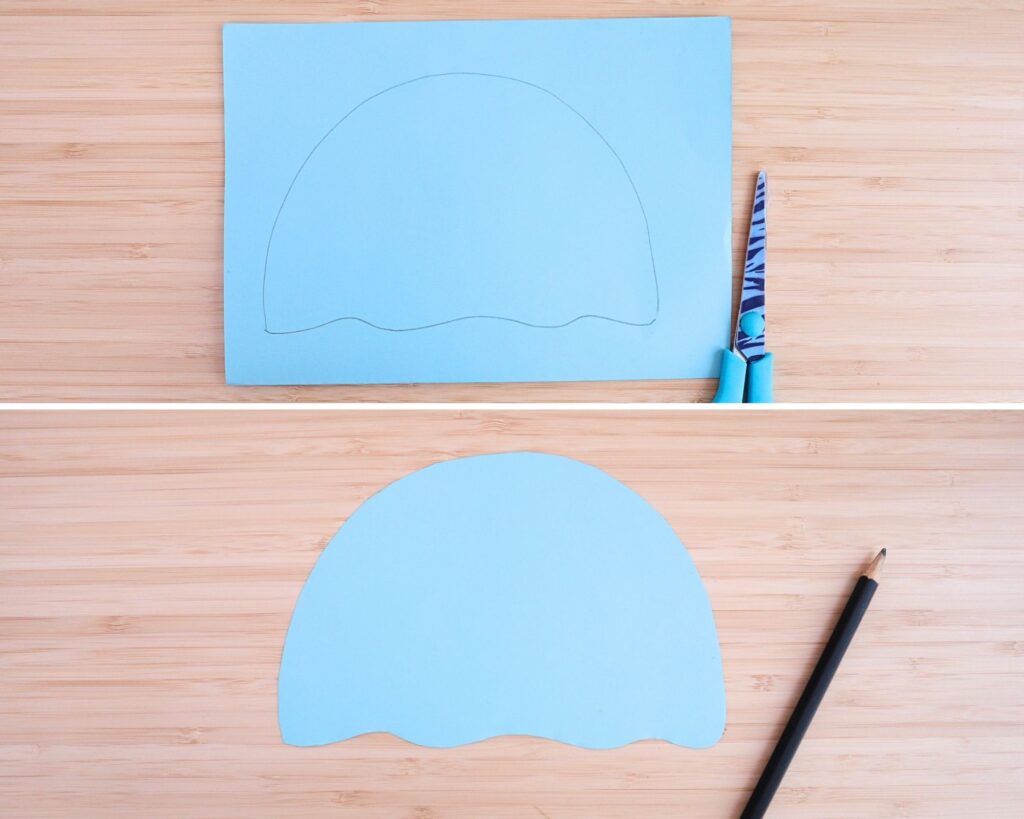
On your blue cardstock, draw a large dome shape with a wavy bottom edge, which is the jellyfish’s bell.
Cut it out carefully along the lines. The wavy bottom gives your jellyfish that fun, wobbly look that makes it look like it’s floating underwater.
Step 3: Create the inner frame
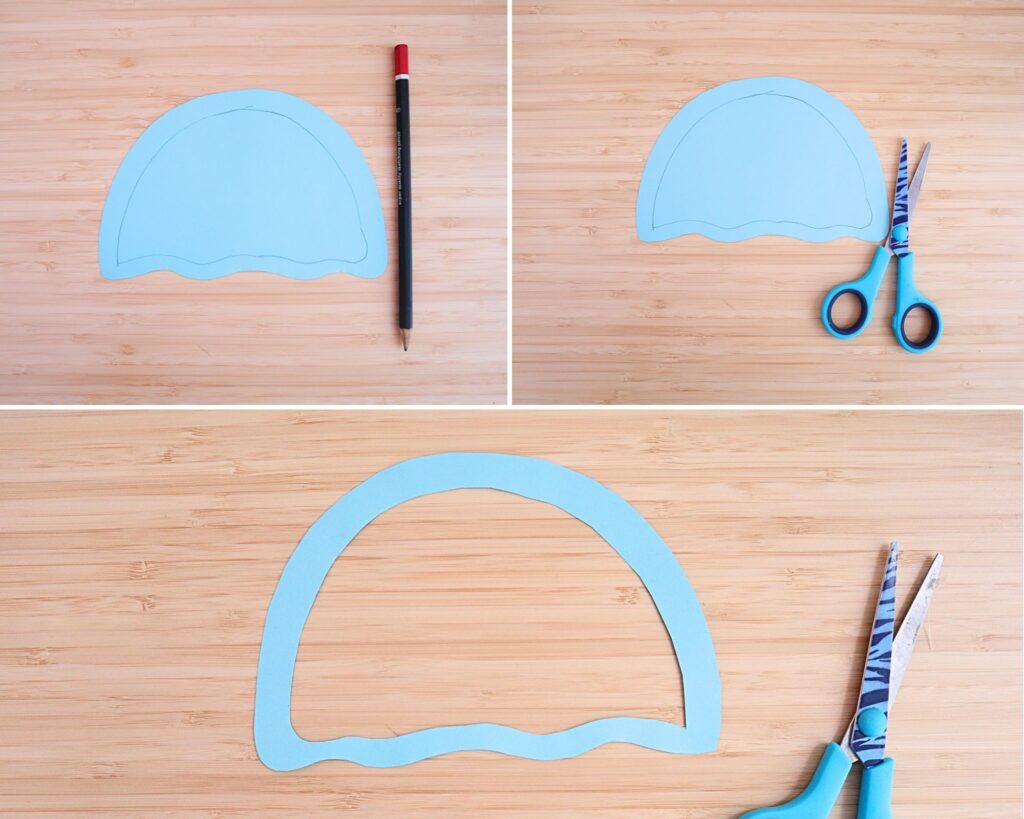
Draw a smaller dome shape inside the cutout blue dome, leaving a border of about an inch all around.
Cut out the inner shape so you’re left with a frame. This blue border will be the outline of your jellyfish and will hold everything together.
Step 4: Glue the frame to the transparent sheet
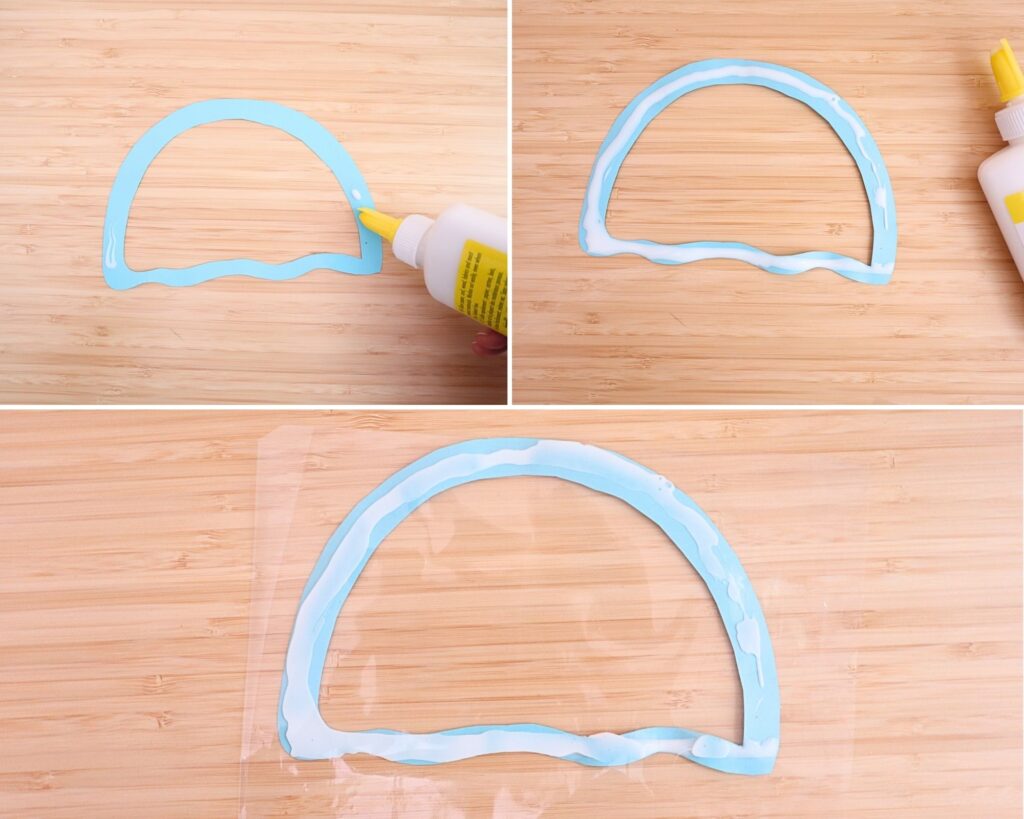
If you have a self-adhesive lamination sheet, you can just stick it to the blue frame here.
But if you are using a non-adhesive one like us, you can use white glue to stick it.
So, squeeze a generous line of white glue all along the blue frame. Press it firmly onto your clear sheet and let it sit for a moment.
The sheet will act as a window, letting light shine through the colorful tissue paper pieces once they’re added.
Step 5: Fill the inside with colorful tissue paper pieces
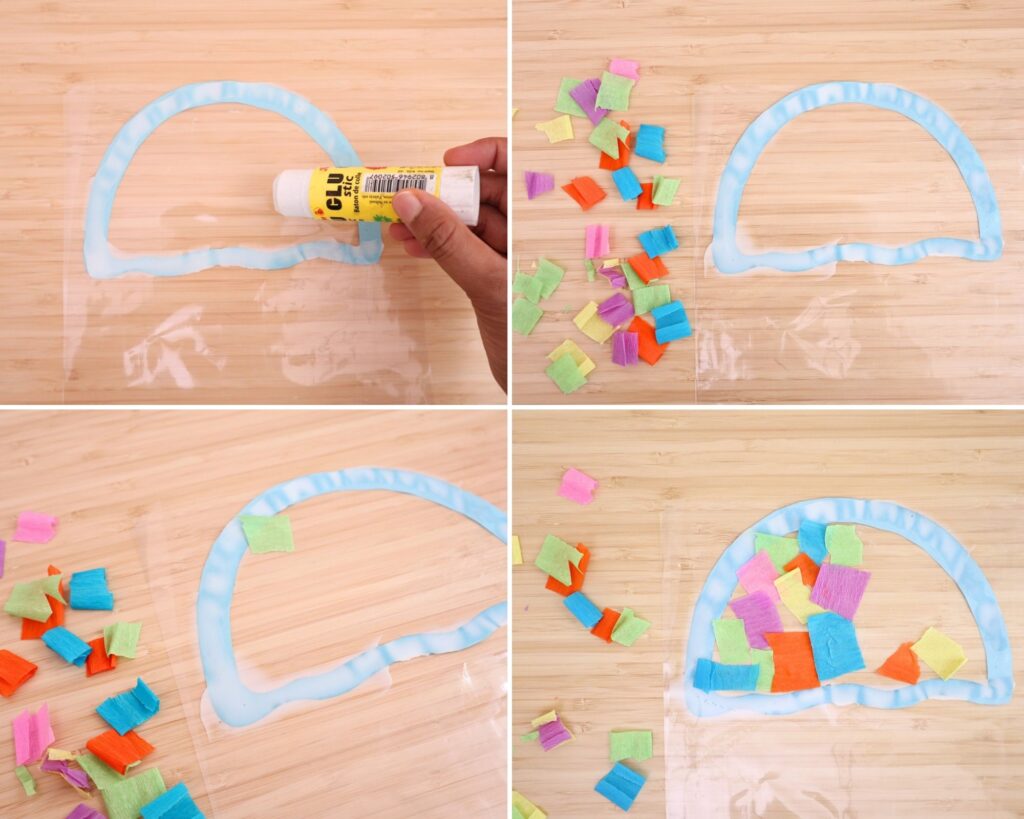
Cut or tear small squares and rectangles from your tissue paper set in as many colors as you like.
Use a glue stick to apply glue onto the plastic sheet inside the frame, then press the tissue paper pieces on, overlapping them as you go. Keep filling until the whole inside is covered in a bright mix of colors.
Step 6: Seal with another transparent sheet
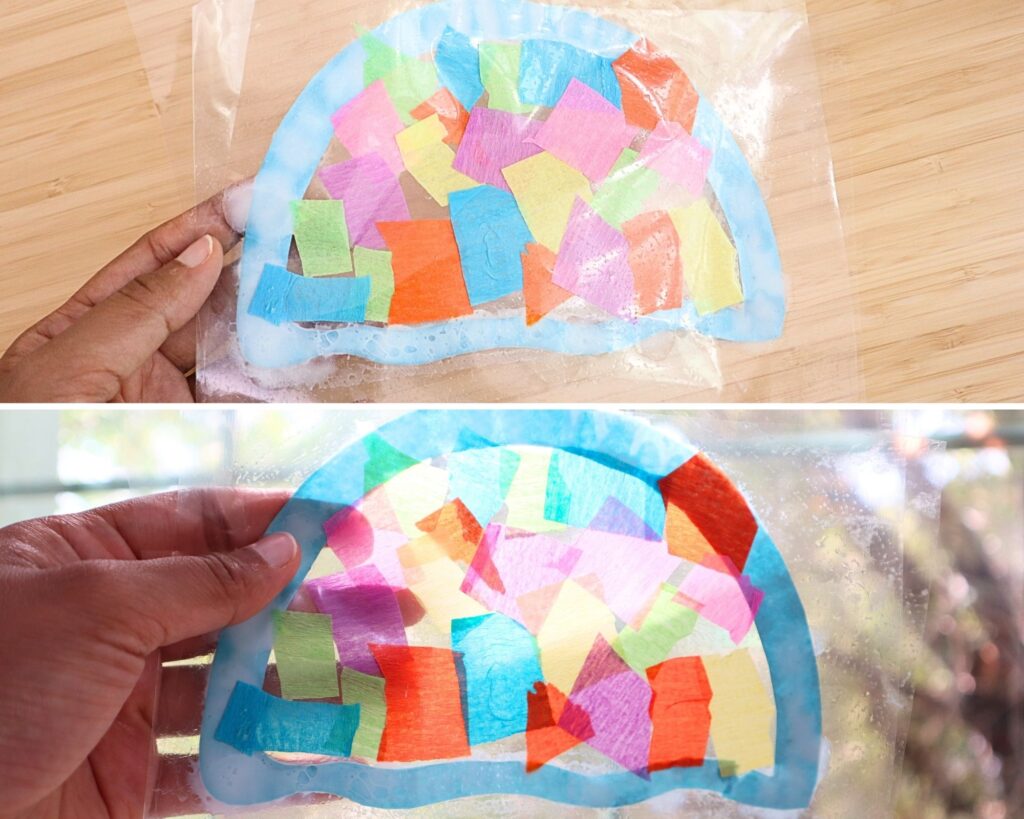
Once all the tissue paper pieces are in place, take the white glue again and apply it to the blue frame. Earlier, we had applied the glue on the back side of the frame, so this time you apply it on the front side to stick the transparent sheet on top.
Now, press the sheet down firmly on top, sandwiching all the colorful crepe paper pieces between the two plastic sheets.
Run your fingers along the edges to make sure everything is well sealed. When you hold it up to the light, the colors shine through beautifully, just like a real suncatcher.
But we are not done yet. Before you start enjoying the beauty of our jellyfish suncatcher, there is some more work to be done.
Step 7: Trim the excess sheet
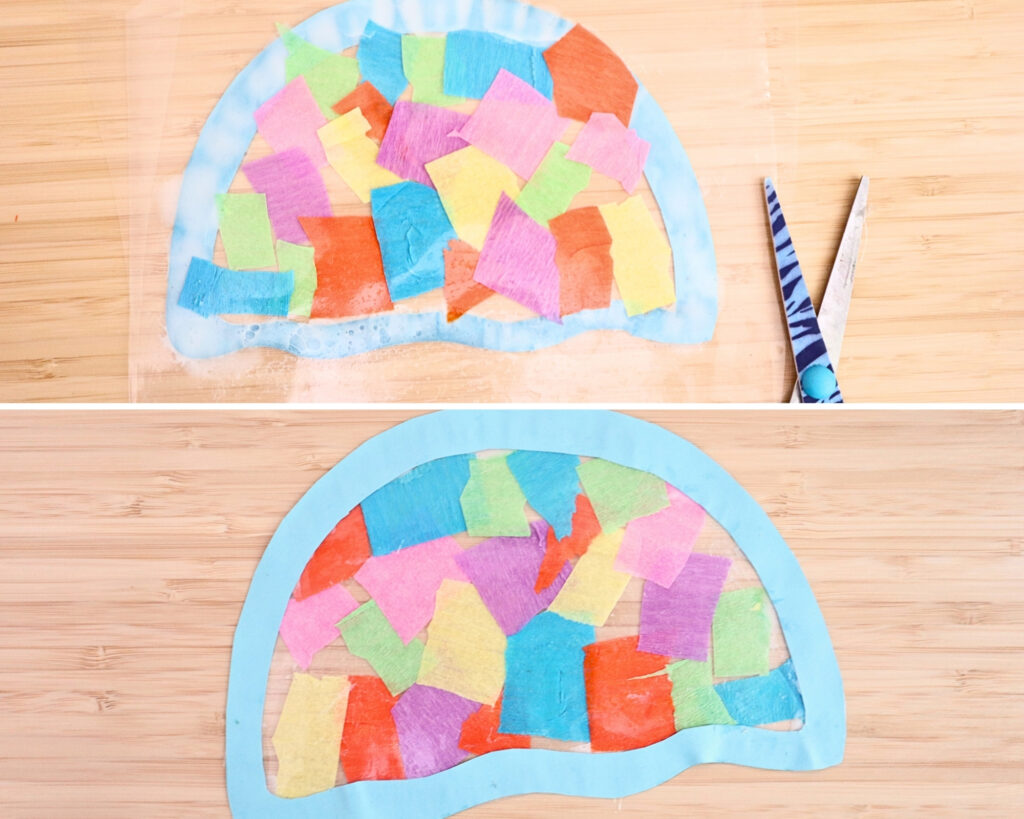
Once the top transparent sheet is pressed down and sealed, you’ll notice the extra sheet sticking out around the edges of the blue frame.
Use your scissors to carefully trim all the way around, cutting as close to the frame as possible.
The bottom photo in the collage shows how clean and neat it looks once the excess is removed, with the colorful tissue paper pieces sitting snugly inside the blue border.
Step 8: Add the tentacles and face
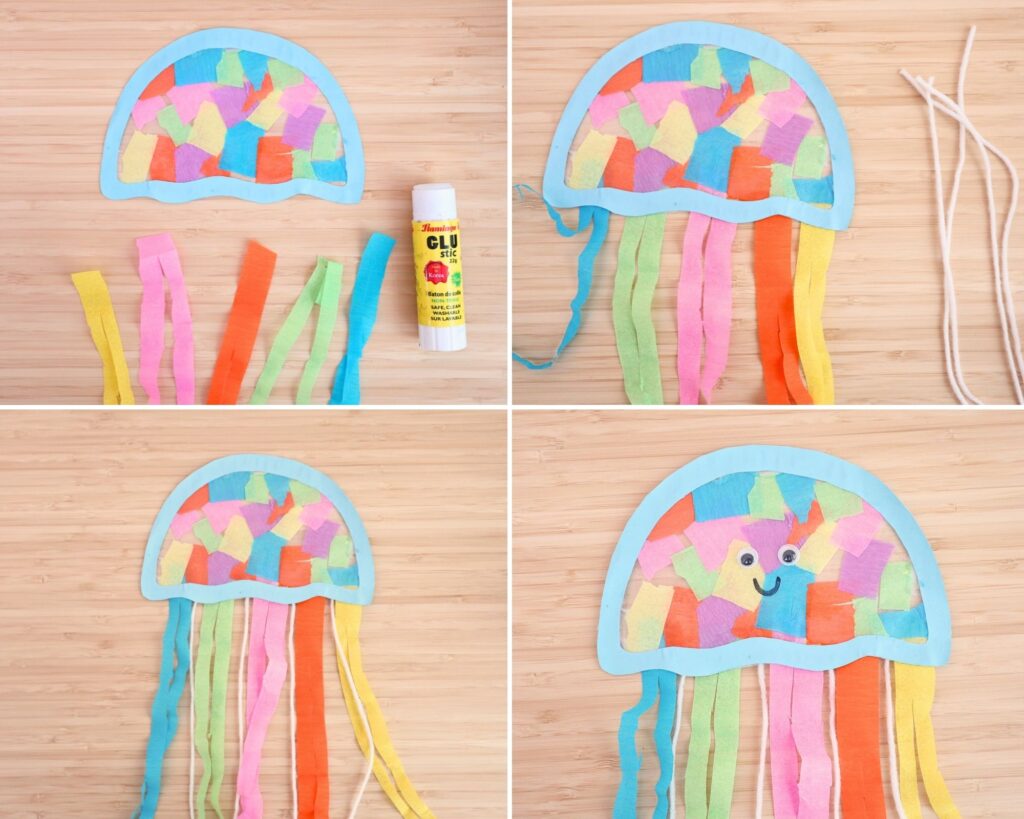
Cut long strips of tissue paper in different colors for the tentacles.
Use a glue stick to attach them along the wavy bottom edge of the jellyfish, letting them hang freely.
Then add a few white yarn pieces in between for extra texture. Once the tentacles are in place, stick on two googly eyes and draw a little smile with a black marker to bring your jellyfish to life.
Step 9: Add the finishing touches and hang it up
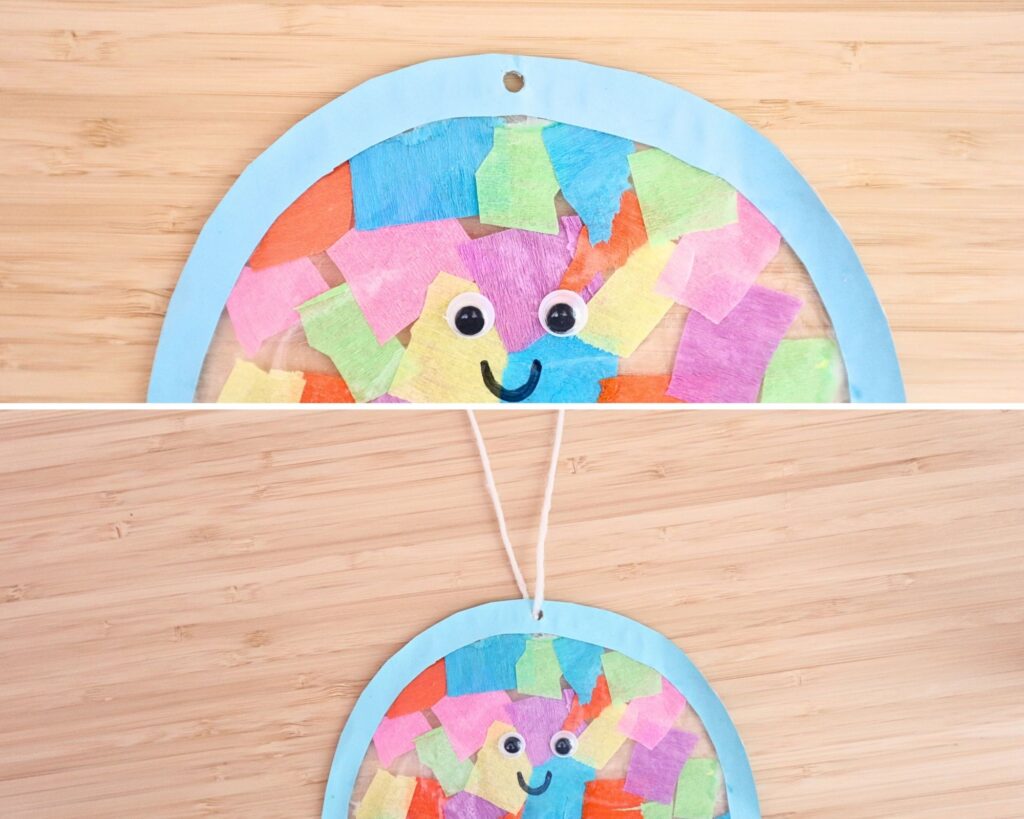
Punch a small hole at the top center of the jellyfish frame.
Thread a piece of string or twine through and tie it into a loop for hanging. Your jellyfish is ready to go up on a window, a wall, or anywhere it can catch the light.
We think it makes such a sweet piece of kids’ room decor that they’ll be proud to show off.
Final Thoughts
And that’s your very own jellyfish suncatcher, ready to brighten up any window it hangs in.
There’s something so satisfying about seeing all those little tissue paper pieces come together into something this pretty. Kids love how it glows when the light hits it, and to be honest, we think it looks so good you might want to make a whole ocean of them.
If your little one gave this a try, we’d love to know how it turned out. Drop a comment to let us know or tag us, and don’t forget to save this for later if you’re planning to make it with a group. It’s a keeper for sure.