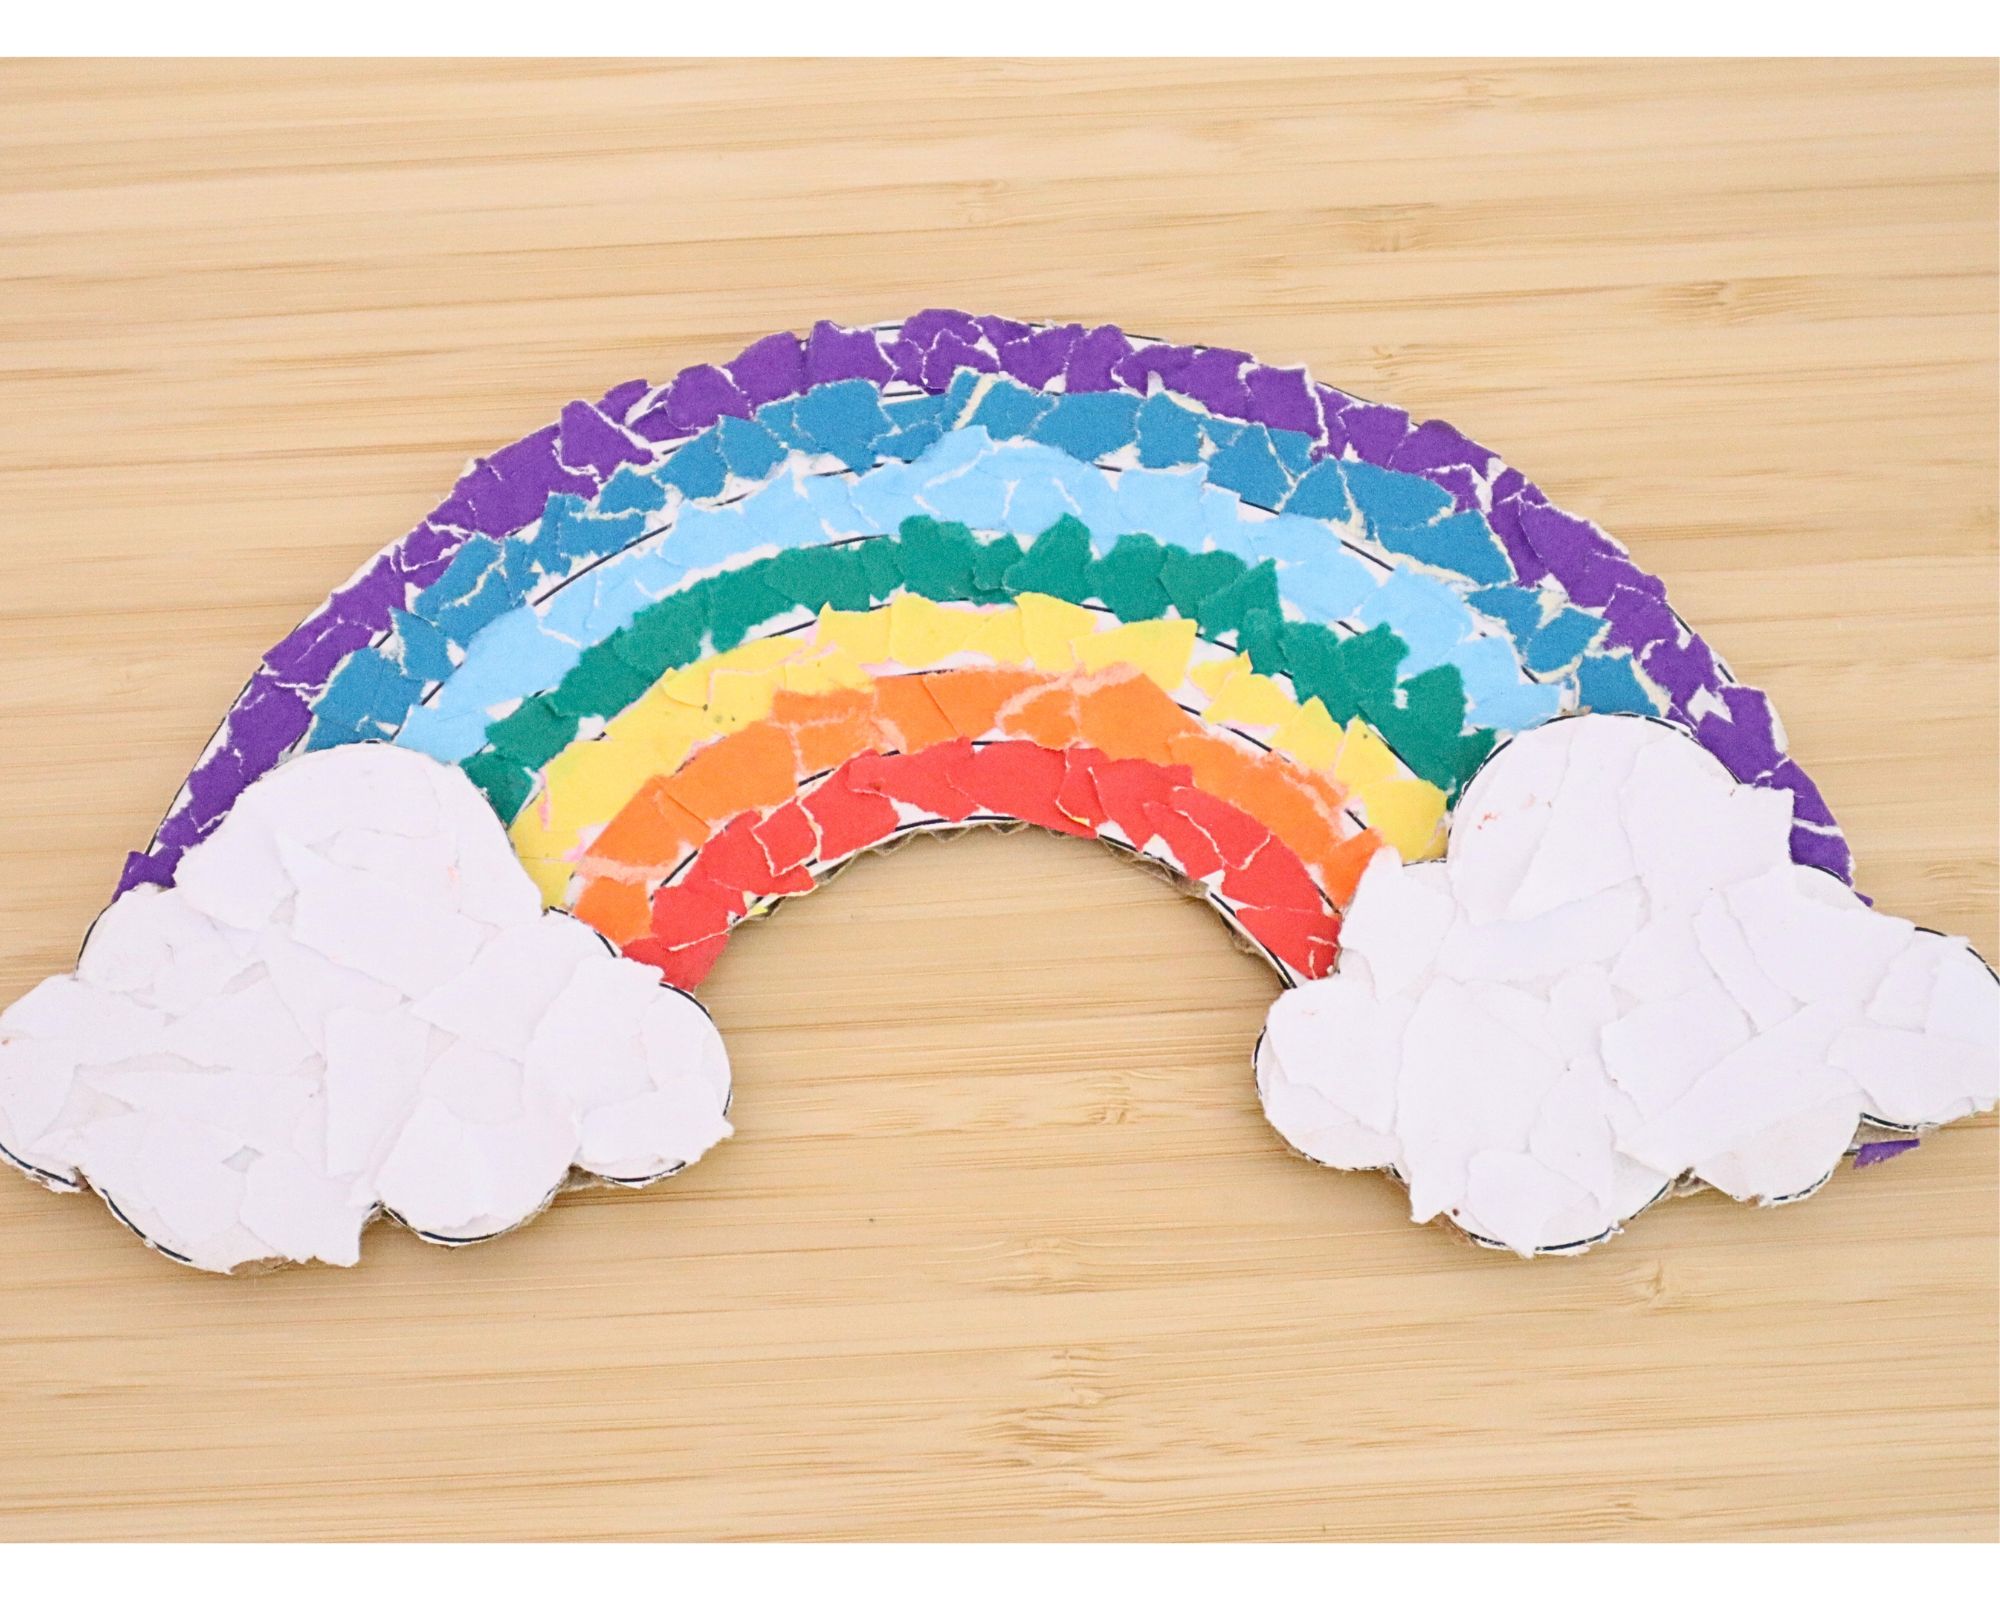
Torn Paper Rainbow Craft for Kids (With Free Template)
There’s something so satisfying about tearing paper and turning it into something beautiful.
This rainbow craft is one of those simple, low-prep activities that kids instantly fall in love with.
It’s colorful, a little messy in the best way, and perfect for working on fine motor skills without it feeling like “practice.”
Plus, the torn paper texture gives the rainbow such a fun, layered look.
Let’s get started.
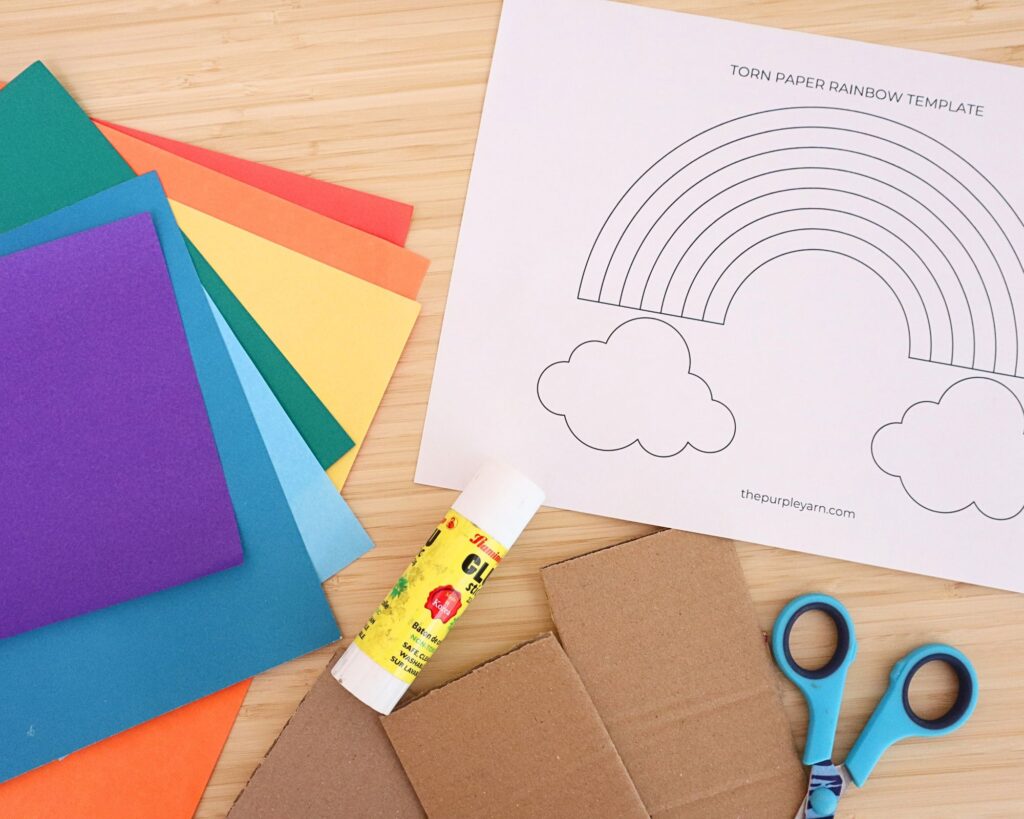
Materials needed:
- Template #30 – Rainbow craft template (available in our free resource library – get the password by signing up using the form in step 1)
- Colored craft papers (rainbow colors)
- Cardboard pieces (for backing)
- Glue stick
- Scissors
- Craft knife (adult use)
Torn Paper Rainbow Craft (step-by-step tutorial)
Step 1: Download the Free Printable Rainbow Template
Start by gathering everything you need.
Print out the rainbow template and keep your colored papers ready in rainbow shades. You’ll also need a piece of cardboard to make the base sturdy.
Free Printable Template for Rainbow Craft
Get the free template for this craft and password for the library to your email by filling out the form below.
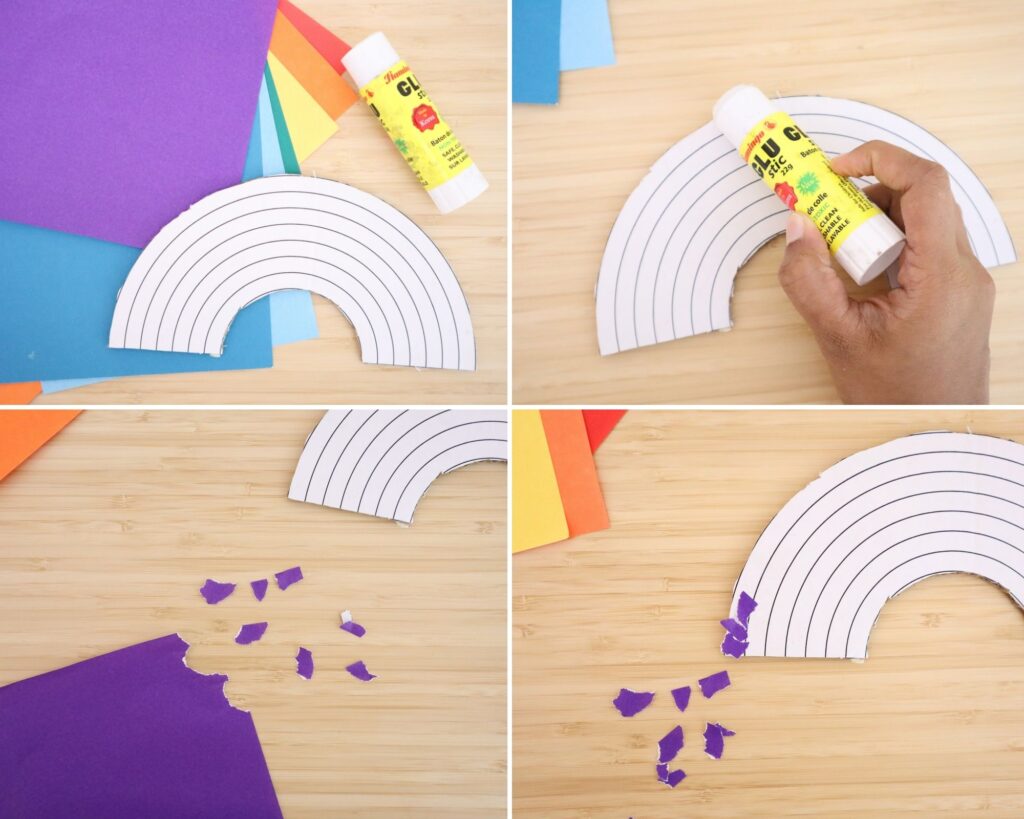
Step 2: Glue the template onto cardboard

Take your cardboard piece and apply glue evenly across it. Carefully place the printed rainbow template on top and press it down so it sticks well without bubbles.
Step 3: Cut out the rainbow shape

Once the glue sets, cut around the outer rainbow shape. For the inner curve, use a craft knife (this part is best done by an adult) to carefully cut it out.
Now you’ll have a sturdy rainbow base ready to decorate.
Step 4: Prepare the cloud pieces
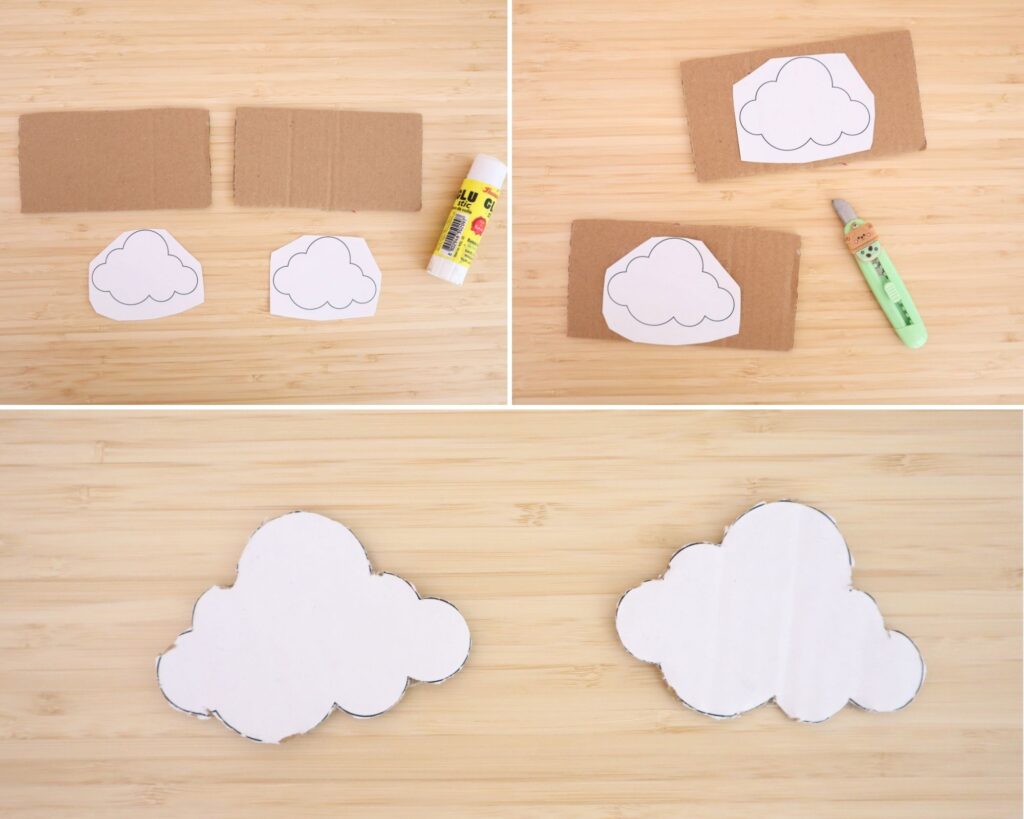
Cut out the cloud shapes from the template. Glue them onto small pieces of cardboard and cut them out to create thick, sturdy clouds.
Set these aside for later.
Step 5: Tear the colored papers
Take your colored craft papers and start tearing them into small pieces. Don’t worry about making them perfect, because uneven, jagged pieces actually make the rainbow look better.
You can tear all colors at once or do it as you go.
Apply glue along the outermost arc of the rainbow. Stick the torn paper pieces one by one, slightly overlapping them to fill the space nicely.
Step 6: Continue filling each rainbow band
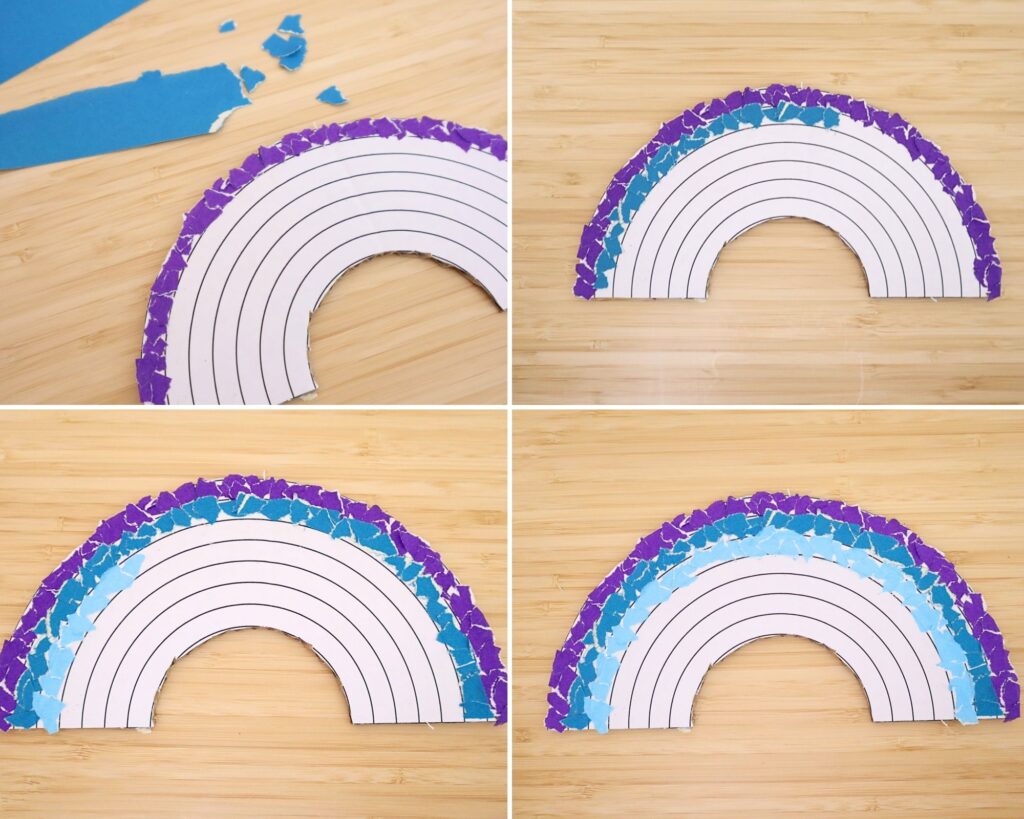
Move on to the next arc and repeat the process with a new color. Keep working your way inward, filling each section with torn paper pieces.
It’s okay if pieces overlap the lines a little; it adds to the handmade charm.
Step 7: Complete all the rainbow colors
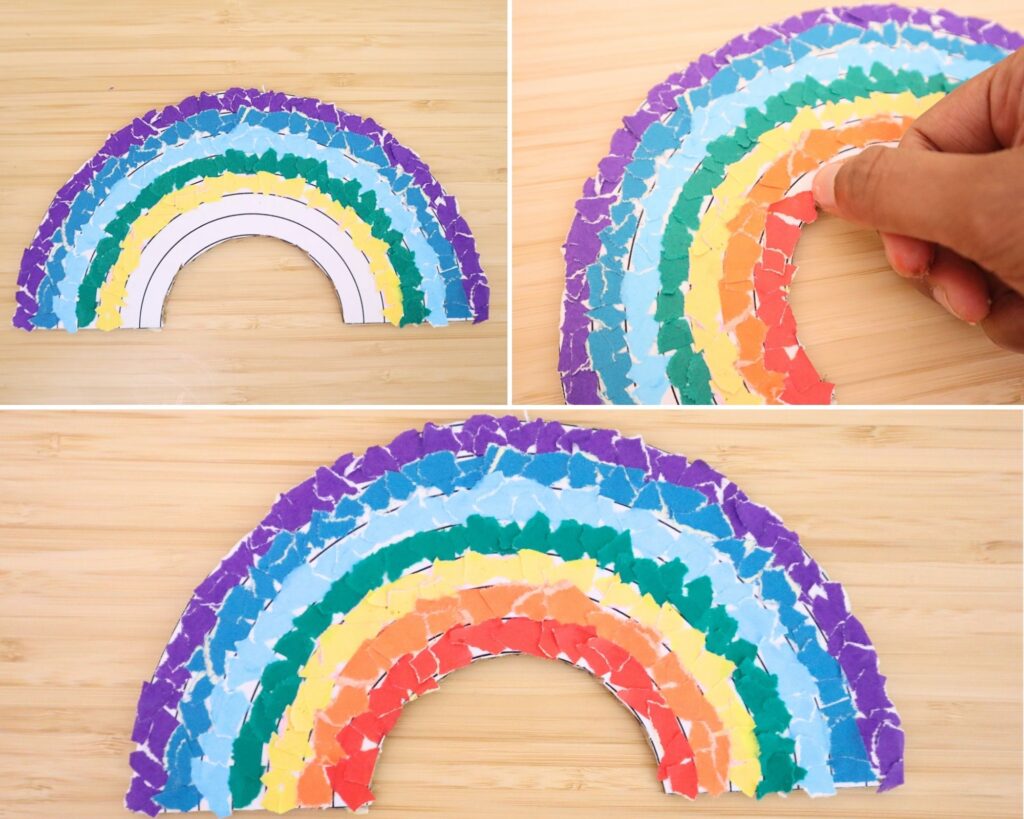
Continue layering each color until the entire rainbow is filled. You’ll start to see that beautiful textured effect come together as each band is completed.
Step 8: Add texture to the clouds
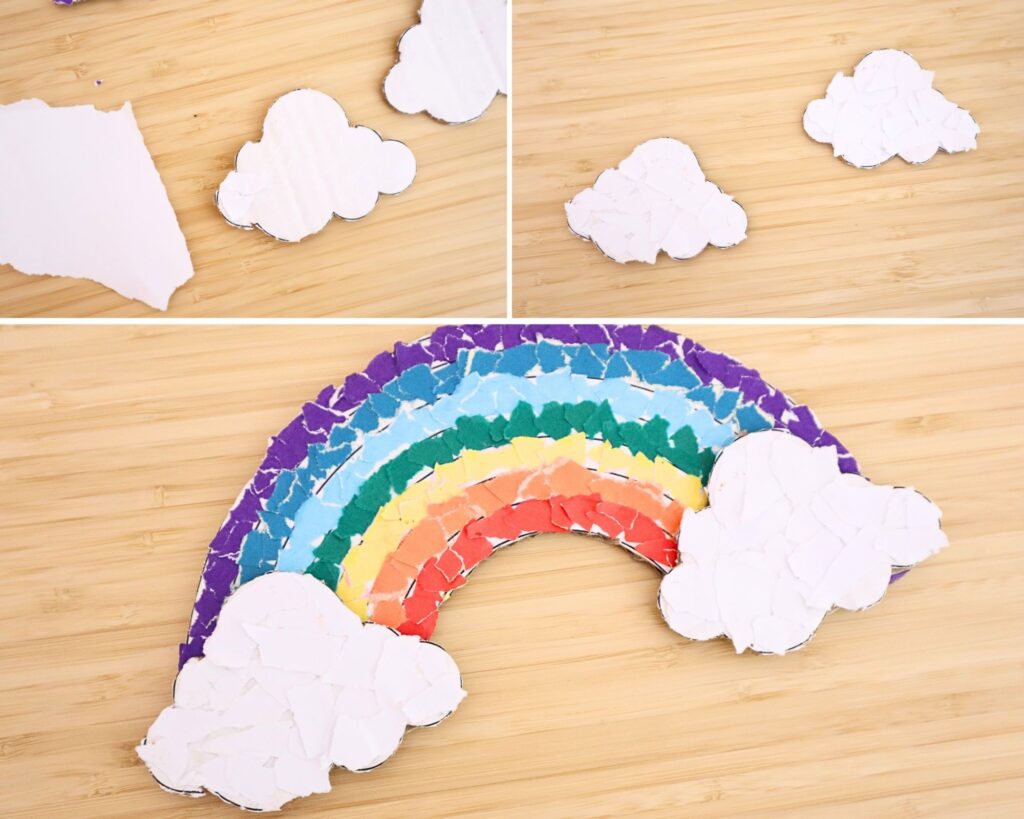
Take the cloud cutouts and glue small torn white paper pieces onto them. This gives the clouds a soft, fluffy look that matches the rainbow texture.
Alternatively, you can use cotton pieces to fill in the clouds.
Finally, glue the clouds onto both ends of the rainbow. Press them down gently and let everything dry.

And your torn paper rainbow is ready!
Final Thoughts
This is one of those crafts that looks impressive with its colors, but is actually so simple to make.
It works well for younger kids since tearing paper is easy and fun, and older kids will enjoy filling each section neatly.
You can hang it up, use it as a classroom display, or even turn it into a cute wall decoration for a kid’s room.