Paper Christmas Wreath Craft
Celebrate the holiday season with this easy DIY wreath craft that’s perfect for adding festive charm to your home.
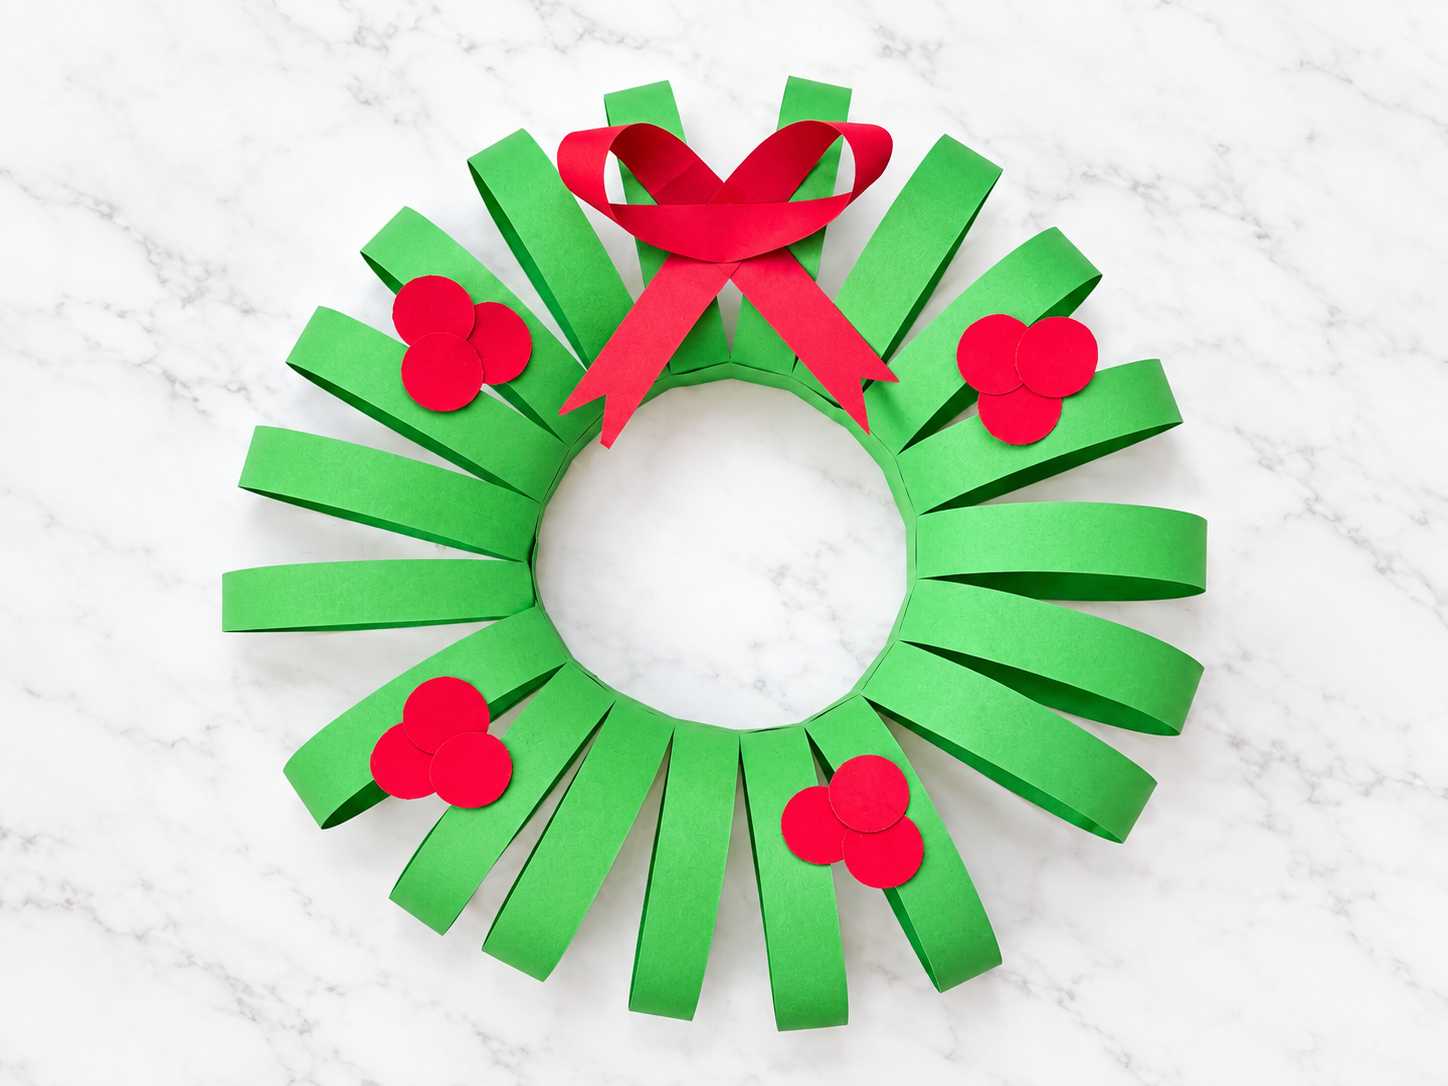
This is a simple paper Christmas wreath craft.
Made with green and red construction paper, this wreath is an easy holiday project that kids can enjoy from start to finish.
From cutting and shaping the green paper to making the little red flowers and bow, each step adds another fun detail to the finished wreath.
This Christmas paper wreath craft for kids is perfect for a cozy afternoon of holiday crafting, a classroom activity, or a fun Christmas project to make with family. Kids can also get creative with the colors and decorations, making their wreath as simple or as festive as they like.
Once finished, it can be hung up as a handmade Christmas decoration to add a little extra holiday spirit to your home or classroom.
Let’s get started!
Before moving on to the craft, we would appreciate it very much if you would check out our YouTube channel and subscribe to it.
We upload new easy craft tutorials there that are different from what we publish on the blog. Thank you!
What you’ll need
- Green construction paper
- Red construction paper
- Scissors
- Glue
- Pencil
- Ruler
How to make a paper Christmas wreath
Step 1: Prepare the green paper
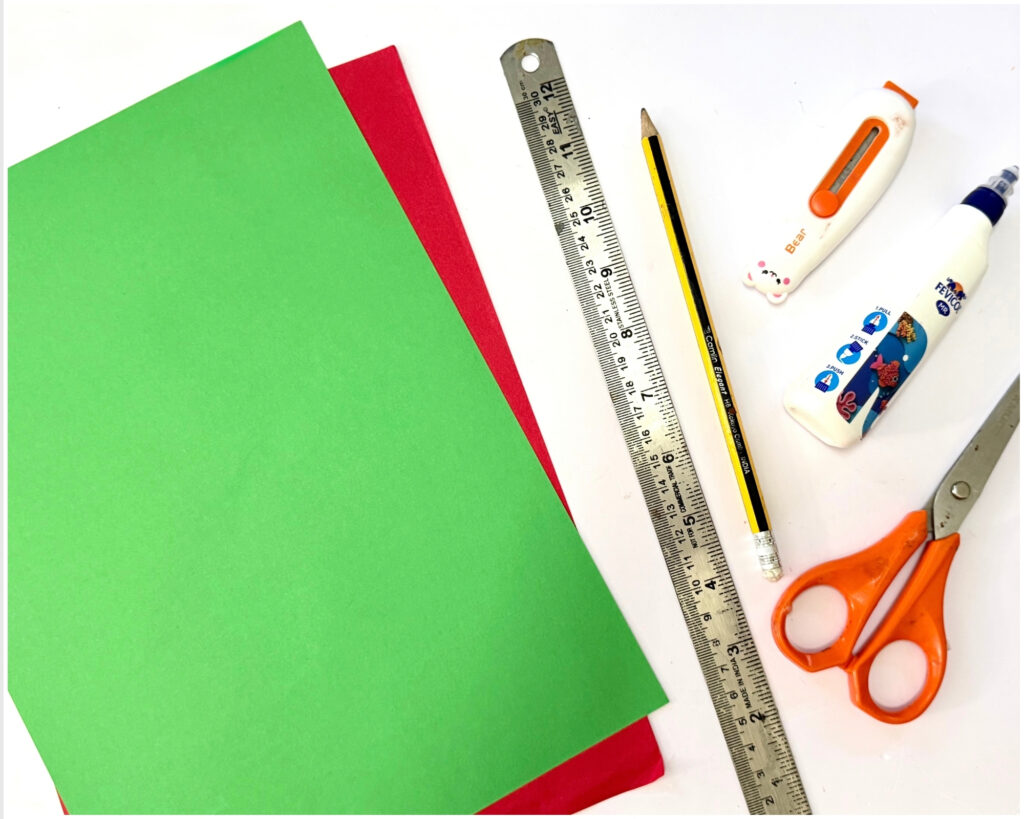
Take a sheet of green construction paper and place it flat on your work surface. This will form the main wreath base.
Step 2: Draw and cut the green paper
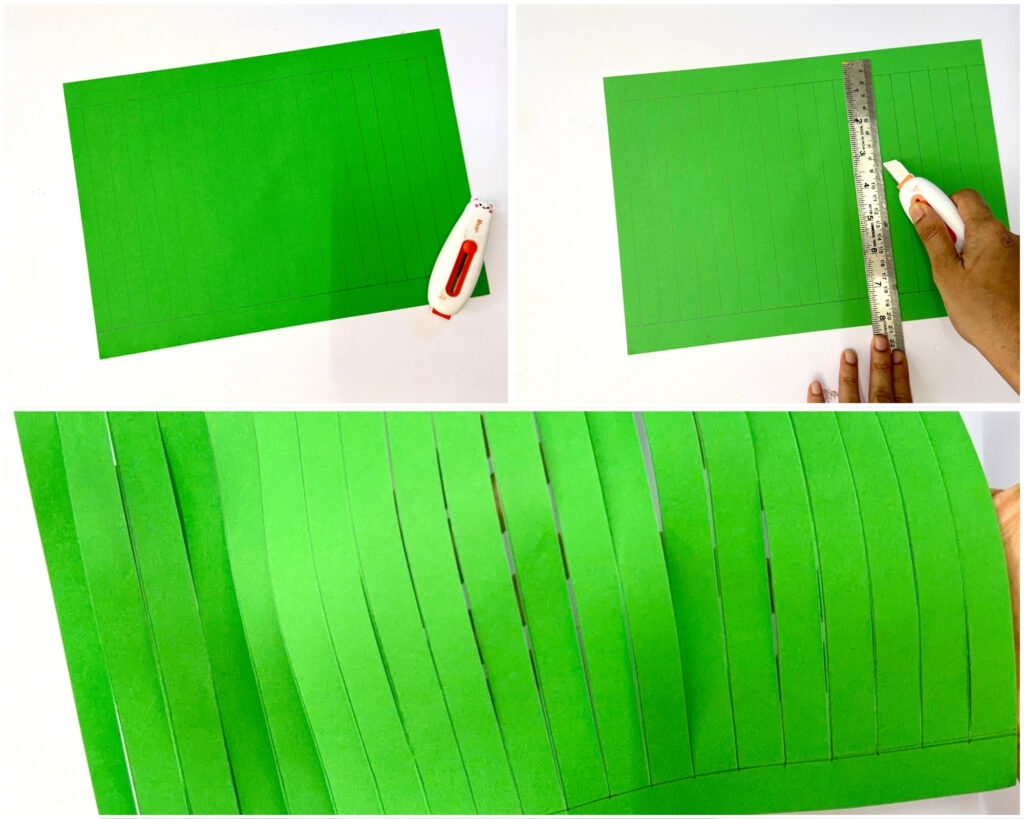
Using a ruler, draw two horizontal lines across the paper, one near the top and one near the bottom.
In the middle section, draw several vertical lines about 1 cm apart.
Carefully cut along the vertical lines, stopping when you reach the two horizontal lines. Do not cut through the horizontal lines.
Step 3: Fold the paper
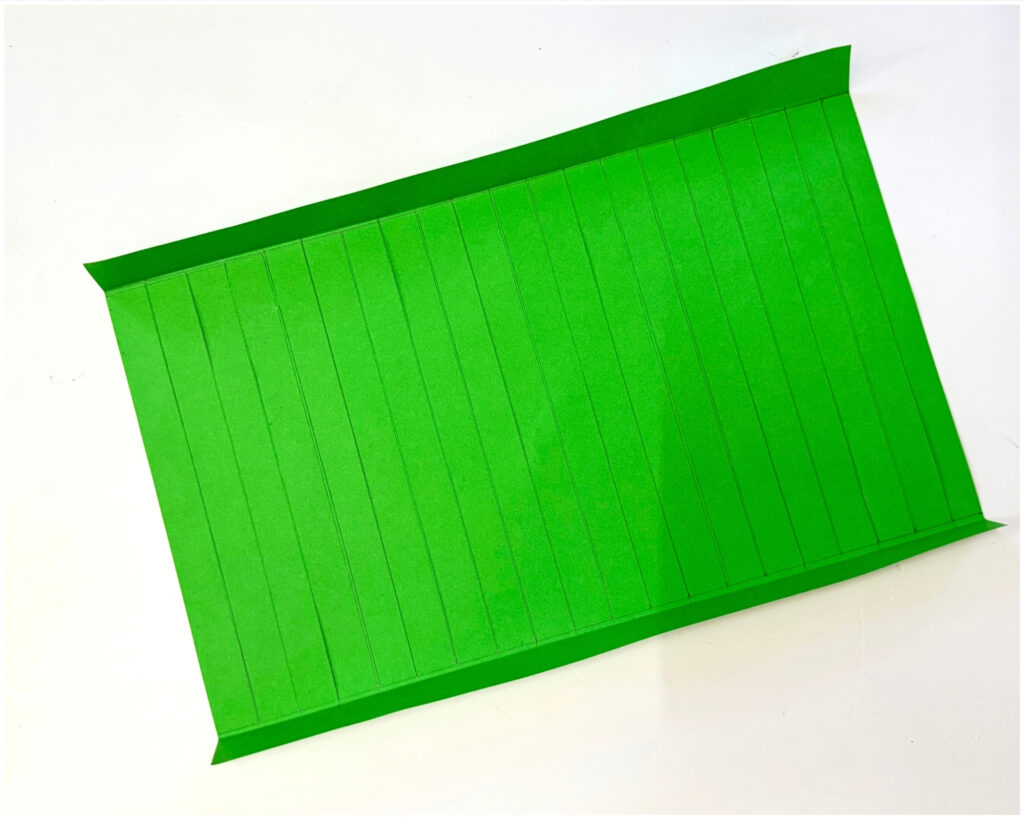
Once all the vertical cuts are made, gently fold the paper along the two horizontal lines, one at the top and one at the bottom. This will help create the curved shape of the wreath.
Step 4: Apply glue to the folded sections
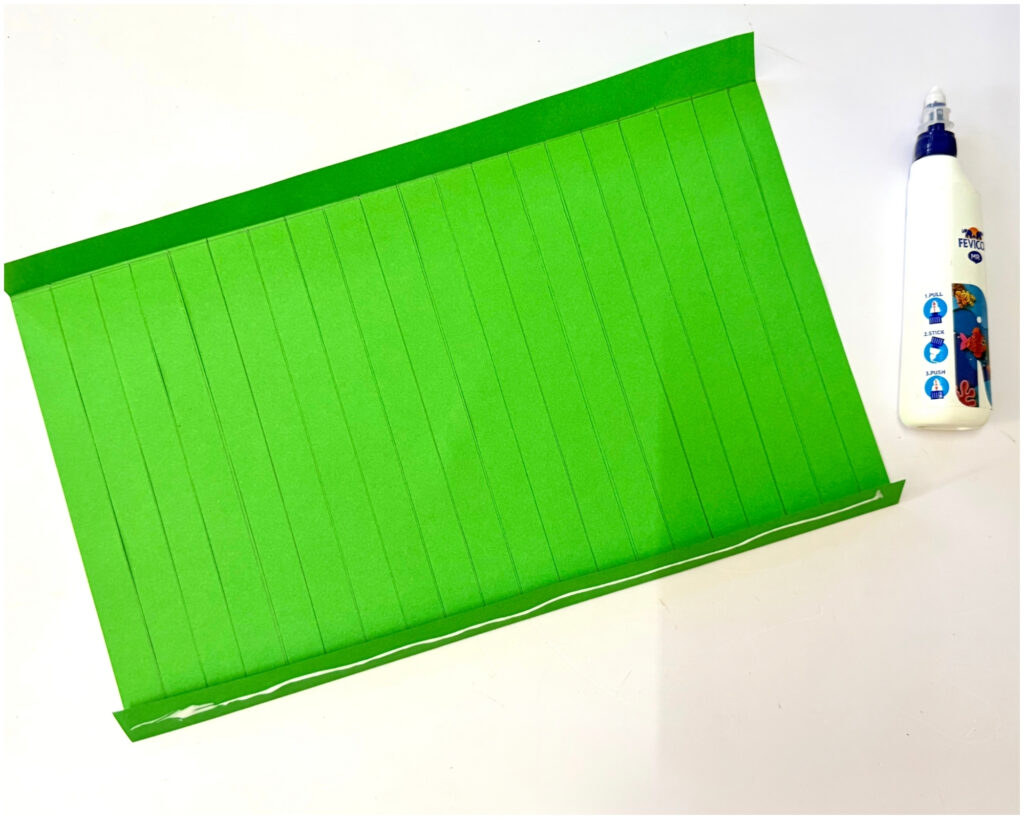
Apply glue to the folded sections along both the top and bottom horizontal folds. Make sure the glue is spread evenly so the paper holds securely when rolled.
Step 5: Roll the paper
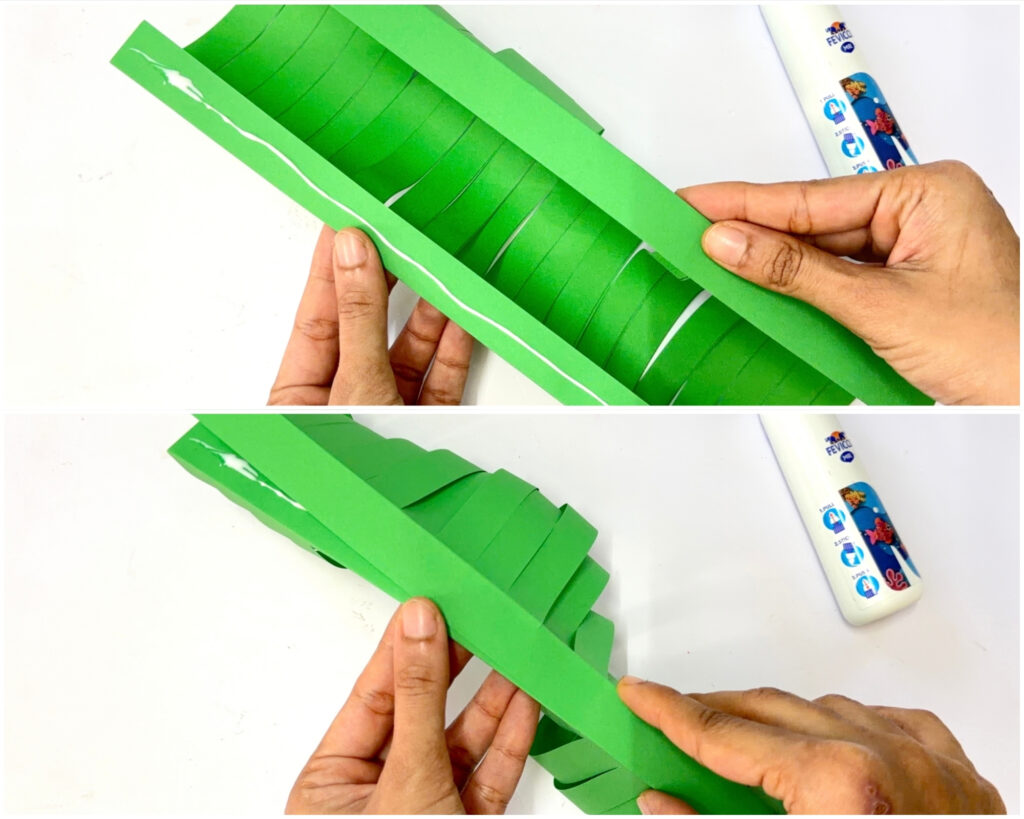
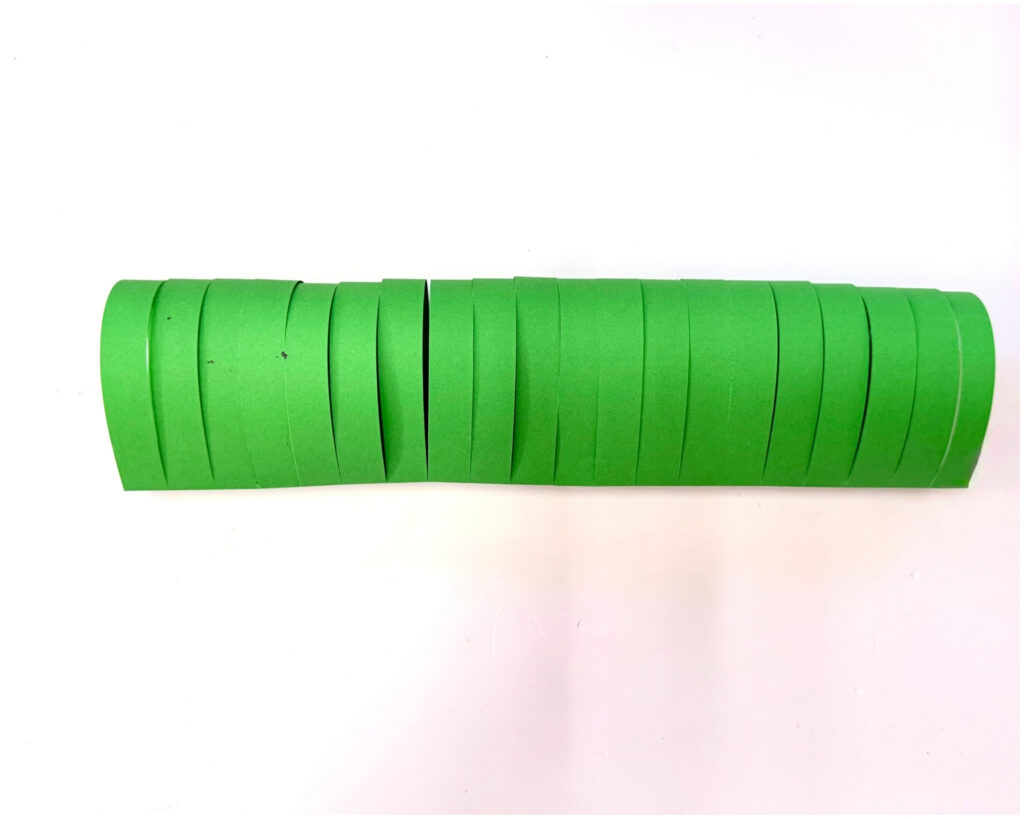
Carefully roll the green paper into a tube shape. Bring the edges together and glue them securely at both the top and bottom. Hold the edges in place for a few seconds so they stick properly.
Step 6: Shape the wreath
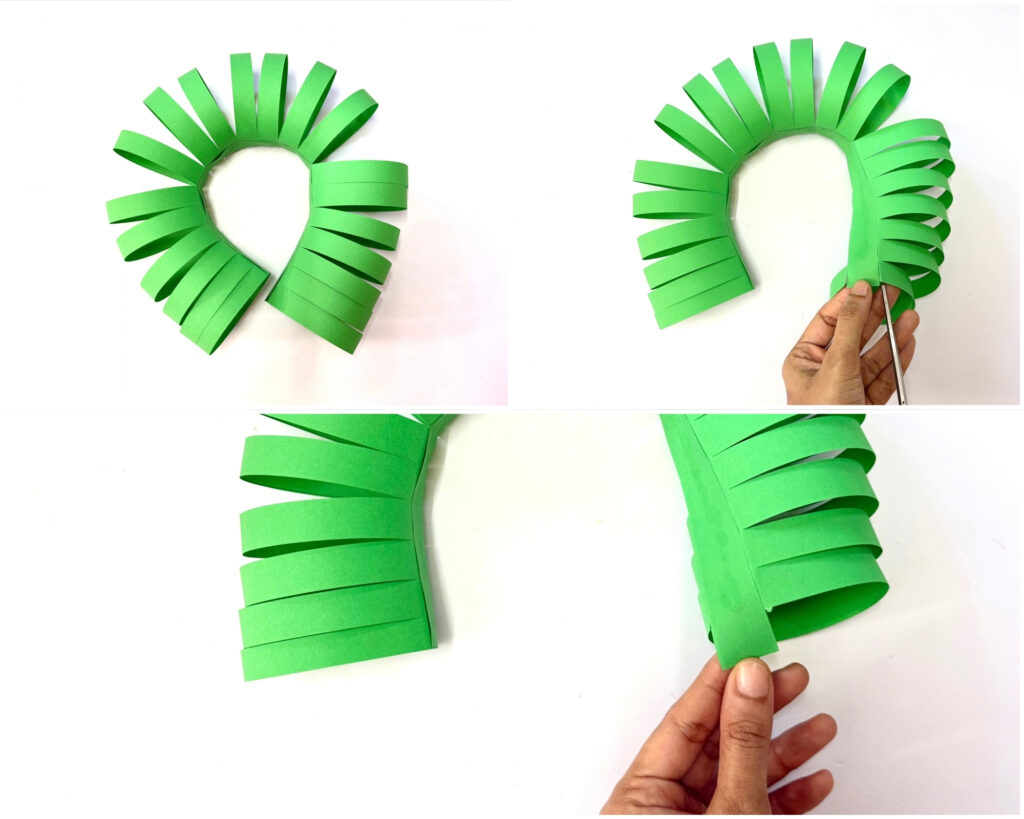
Once the green paper is rolled, gently bend it around to form a circular wreath shape. At one end, cut one vertical strip so that it becomes an extended tab.
This tab will be used to connect the two ends of the wreath.
Step 7: Secure the circular shape
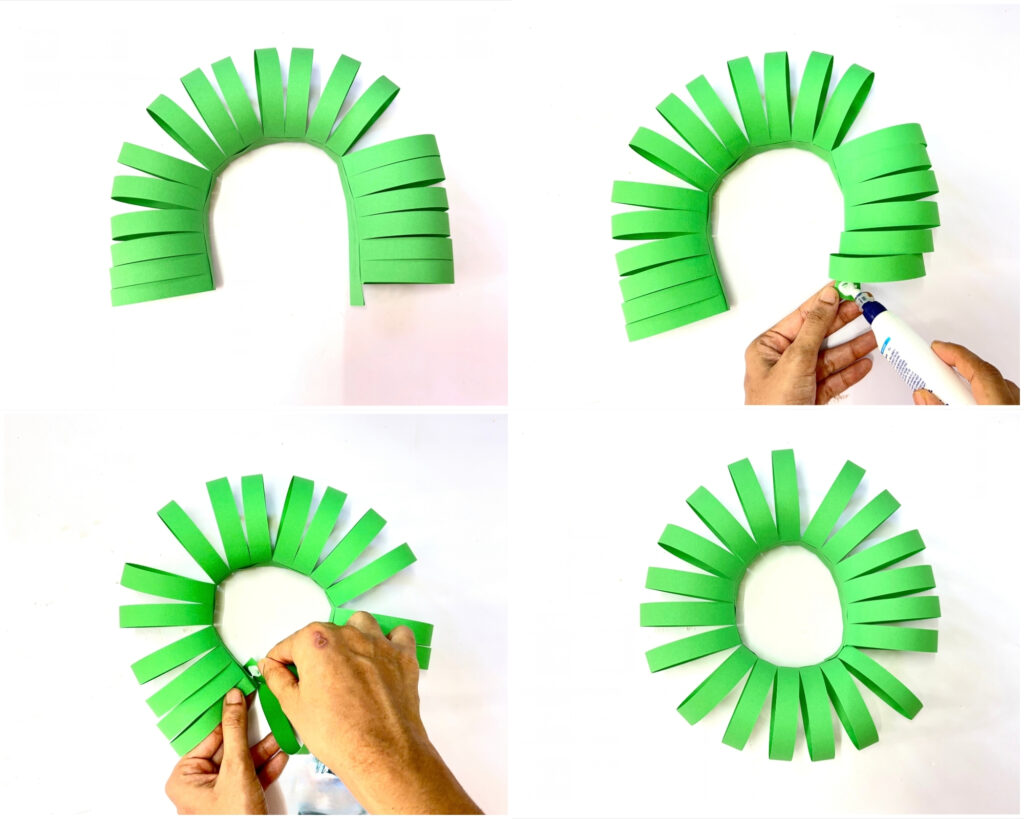
Apply glue to the extended tab and attach it to the opposite end of the wreath. Press the pieces together until the glue holds firmly, creating a complete circular wreath.
Step 8: Prepare the red decorations
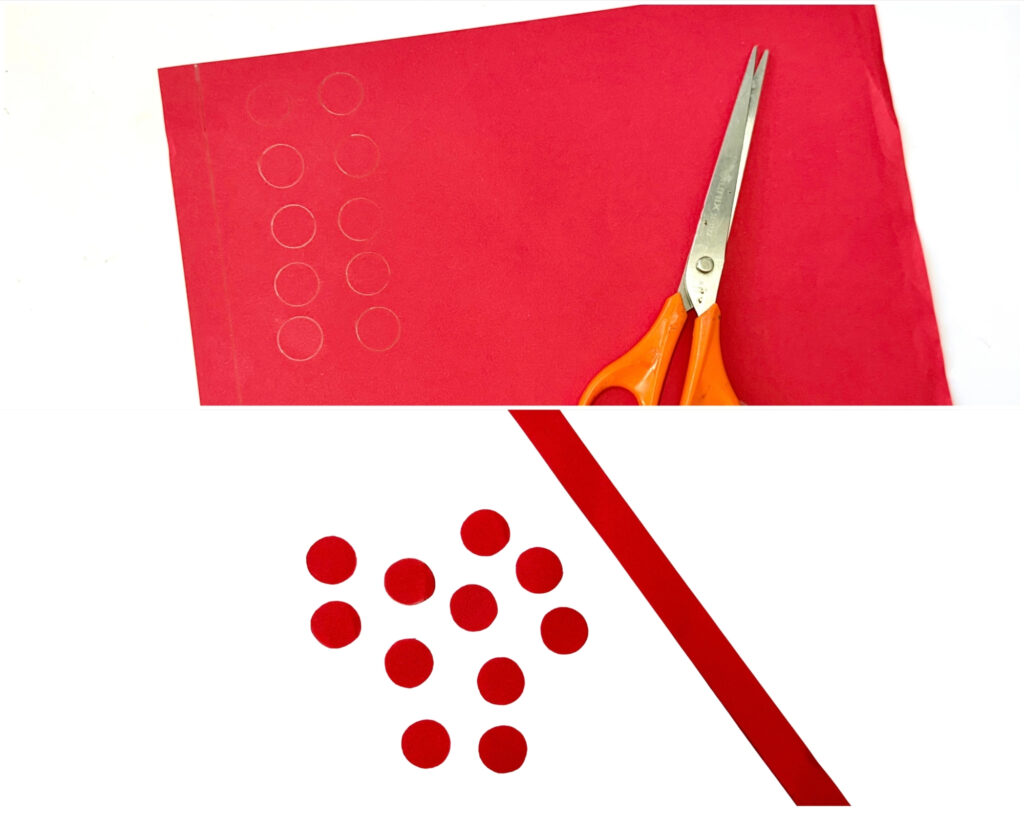
Take a sheet of red construction paper and draw several small circles and a long strip.
Carefully cut them out with scissors. The circles will be used to make the decorative flowers, while the long strip will be used to create the bow.
Step 9: Make the flowers
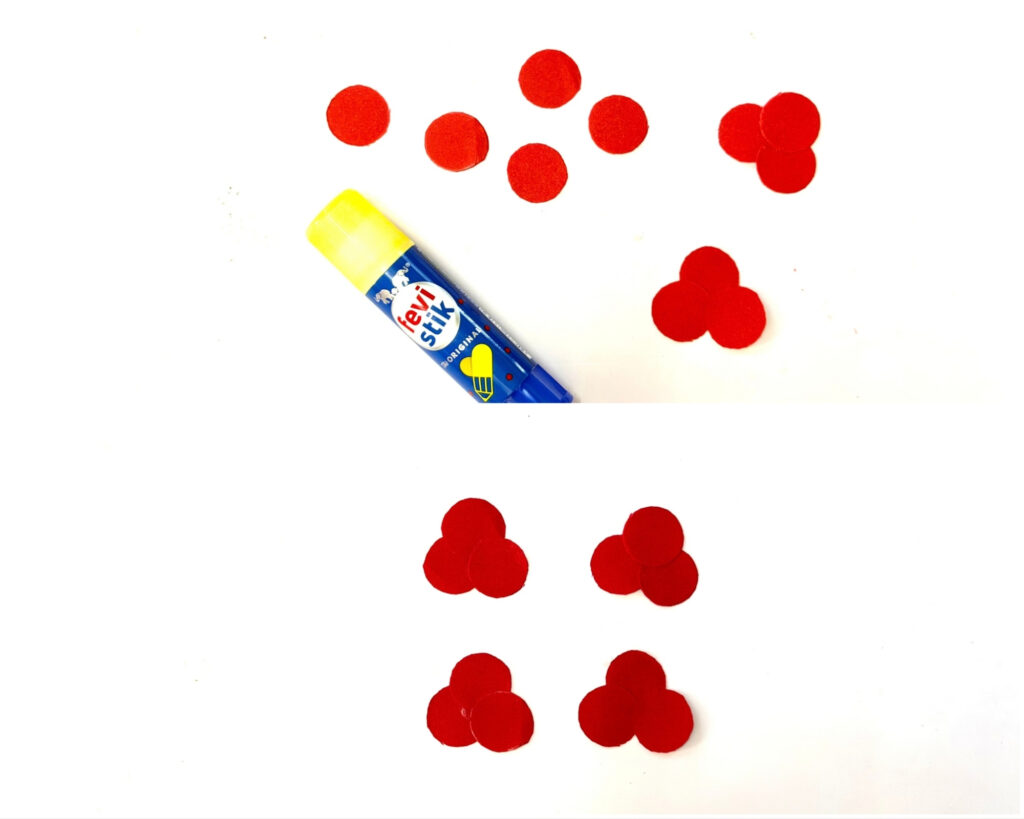
Arrange the small red circles into little flower shapes and glue the circles together. Make as many flowers as you like, depending on how full and decorated you want your wreath to be.
Step 10: Decorate the wreath
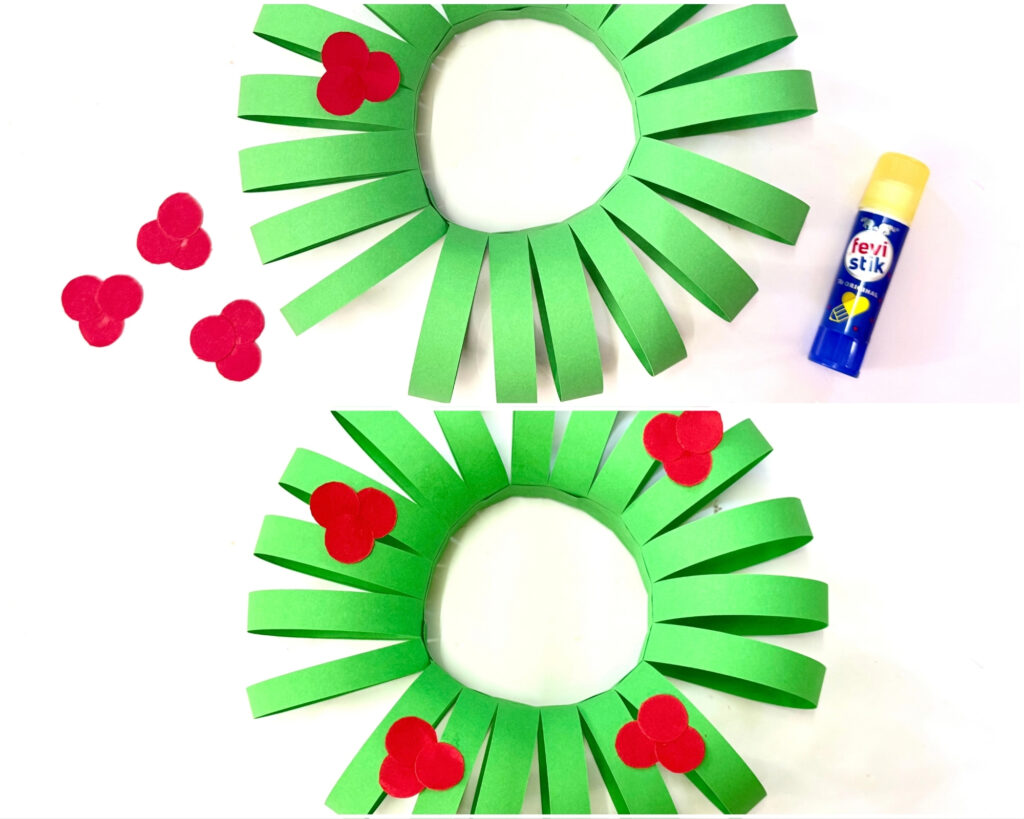
Glue the red paper flowers around the green wreath. You can spread them around in different sections rather than placing them all in one area to create a balanced look.
Step 11: Make the ribbon bow
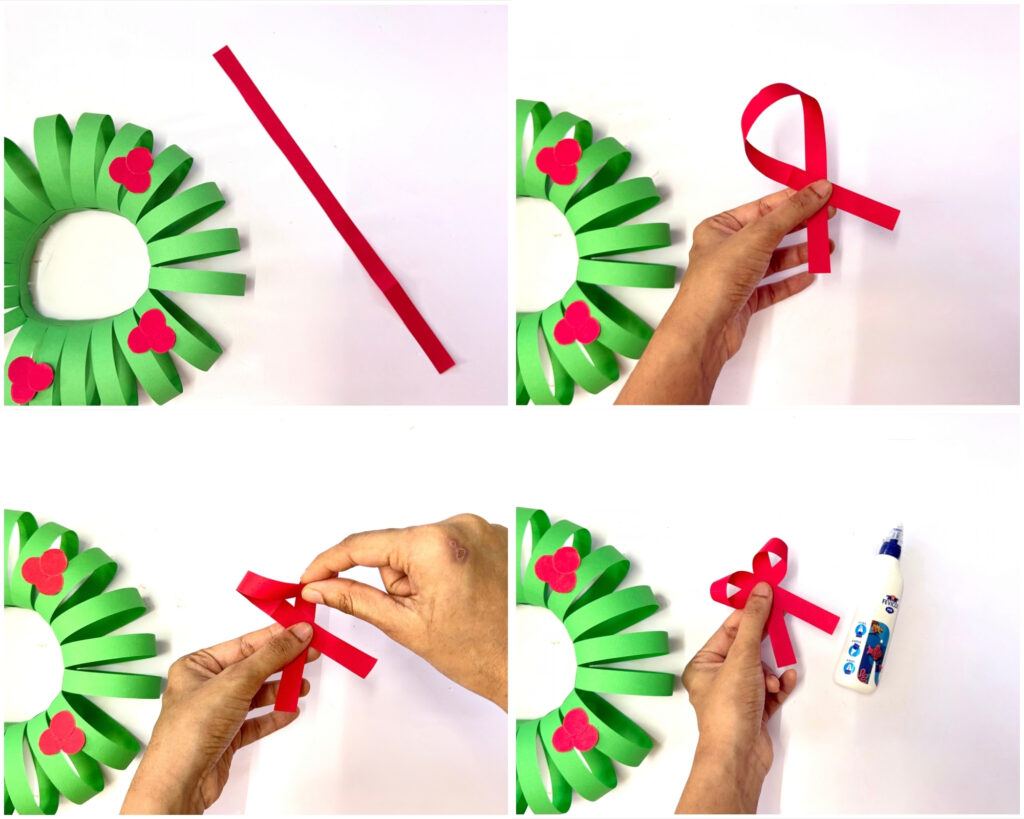
Take the long red paper strip and bend it to create the loops of the bow.
Overlap the ends as shown and fold the middle section inward. Apply a little glue to hold the folds together and shape it into a simple paper bow.
Step 12: Add the bow
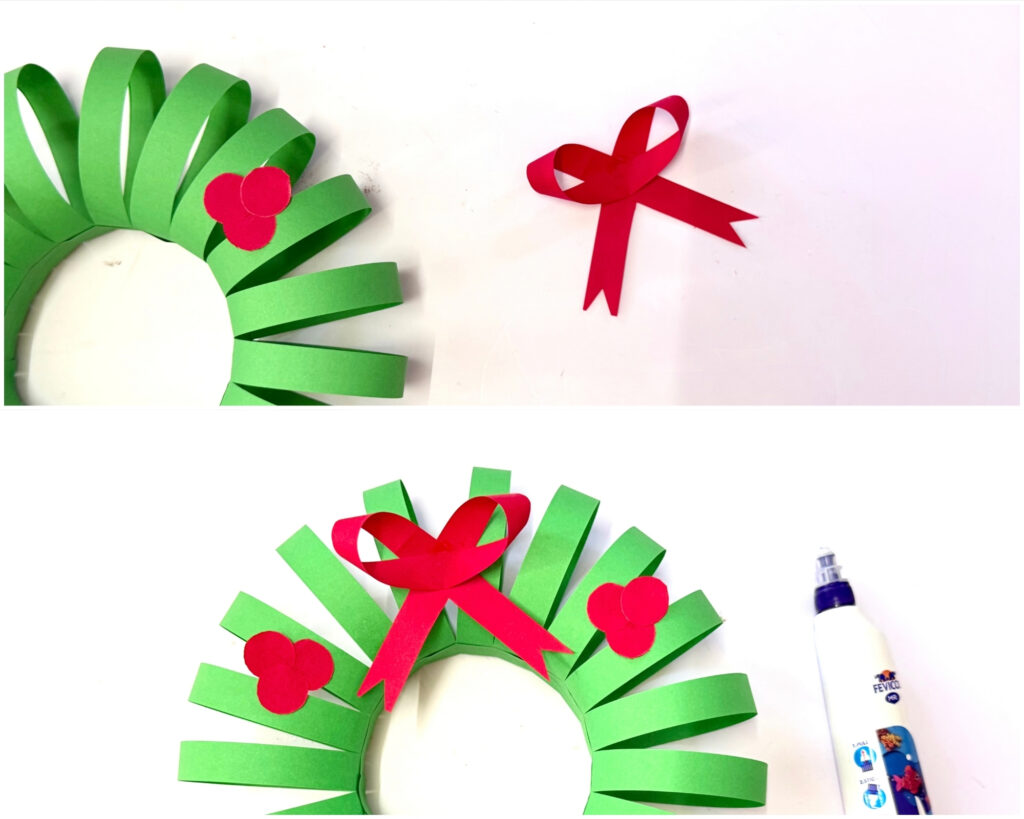
Glue the finished red paper bow onto the top of the wreath. Press it gently into place and allow the glue to dry completely.

Your handmade paper Christmas wreath is ready to become part of your holiday decorations!
Final Words
What makes this craft special is that the whole wreath is made from simple pieces of construction paper, yet the finished result looks bright, colorful, and festive.
Kids can use their creativity and make their own version by changing the number of flowers, trying different colors, or adding extra decorations.
Now, go hang your finished wreath on a door, wall, classroom display, or anywhere that could use a little Christmas cheer.
It’s a simple Christmas craft for kids that turns basic craft supplies into a fun handmade decoration you can enjoy throughout the holiday season.
What do you think of the craft? Let us know in the comments below!
More Christmas crafts:
- Easy paper elf craft
- Paper gingerbread man craft
- Reindeer headband craft (with free template)
- Toilet paper roll Santa Claus
- 3D Christmas tree craft idea
- Paper plate Christmas tree craft
- Paper bag Santa Claus craft for kids
- Paper plate Santa Claus craft for kids (with free template)
- Paper jingle bell ornament craft for kids (step-by-step pictures)
- 45+ Easy Christmas crafts for kids of all ages
- Santa Claus ornament craft for kids
- Paper plate Christmas wreath craft for kids (with free template)
- Cute christmas tree craft using cardboard (with free template)
- Christmas Paper elf craft idea for kids
- DIY elf Christmas ornament
Explore all our Christmas crafts and Winter Crafts