How to make an easy paper airplane
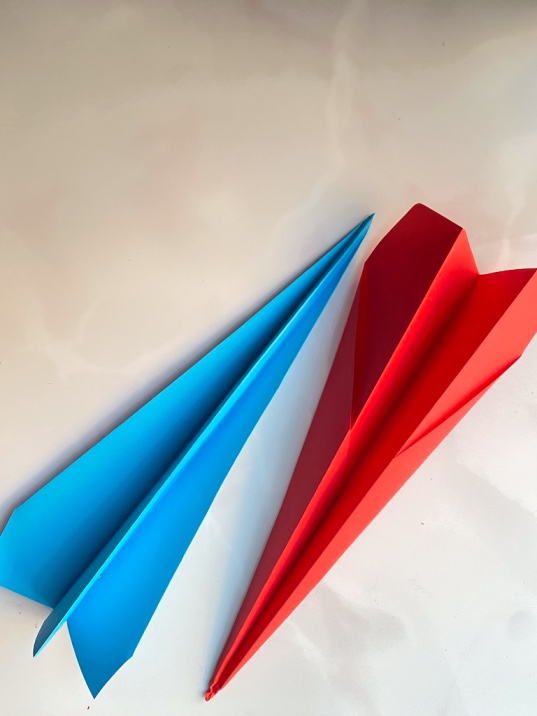
A paper airplane is a craft that everyone has tried at some point in their life. It’s a fun craft to do and helps to keep kids active for quite some time once you make the paper airplane.
There are many different designs for paper airplanes and here we are showing how to fold the traditional Origami airplane.
Materials required
-A4 sheet color paper (or printer paper will do)
Step-by-step tutorial to make a paper airplane
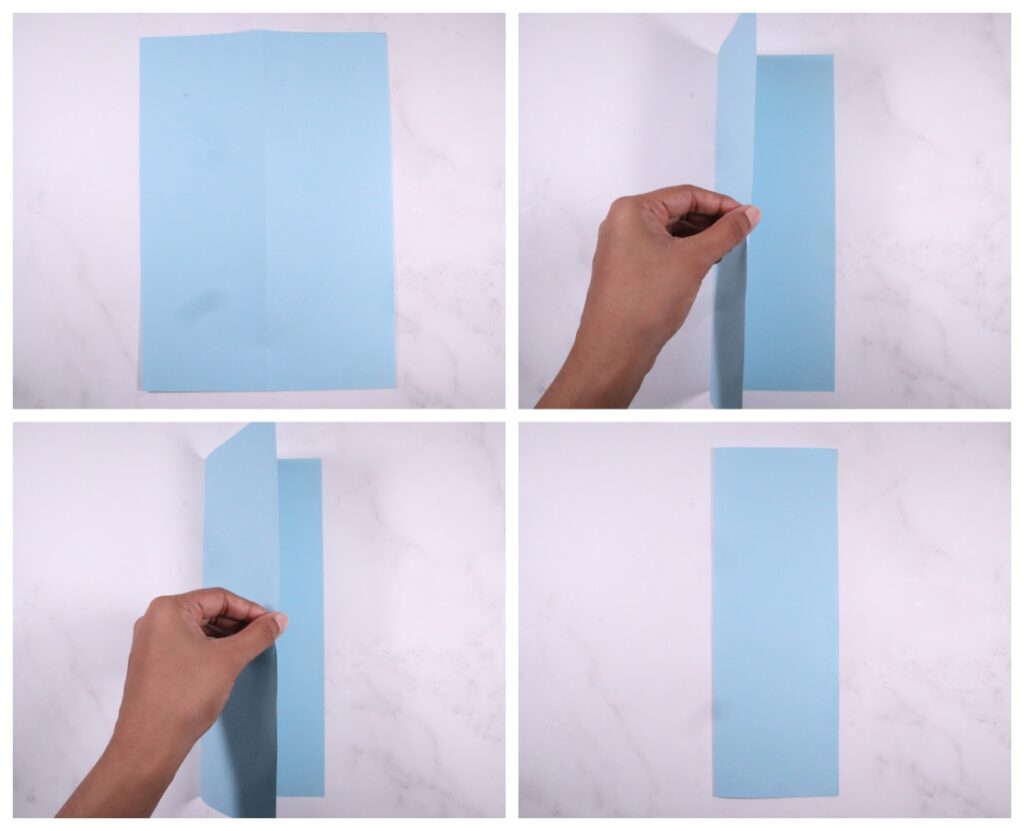
- Take an A4 sheet and position it horizontally as shown in the picture.
2 & 3. Fold it horizontally as shown in pics 2 and 3.
4. Make a crease.

5. Place the paper vertically. You can see the crease in the middle.
6. Fold the right corner towards the centre along the crease and make a crease.
7 & 8. Fold the left corner towards the centre along the crease in the middle. Make a crease here as well.
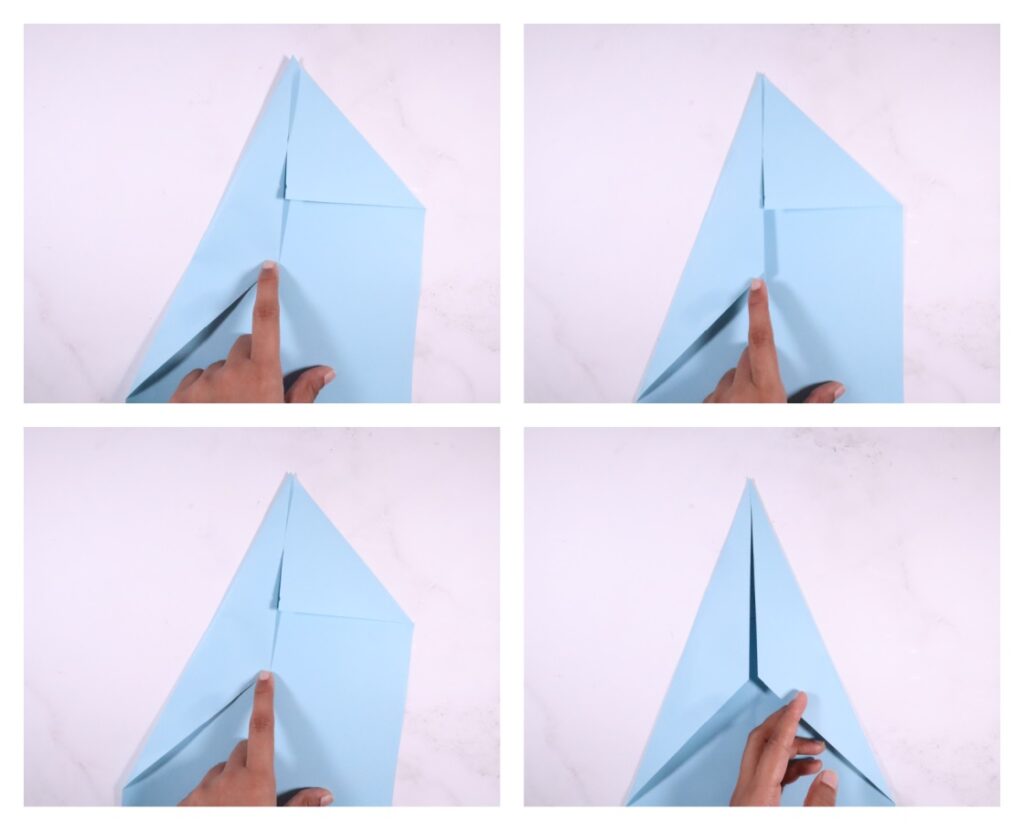
9. In this step, we make one more fold by folding the left corner to the center (in the same way as we did in step 6).
10 & 11. Make a crease.
12. Now, fold the right corner towards the center. Make a crease again.
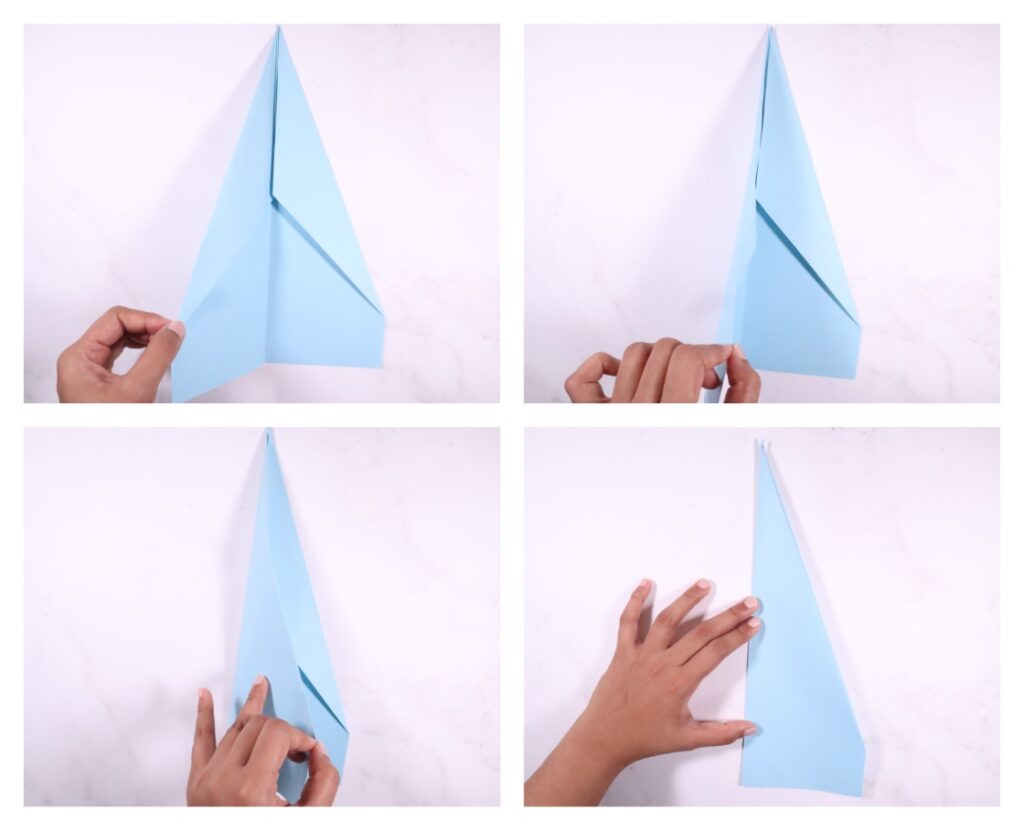
13, 14 & 15. Place the paper vertically as shown in the first picture and fold in half as shown.
16. Flatten and make a crease.
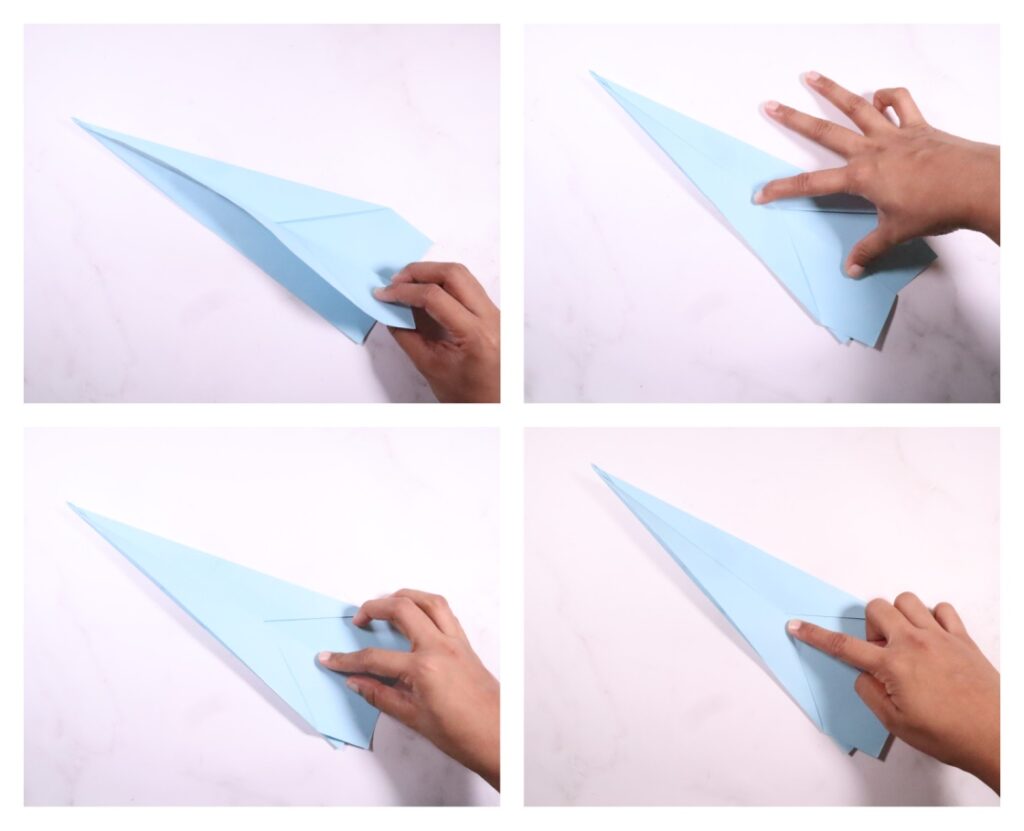
17. Now, fold the flap of the paper airplane backwards and make the top edge meet the bottom edge.
18, 19 & 20. Flatten it well and make a crease.
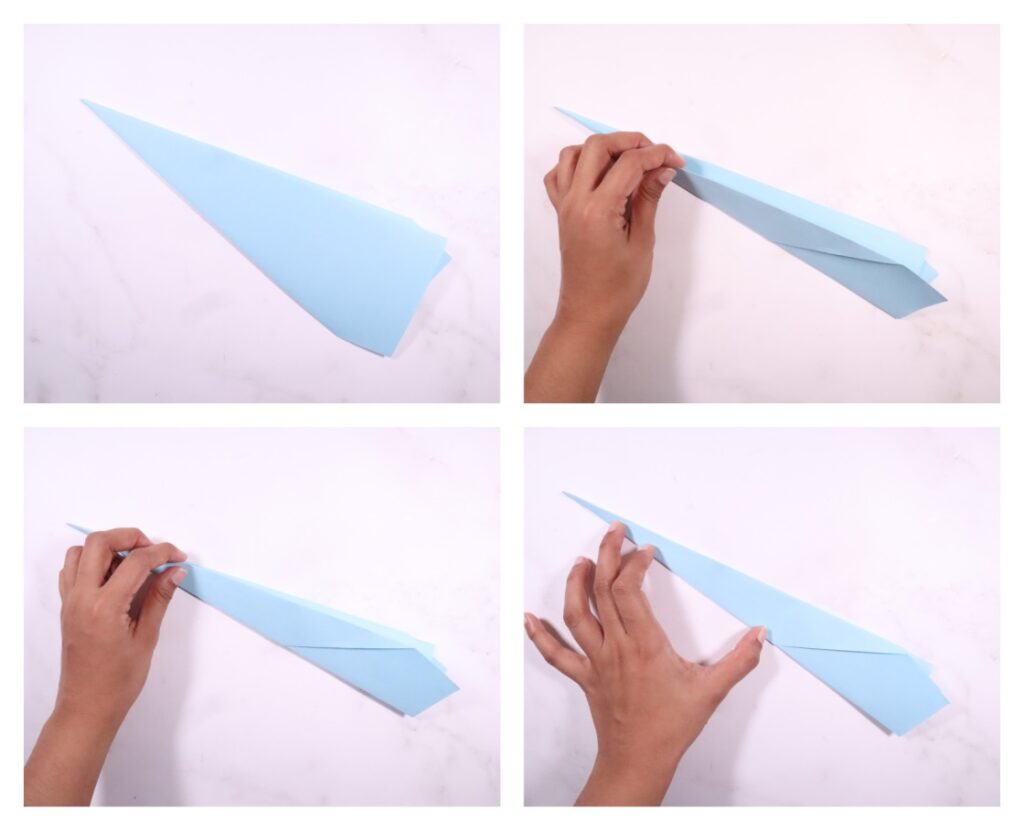
21. Turn the figure over.
22 & 23. Repeat the same step by folding the flap and making its top edge meet the bottom one ( second and third pic in the above collage).
24. Fold it well and make a crease.
Lift the right and left flaps up carefully and your traditional paper airplane is ready.

In case you have any doubt regarding any step, feel free to watch the step-by-step video tutorial below. Please make sure you also subscribe to our Youtube channel to get more craft ideas for kids every week.
