How to make a paper butterfly (step-by-step instructions)
A paper butterfly is not only easy to make, but it is a fun craft too.
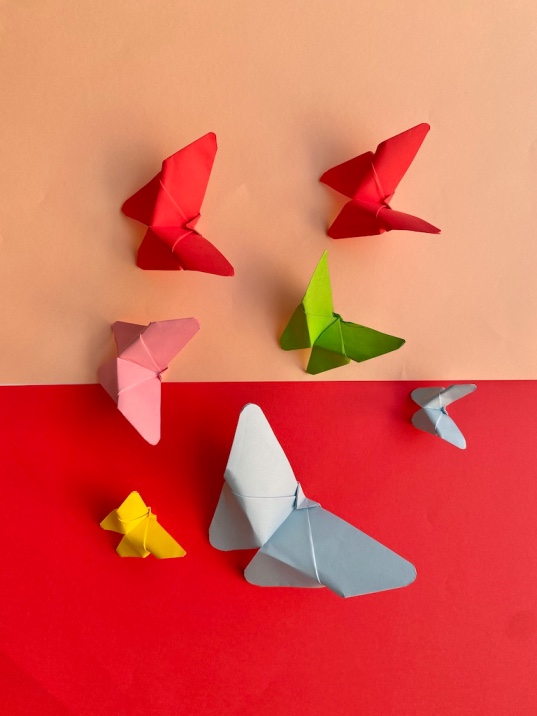
When you make a paper butterfly, don’t stop at one. Make a few and use them as home decor by making wall hangings. Or make butterflies in different sizes (use square papers) and arrange them in the order of size and display.
This paper butterfly is easy to make and you don’t need glue to make it.
Materials required:
- Origami / Color paper of size 15cm
- Scissors
Step-by-step tutorial to make an easy paper butterfly
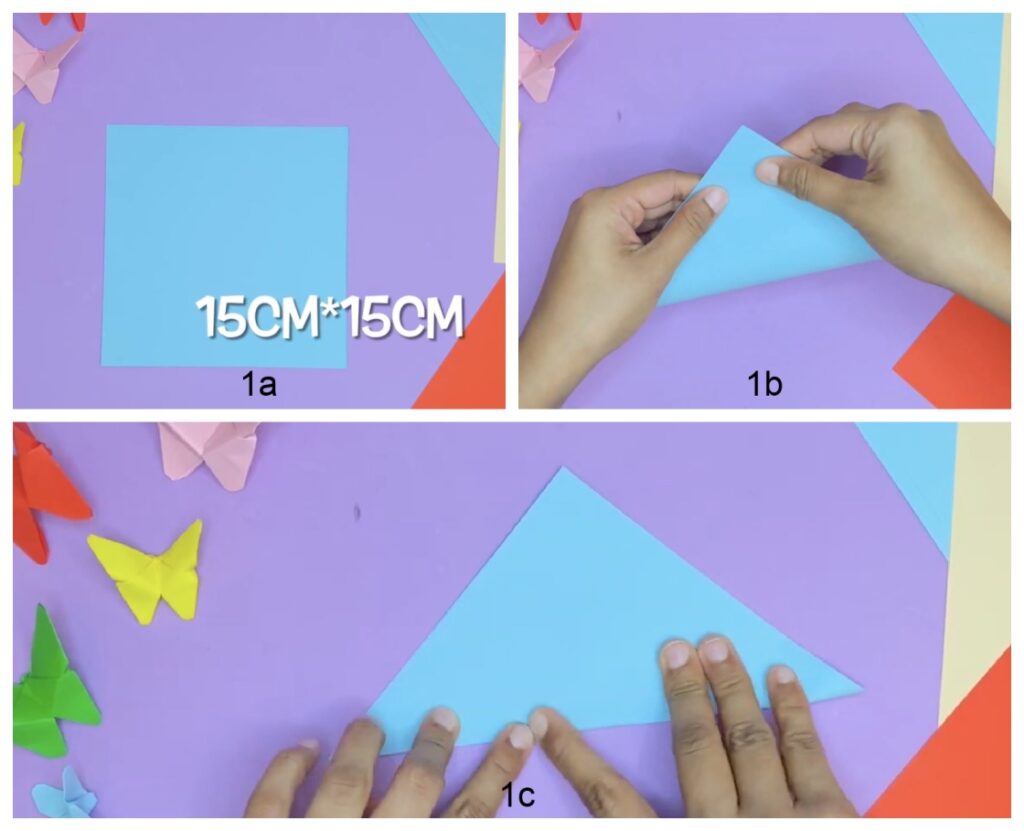 Cut a square paper of size 15cm (1a). Fold it diagonally and make a crease (1b and 1c).
 Unfold (1d). And fold diagonally in the opposite direction (1e) and make a crease.
Unfold and you can see two diagonal creases (1f).
 Now, fold horizontally so that bottom two ends meet the top two corners and unfold (1g and 1h).
 Next, we do a common Origami fold called waterbomb base. The same fold is used in making paper frog and paper tulip.
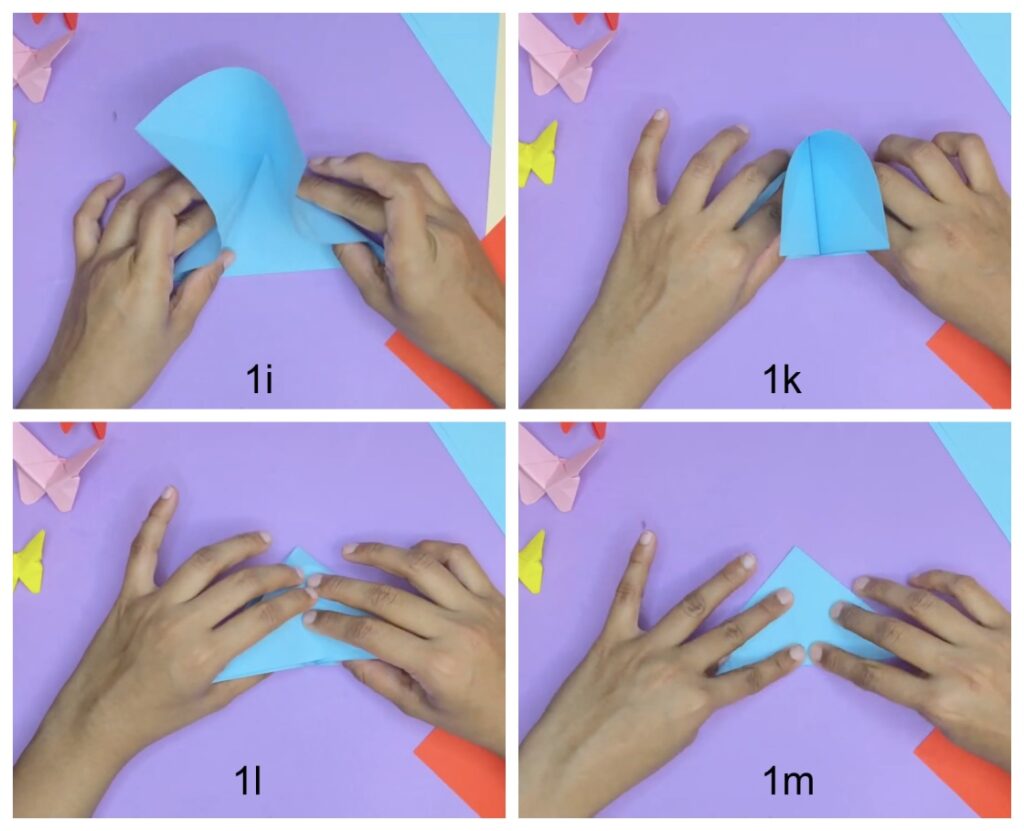
Start by folding the paper together from both sides by following the horizontal and diagonal creases (1i and 1k).
Now, press lightly downwards to form the triangle shown in 1l and 1m.
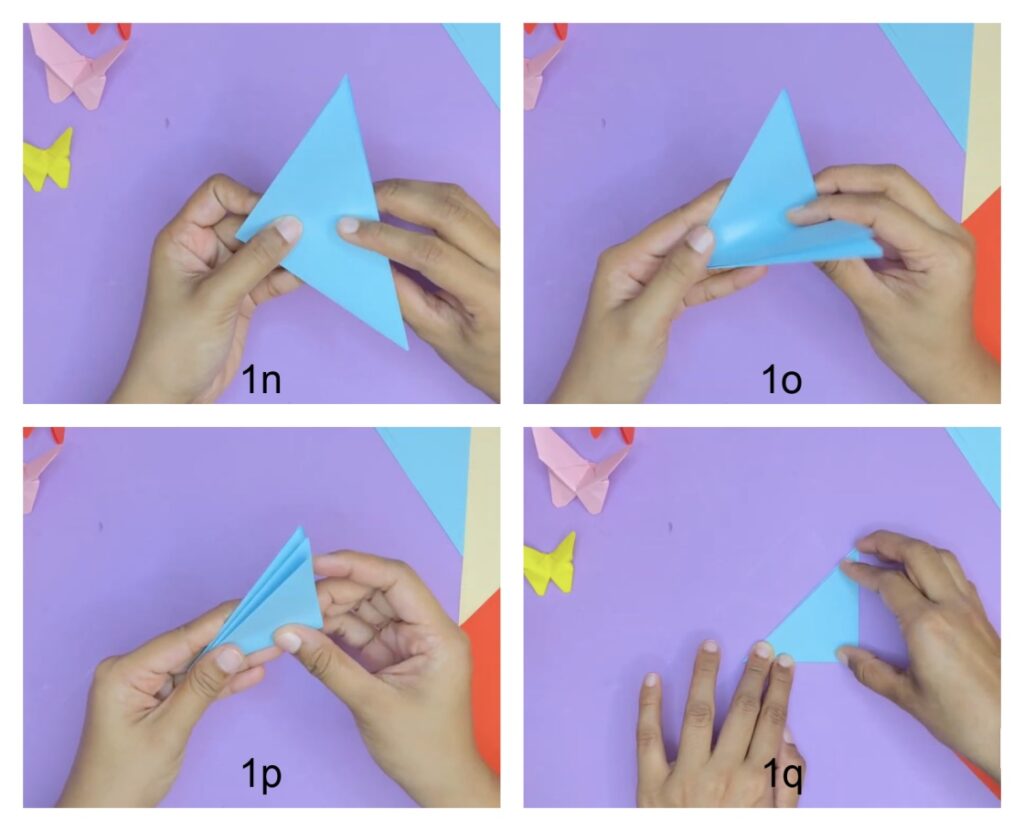 Hold the triangle as shown in figure 1n. Now fold the triangle in half again and press well to make a crease (1o, 1p, and 1q).
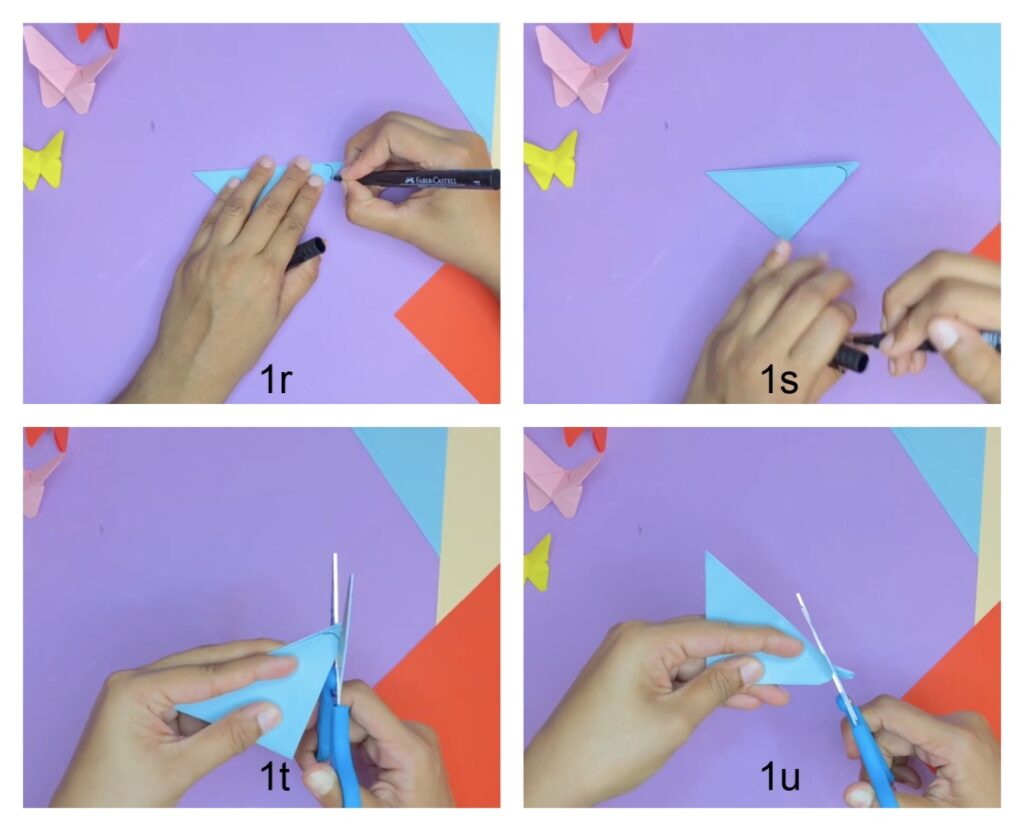 Now, keep the triangle exactly as shown in picture 1r (the top vertex should point towards you). And draw and arc on the right corner vertex. (1r and 1s).
Now cut along the arc (1t and 1u).
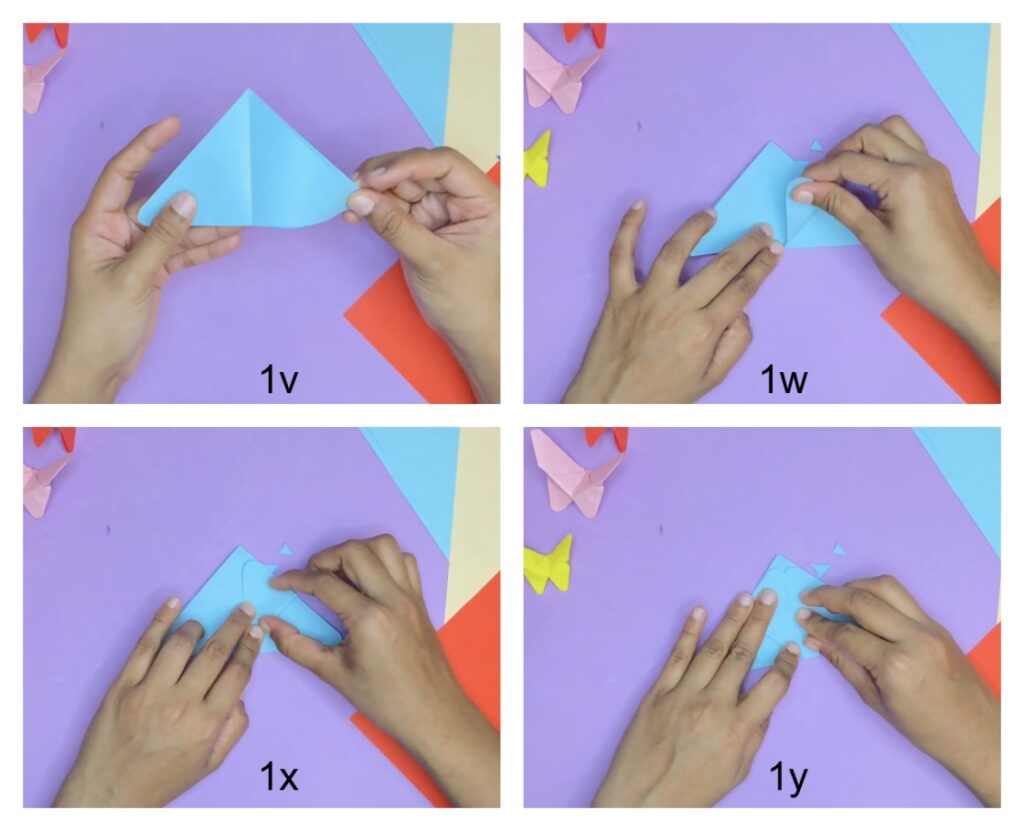 Unfold as shown in figure 1v. Now take the right corner and fold it towards the top corner and make a crease (1w and 1x).
Do the same with the left corner (1y).
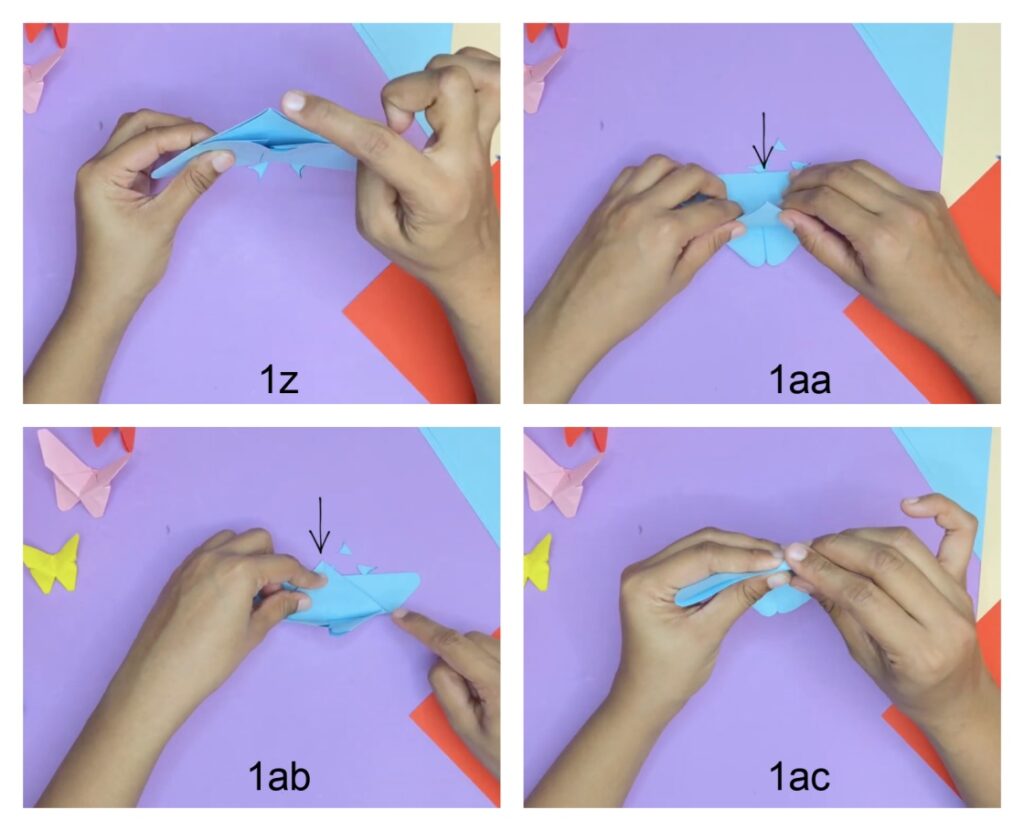 Now, do you see the vertex pointed by the finger in 1z?
We have to fold this vertex past the edge marked by the arrow in figure 1aa, by turning the figure over.
Then you will get the figure in pic 1ab.
In the next step of folding the butterfly, we have to fold the portion marked by the arrow in figure 1ab behind the edge as shown in 1ac.
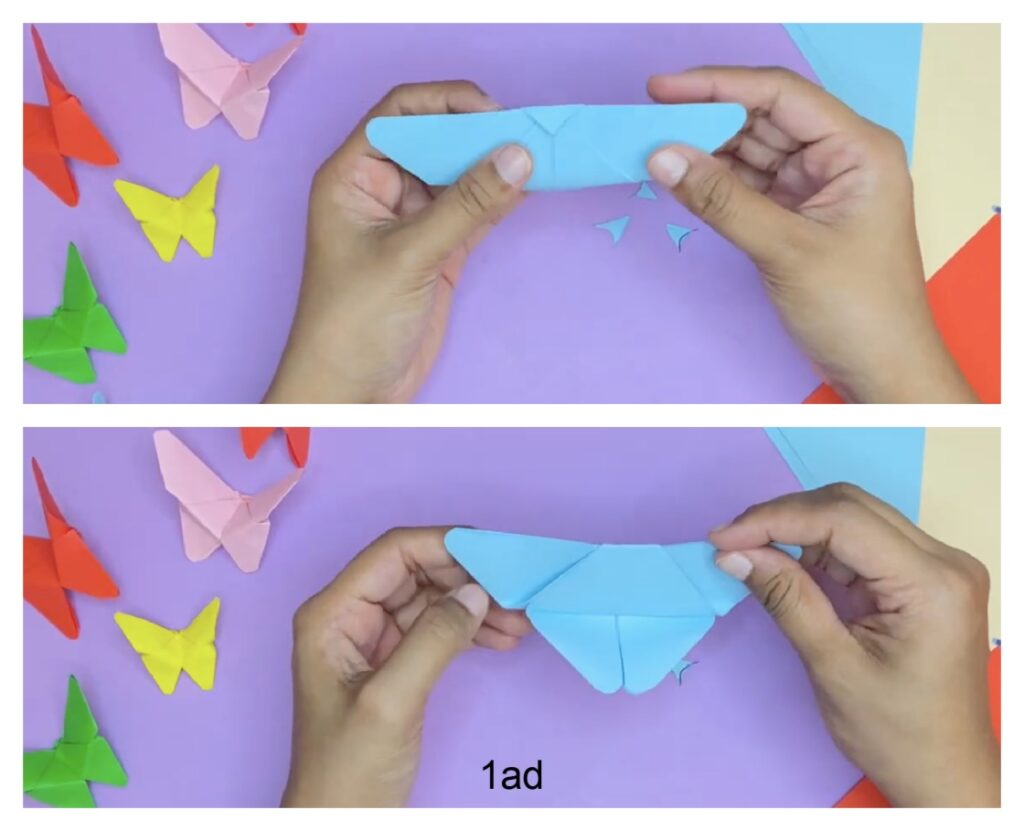
For more clarity, see the pics below (1ad). You can see the front and back views of the paper butterfly.
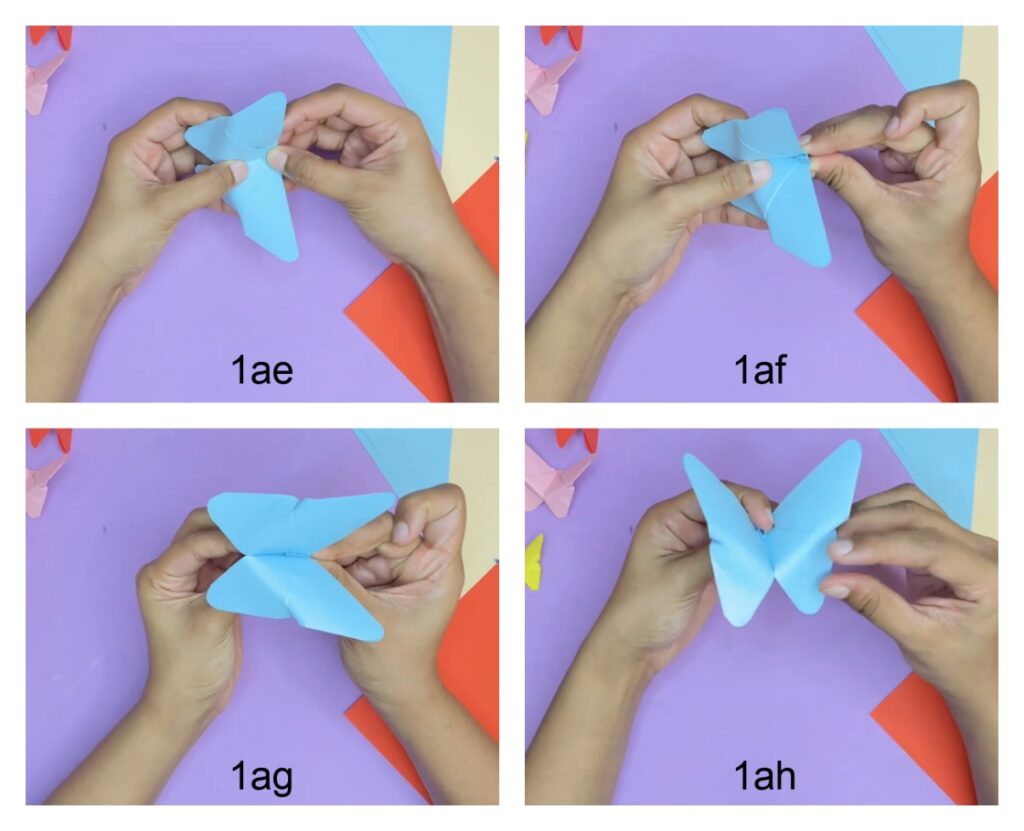 Now, hold the front view of the butterfly as shown in 1ae. Give a small nudge to the top center and slightly bring both upper wings upwards to shape the butterfly (1af and 1ag).
Now, shape the lower wings of the paper butterfly by bending it slightly downwards (1ah).
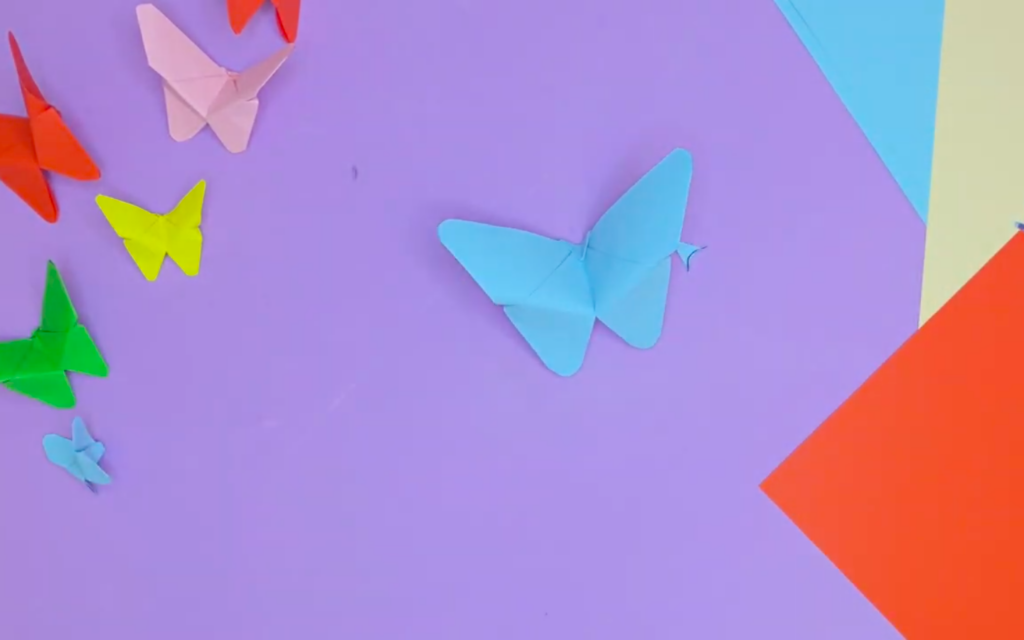
Thus, your easy paper butterfly is ready!
In case you have any doubt regarding any step, feel free to watch the step-by-step video tutorial below. Please make sure you also subscribe to our Youtube channel to get more craft ideas for kids every week.
Video tutorial to make a paper butterfly