How to make a paper jumping frog (Step-by-step tutorial)
Origami jumping frogs are easy and fun to make.
In this post, we will show you the step-by-step instructions on how to make a paper frog.
You can see that when you press on the back of paper frog, it really jumps!
For small kids, you can help them with the folding, and the result would be a few hours of play for them with this easy paper frog.
So let’s dive into the tutorial.
Materials required:
-Color paper / Origami paper
-Googly eyes (optional)
Step-by-step tutorial to make a paper jumping frog
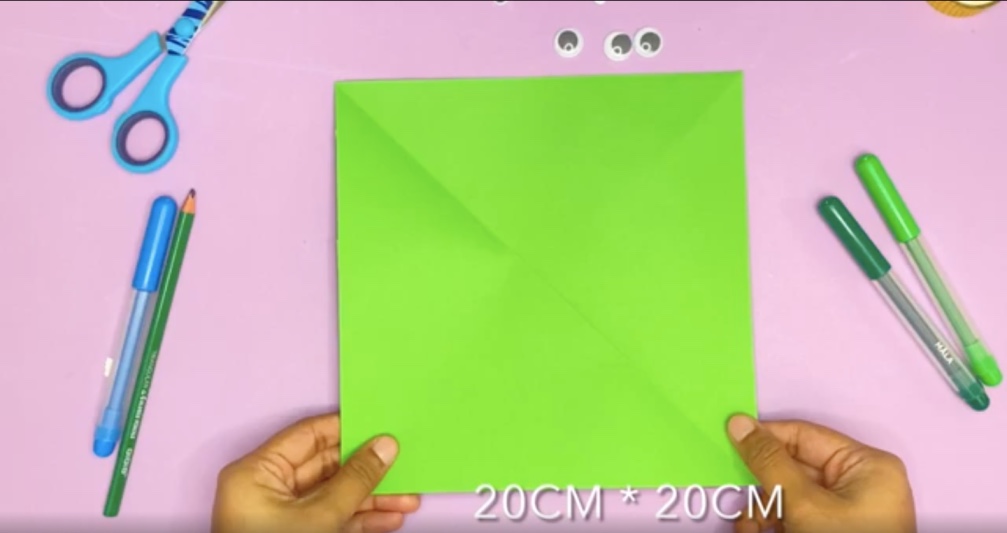
Step 1: Take a square paper.
We didn’t have origami paper so we used color paper and cut a square of size 20 cm from it.
Step 2: Fold it

Fold it in half from left to right so that the left two corners meet the right two corners. And make a crease (2a).
Now fold it again from bottom to top meeting the top two corners. Make a crease again (2b).
These creases are needed in the next steps to fold the legs of the paper frog, so make sure you do it well.
Step 3: Fold again

Open the folded part in 2b to get back to the rectangle shape again. Here you can see two identical squares.
Now we need to make folds in these two squares.
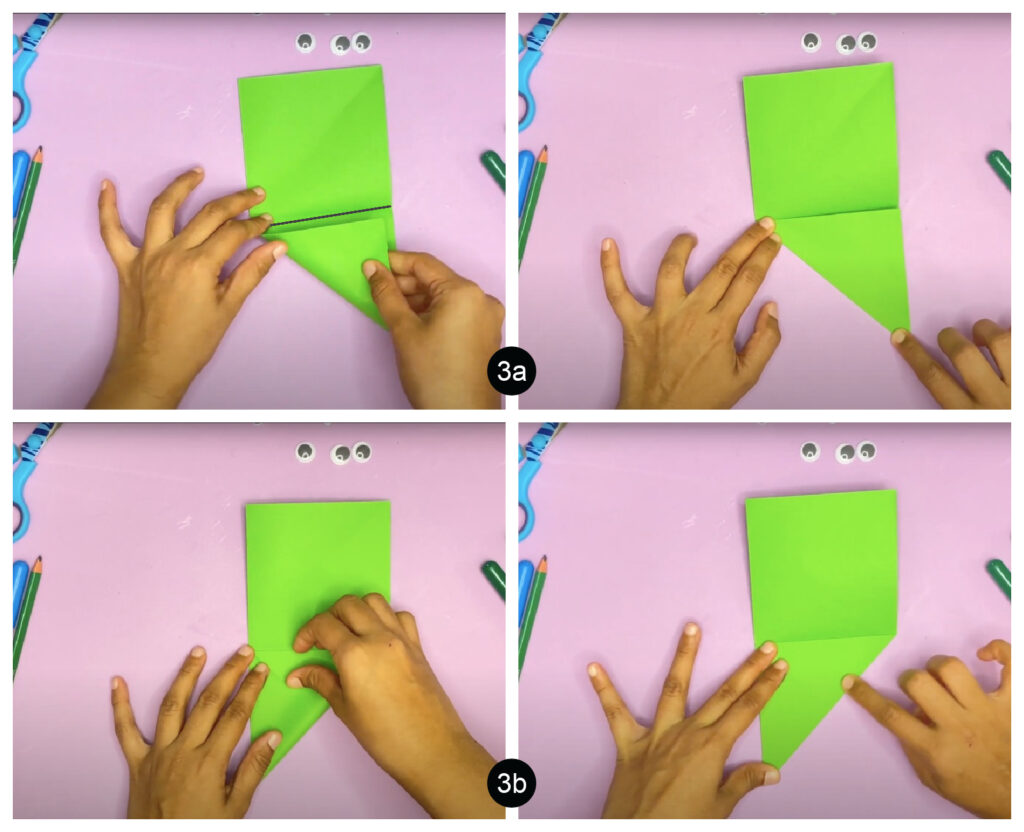
I have drawn a black line in the picture above (3a) along the crease, to show where to fold next.
First, as shown in pic 3a, make a diagonal fold along the crease (the black line) and press with your fingers along the new fold to make another crease.
Open it and as shown in pic 3b, make another diagonal fold from bottom right to top left to make another crease.

Now, open the fold (3c). Now we need to make a horizontal fold in the bottom square (3d) along the crease we made earlier (the black line in the pic 3a).
Make a crease again (3e).
Step 4: Repeat the same process with the top square
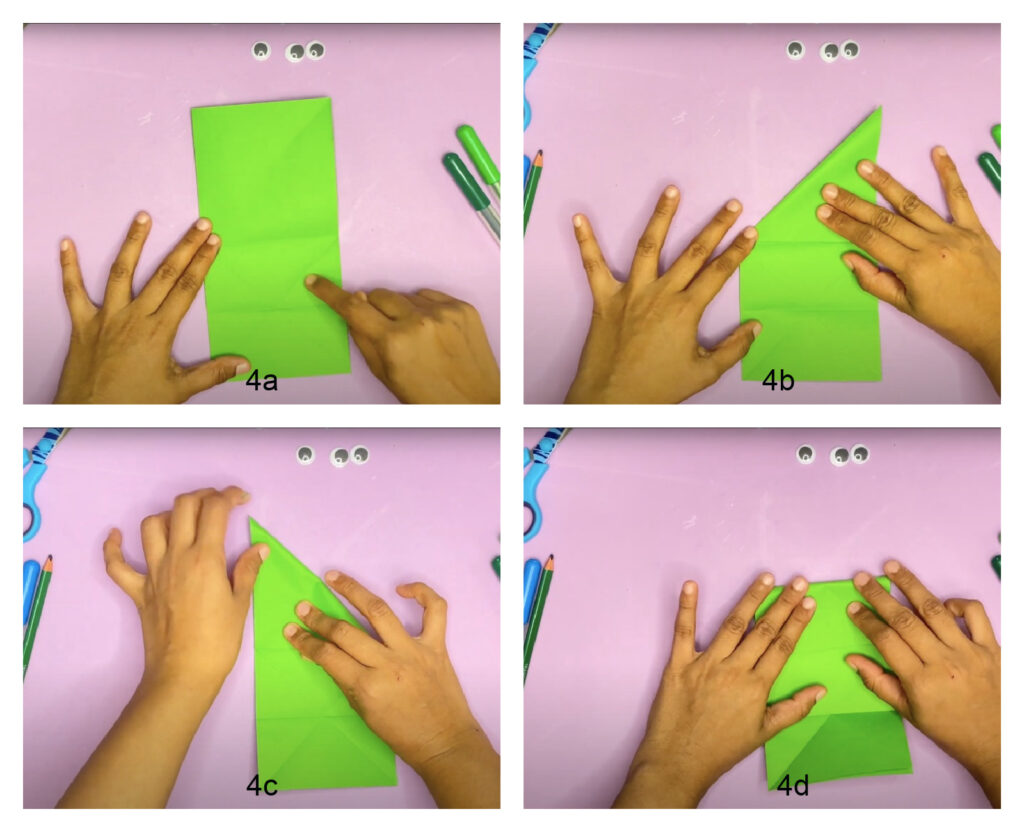
Open the fold. Now we are going to repeat the same process as in step 3 with the top square. (steps 4a – 4d). ie, make two diagonal folds and one horizontal fold. Please don’t forget to make creases in each step.
Step 5: Make the waterbomb base
In this step, we are going to make a fold called waterbomb base (a common Origami fold) in both squares.

Look at pic 5a. Start by folding the paper together from both sides by following the diagonal and horizontal creases.
From the sides, push in and fold the paper in half following the horizontal crease you already made (5a).

Now you get a triangle shape (5b).
In case you are confused about this step, watch the video tutorial of paper frog below or watch this video that shows how to make the Origami waterbomb base.

Do the same with the bottom square as well to obtain a diamond shape (5c).
Step 6: Fold the legs of paper frog

Now, take the upper triangle (6a). Take the vertex C (see the pic) and fold it to touch vertex A marked in the picture (6b). Make a crease (6c).

Do the same with vertex B. Take the vertex B and fold it to touch vertex A. Make a crease(6d).
Unfold and take the vertex C again to make a fold touching along the crease we just made (6e and 6f). (see the black dotted line).
Now, take the vertex B and fold it along the crease we just made (6g).

Now, repeat the same process with the bottom triangle as well to form the other two legs of the paper frog (6h).
Step 7: Fold the body of the paper frog

Now, turn the paper to face the other side.
a. Keep it in the position like in the picture so that the paper frog’s legs are standing in a vertical line. (see the black line in the first collage in pic 7a ).
Now, from the bottom, fold one corner of the diamond shape at such a length so that its vertex crosses more than half of the diamond shape (See the black line in the second collage of pic 7a).
You can also take the crease we made earlier as a reference. It should be slightly more than than the horizontal diagonal of the diamond shape.
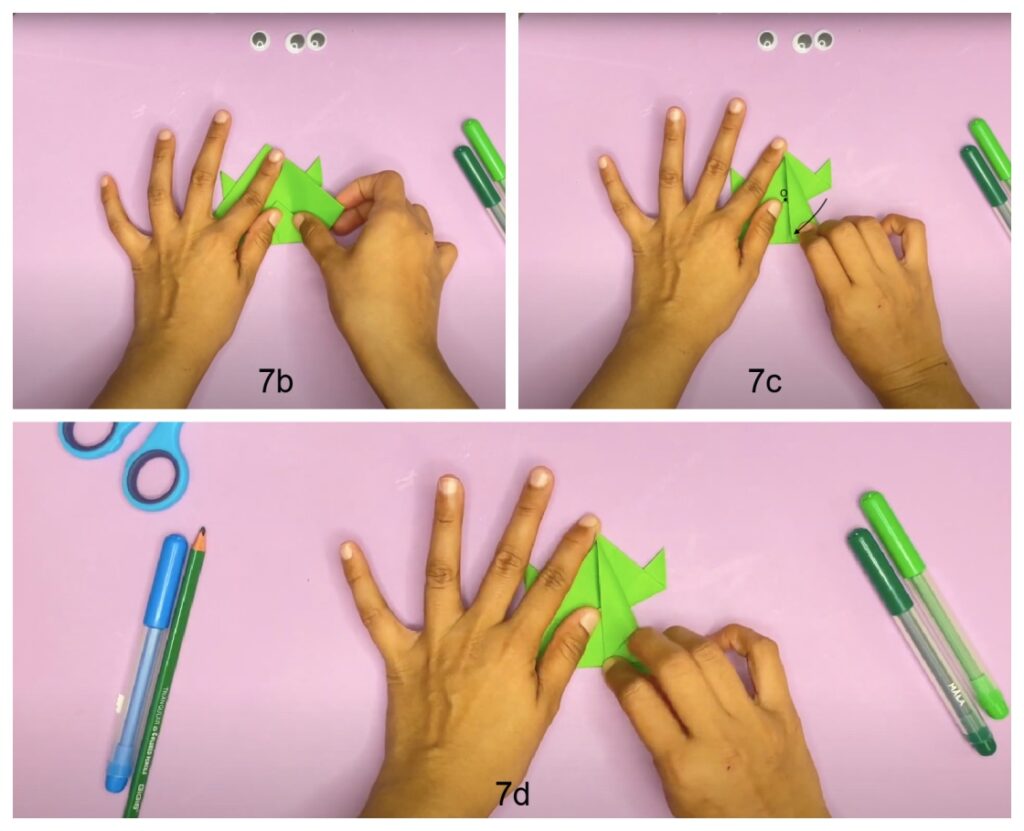
b. Now, take the right side of the shape and fold it in a way its vertex touches the bottom (see pic 7b and 7c). In picture 7c, also note the point marked as O which is the vertex of the triangle we just folded in step 7a.
So when we make the fold in step b, the edge should also align with the center of the fold marked as O (7d). After making the fold, press on top of it to make a crease.

Now, open this fold to tuck the corner into the pocket you see in pic 7e.
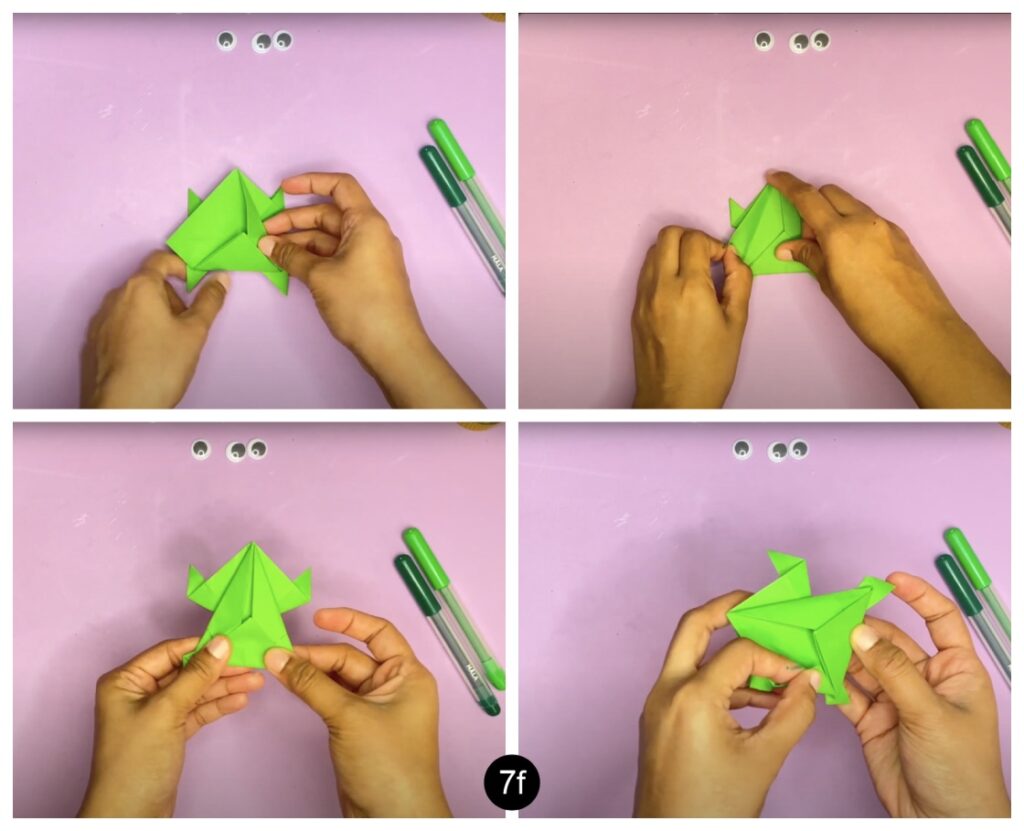
Repeat the same procedure on the left side to obtain the body of the paper frog (7f).
Step 8: Making the paper frog jump

Turn the paper frog to face the back side (8a).
See the crevice pointed by the finger (8a). Fold along the crevice and press it giving light pressure (8b and 8c).

After that, fold the folded part again, this time from top to bottom (8d). Press it well (8f).
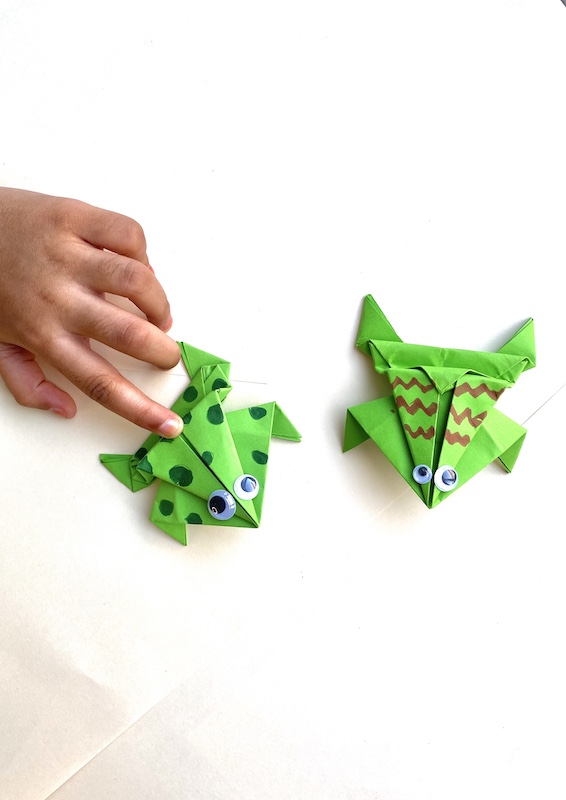
Turn the frog to face the front (8g). Add some design and glue Googly eyes to make it more real (this is optional).
Thus, your easy paper frog is ready.
Now try pressing on the folds to see it jump (8h).
Make two or more paper frogs and run a race to see whose frog jumps the farthest!
If you are still confused about any step, watch the video tutorial below.