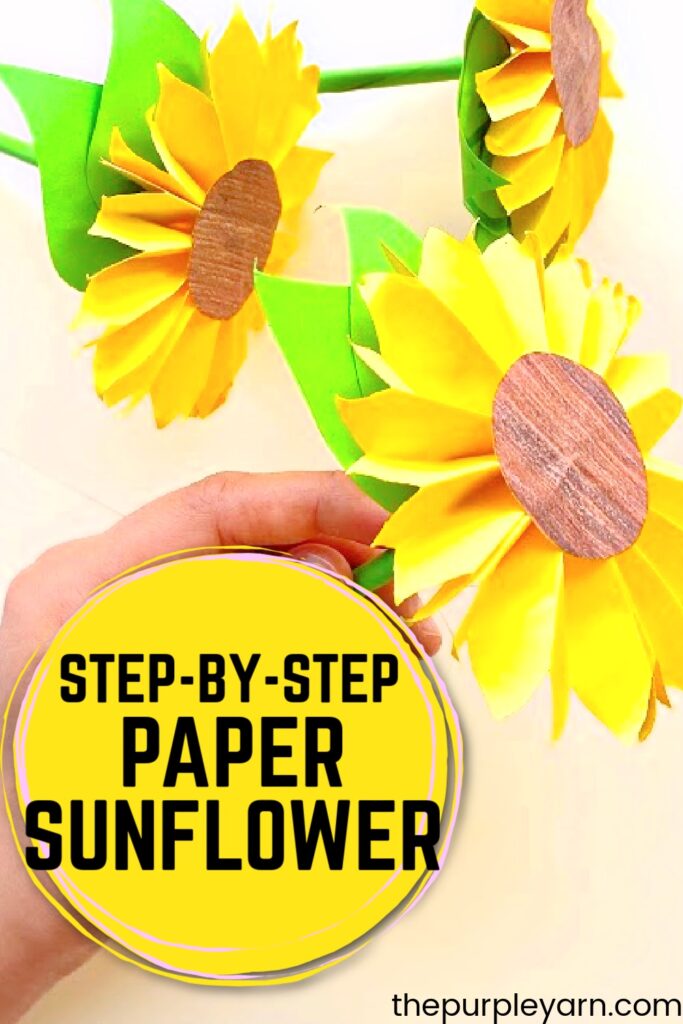
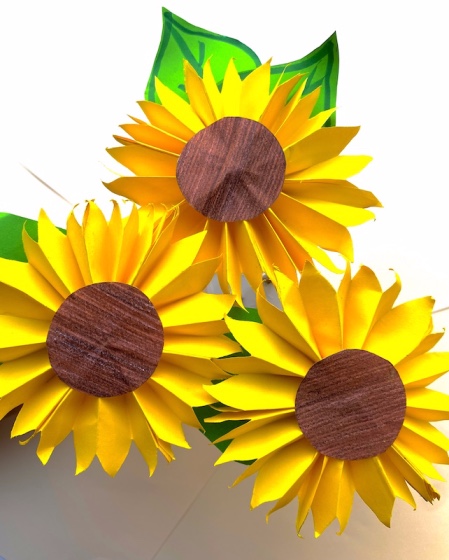
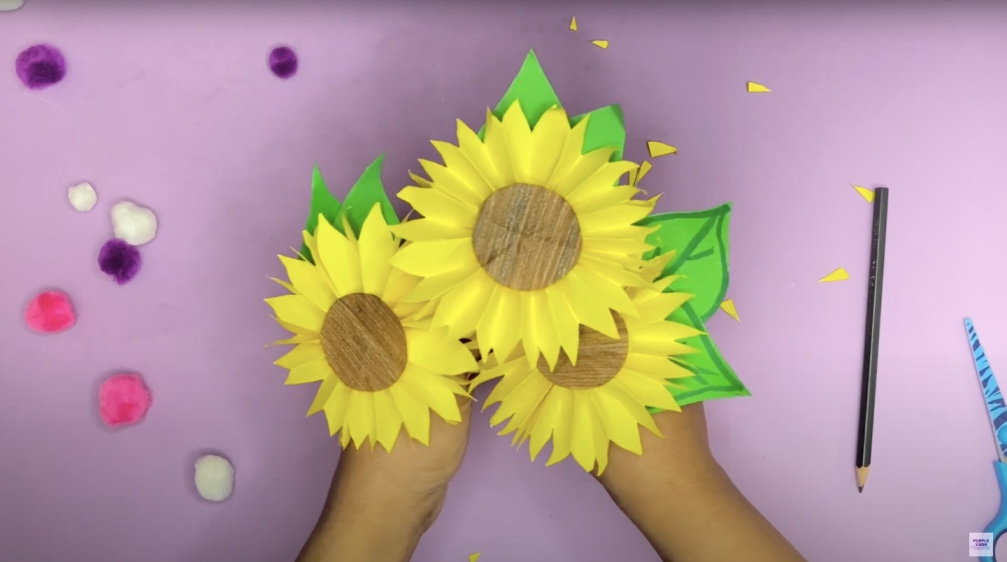
How to make a paper sunflower (step-by-step tutorial)
Sunflowers are one of the easiest papercraft items you can help your kids make with just simple paper available at home.
They are simple to make, yet they always look bright and elegant brightening up any dull space.
Do you have color paper at home?
Then let’s get started on making this simple paper sunflower. It’s easy for kids to make.
Before moving onto the tutorial, we would appreciate it very much if you will check out our Youtube channel and subscribe to it. We upload new easy craft tutorials every week there.
Materials required:
– Color papers (yellow and green)
– Glue
– Scissors
Easy DIY paper sunflower step-by-step tutorial
Step 1: Cut the paper and fold
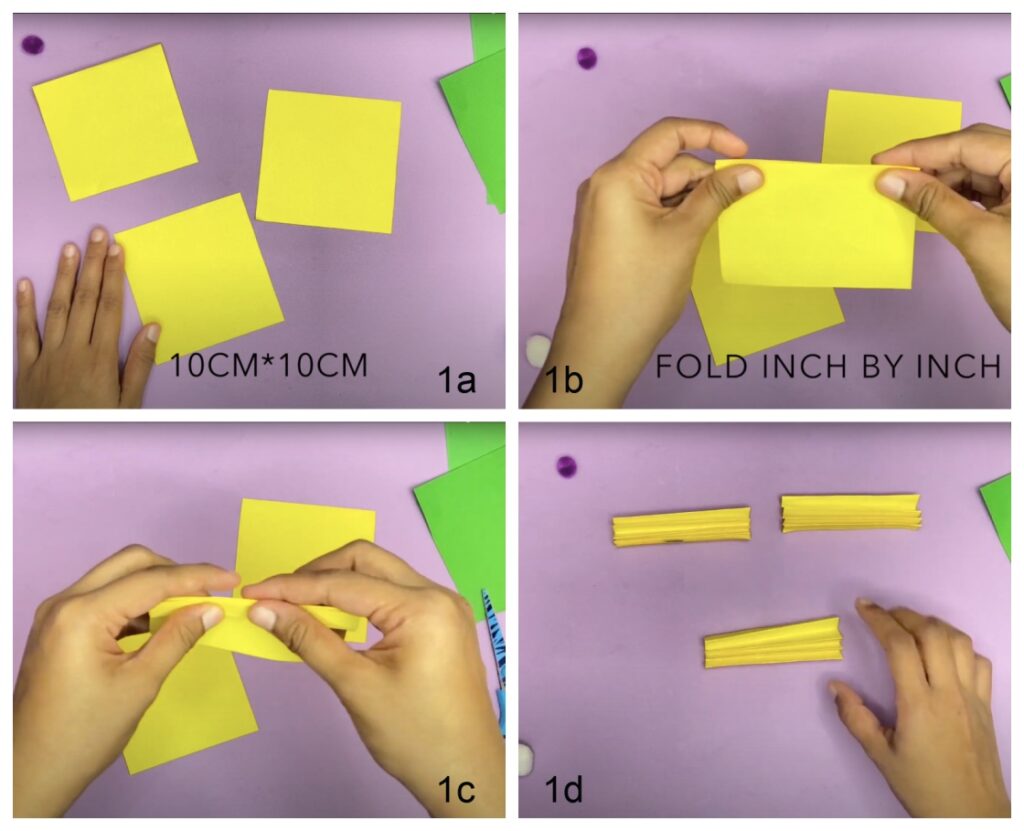
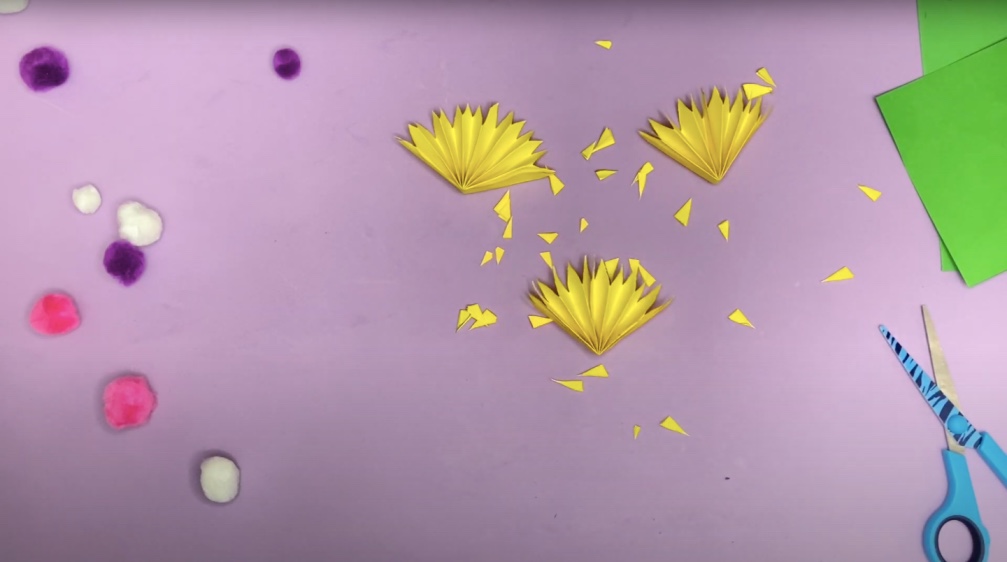
Take a yellow color paper. And cut it into 3 squares of size 10cm each(1a).
We had an A4 sheet sized color paper at home, so we used it. It doesn’t matter what size your paper is, as long as you can make 3 squares of size 10 cm.
Now, take each paper and make concertina folds (also called zig-zag folds – pics 1b and 1c). The size of the pleats should be more than 1 cm.
Do it with all the three squares (1d).
Step 2: Draw and cut the end of the petals
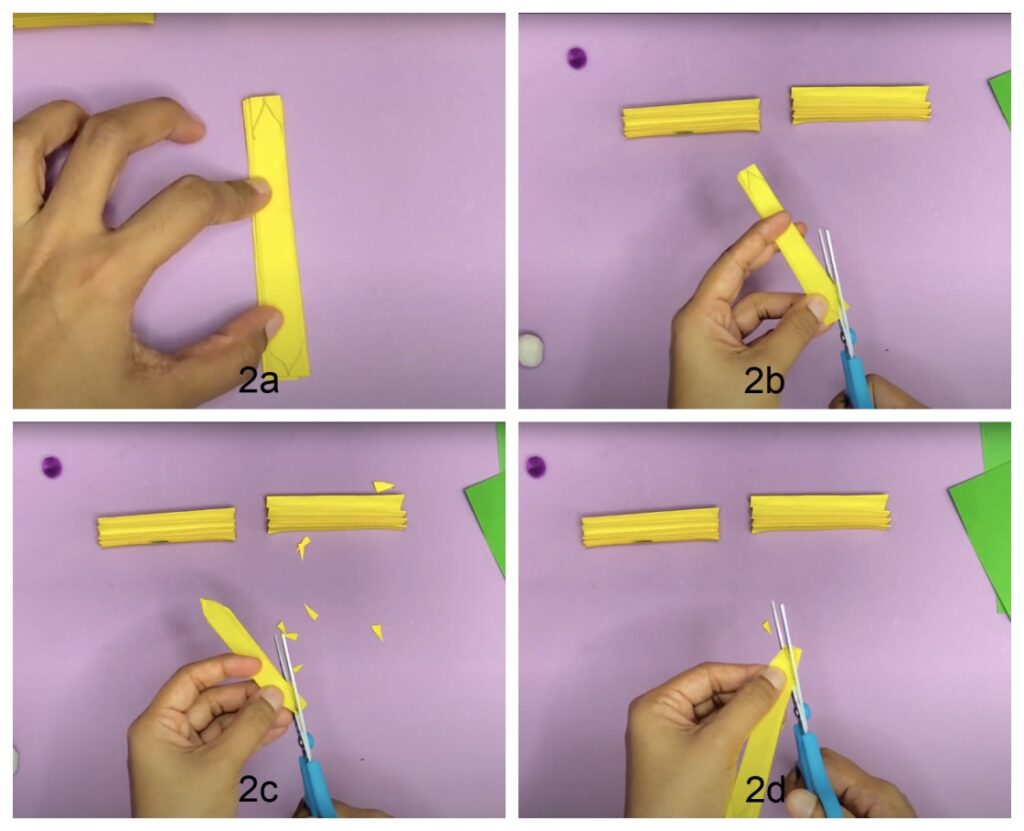
Take one concertina folded piece of paper and draw half-petal shapes on both ends, as shown in pic 2a.
Cut along the drawing on both ends to get the tips of the petals of the sunflower (2b, 2c, and 2d).
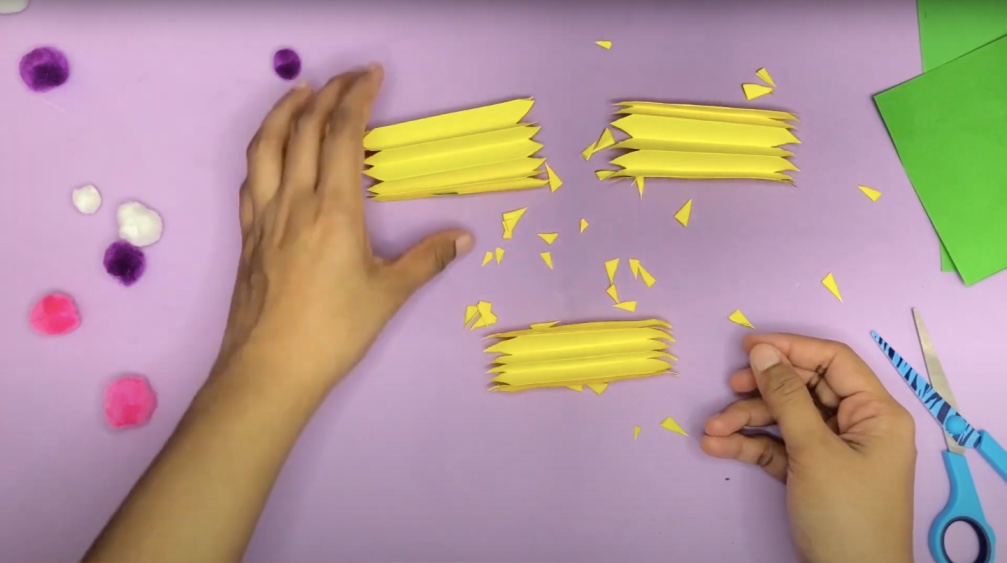
Repeat steps 2a-2d on the other two pleated papers as well.
Step 3: Glue the folds together to form the petals
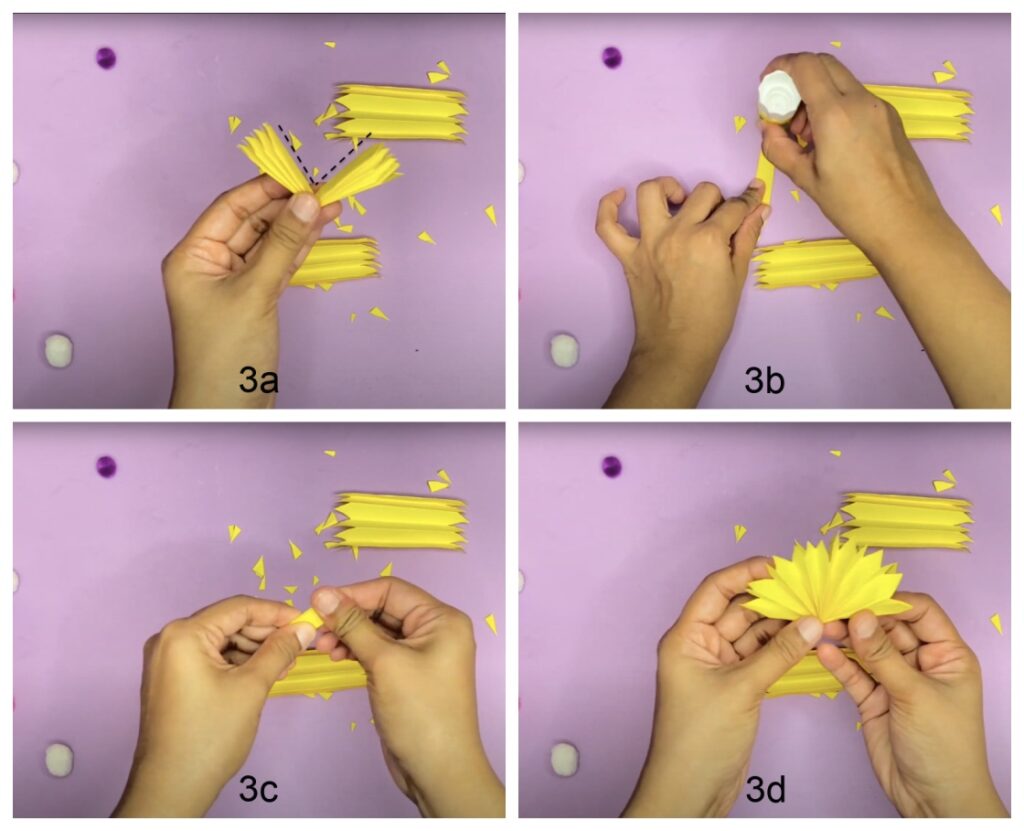
a. Now, take one concertina fold and fold it in half like shown in pic 3a.
We need to glue and stick the folded parts together. Therefore, apply glue in between the folds (see the dotted V line).
b. Apply glue and stick it together (3b).
c. Press it well to make sure the folds stick well to each other (3c).
d. Open to get one portion of the petal (3d).
Repeat the same steps with the other two zig-zag folds.
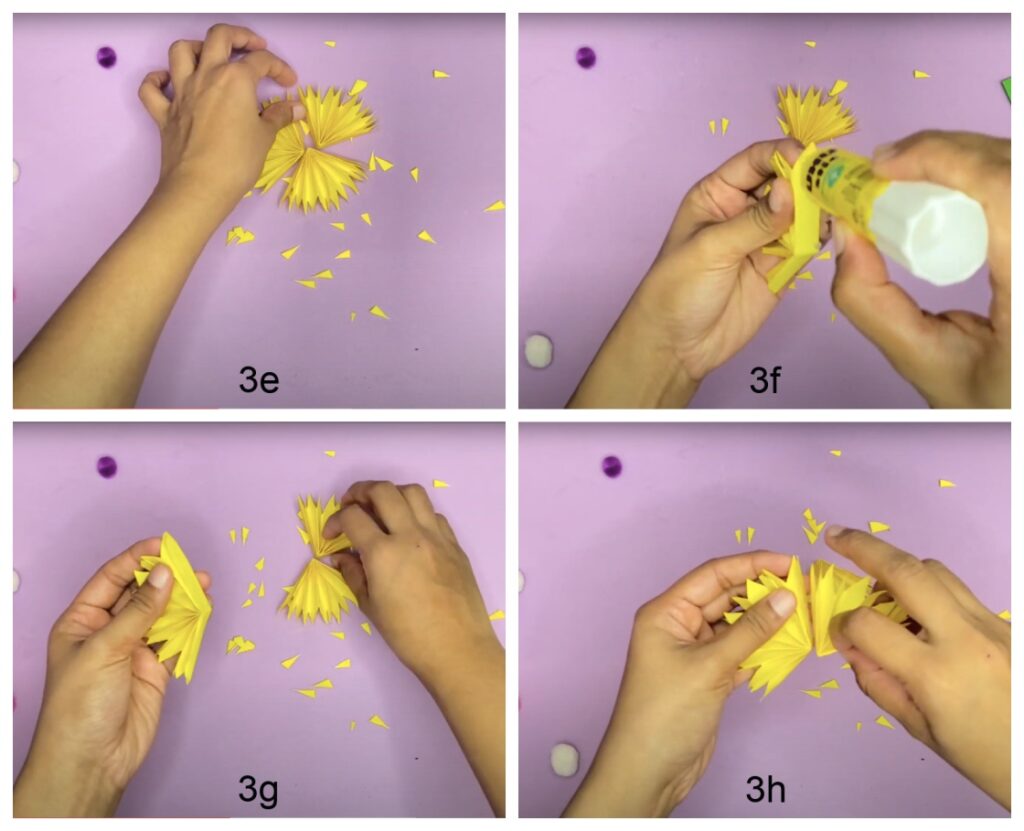
The next step is to stick these 3 folded pieces together. Apply glue on the base of the petal pleats to stick them end-to-end (pics 3e-3h).
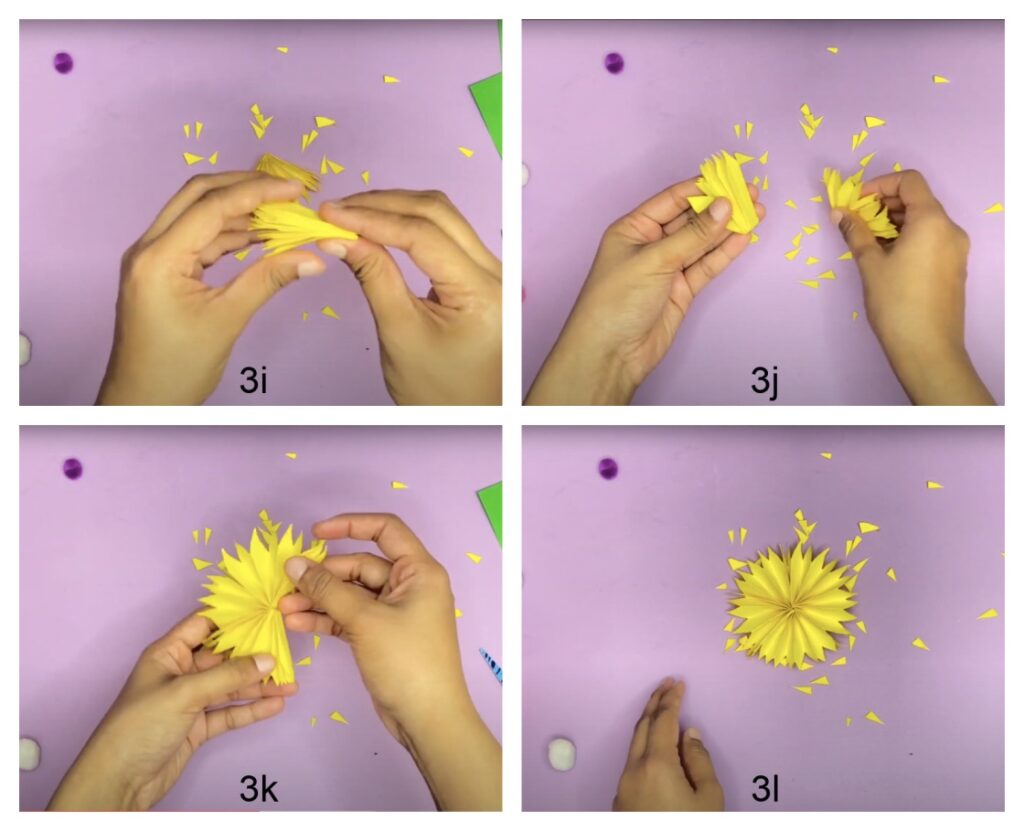
Now, take the third folded petal piece and stick it to the base of the second petal fold. Open it to see the sunflower petal (3l). Make sure all three petal pieces are glued well and stuck end-to-end.
Step 4: Make the center of the paper sunflower
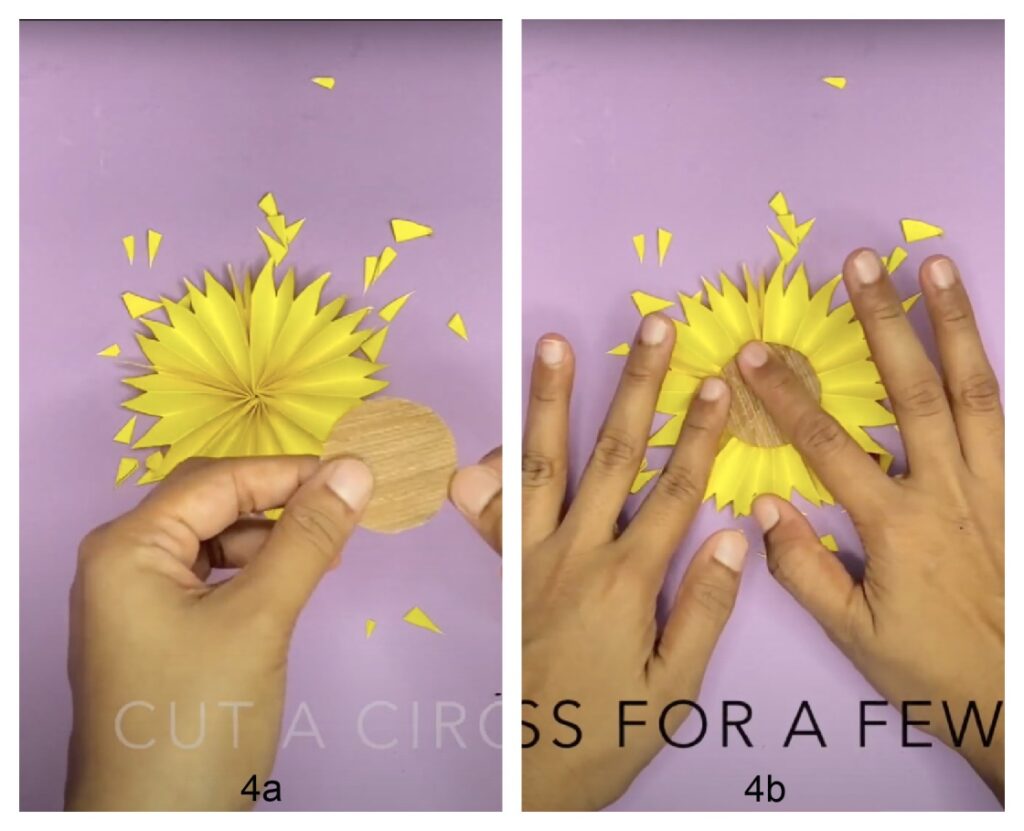
In this step, we cut a small circle and stick it on the center of the petal base. We didn’t have brown color sheets, therefore, we did it on white paper by coloring using color pencils (4a and 4b).
Step 5: Make the leaves
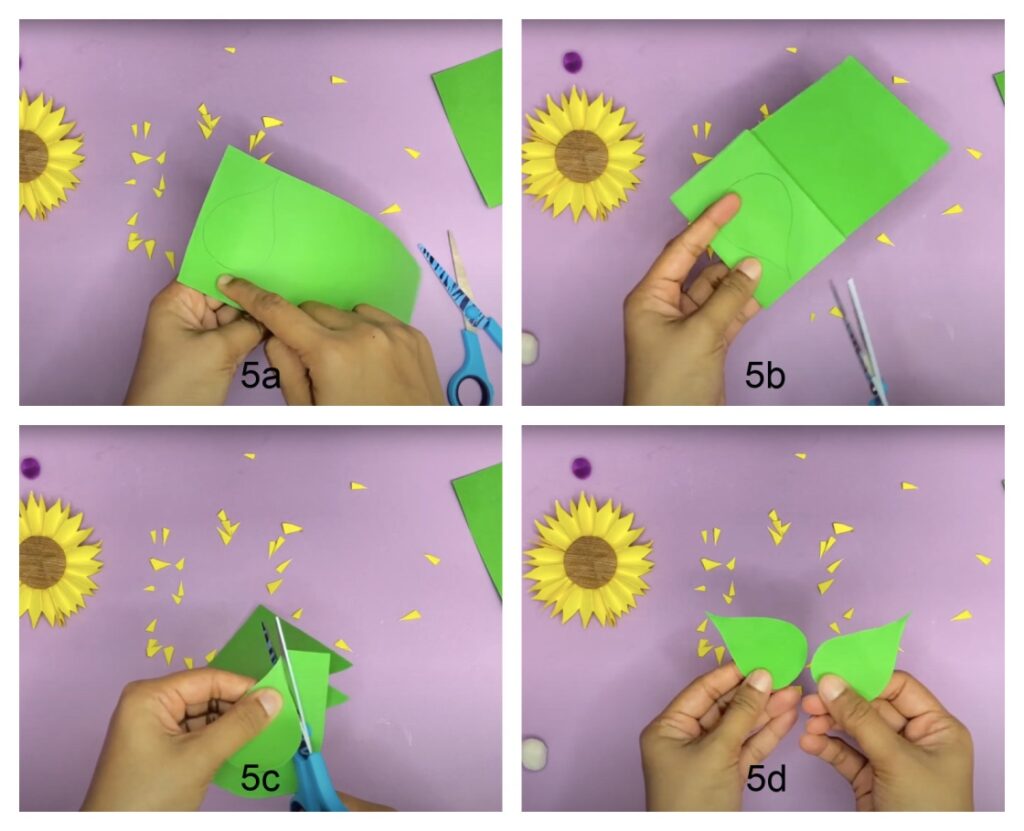
Draw a petal shape on a green colored paper (5a).
Make the green paper wide enough to cut two leaves at a time by folding the paper as shown in pic 5b.
Cut along the drawing to get two leafs (5c and 5d).
Step 6: Make the stem
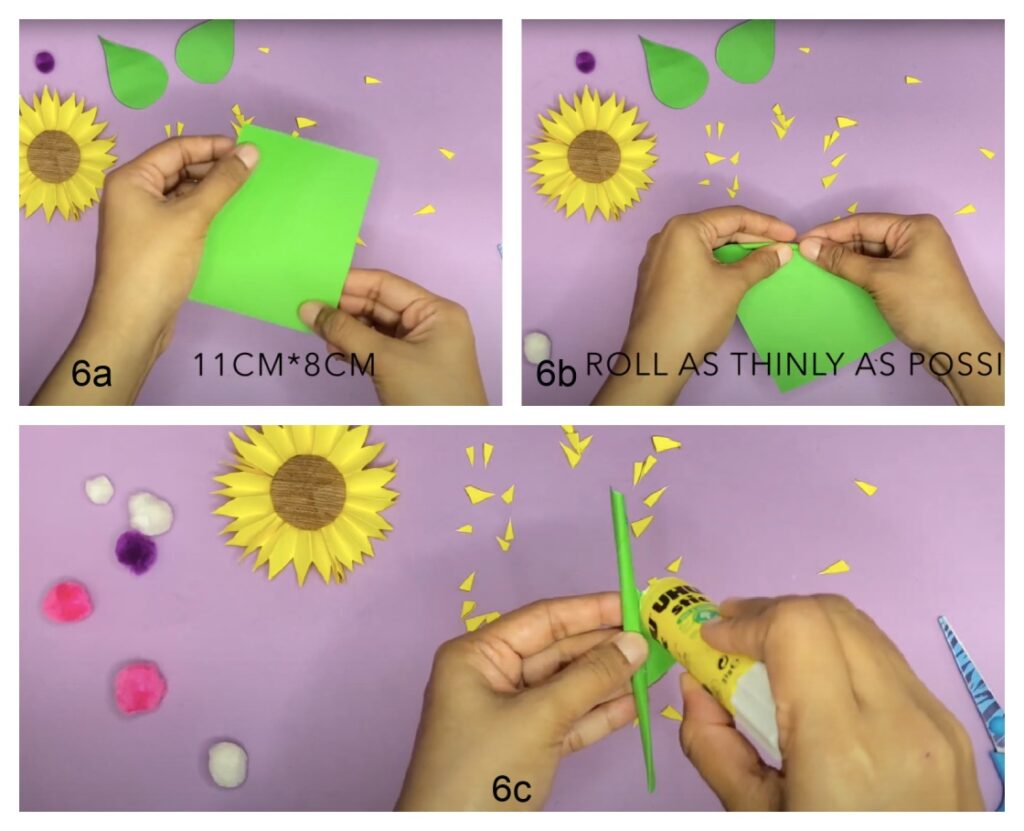
Cut a rectangle of size 11cm x 8cm on a green paper (6a). And roll the paper “diagonally” as thinly as possible (6b). When you reach the end, apply glue and stick it (6c).
Step 7: Put it all together
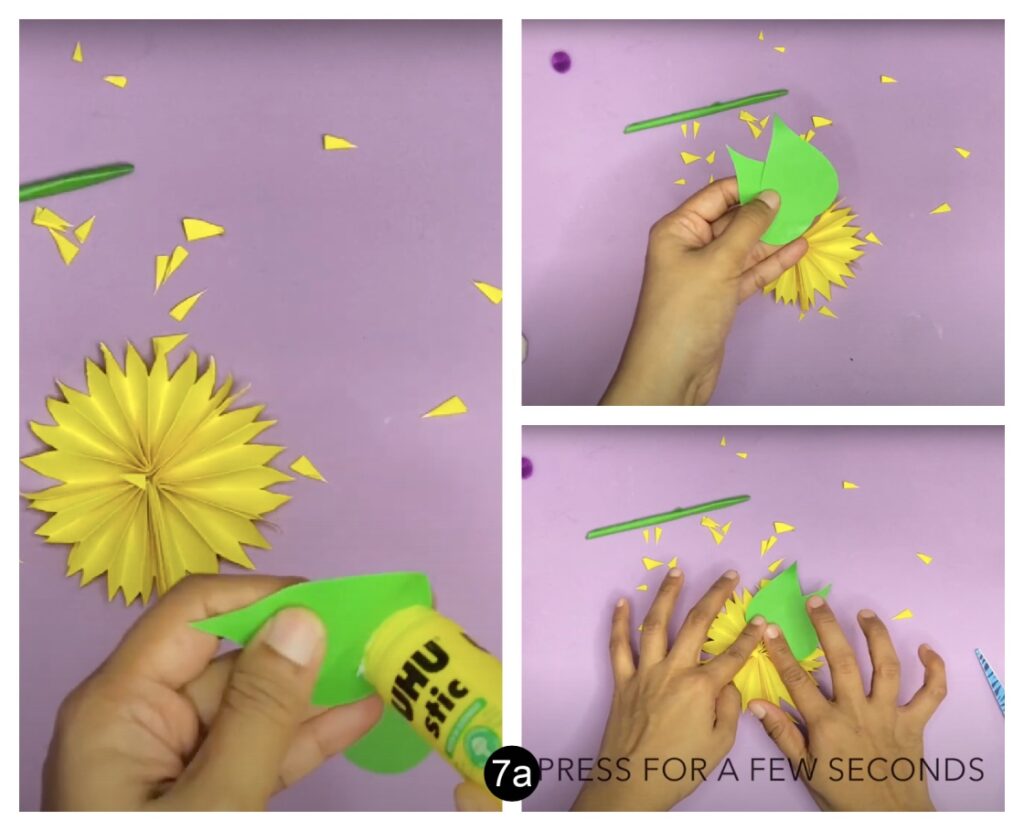
a. Apply glue to the base of the leaves and stick them together and then stick them to the base of the petal. Press for a few seconds(7a).
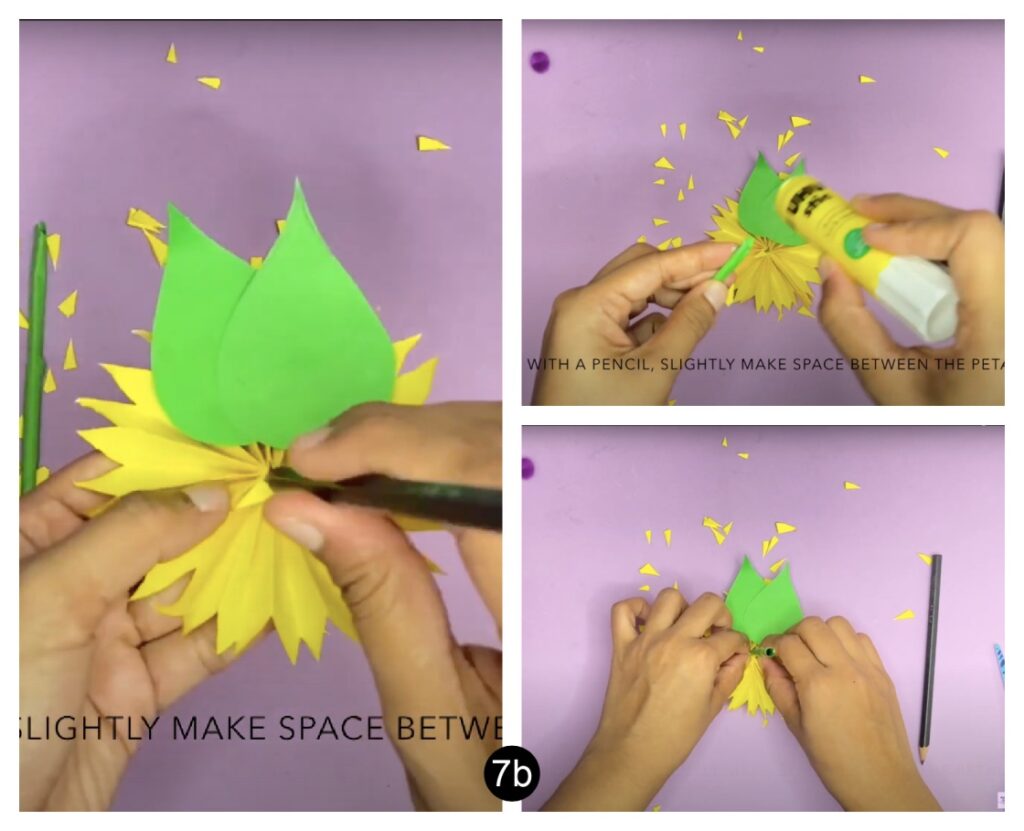
b. With a pencil, slightly make space between the petals at the centre. Stick glue to the end of the stem and stick it to the centre between the petals (7b).
Thus, the paper sunflower is ready!
Hope you have fun doing it! If you have any doubts, do ask in the comments below!
You can also remove any confusion by watching the video tutorial below.
Video tutorial to make an easy paper sunflower
More craft tutorials:
How to make a paper rose step-by-step
Easy summer ice cream popsicle craft for preschoolers and above
How to make a paper jumping frog
Like this post? Save for later!