Christmas Tree Card Craft for Kids
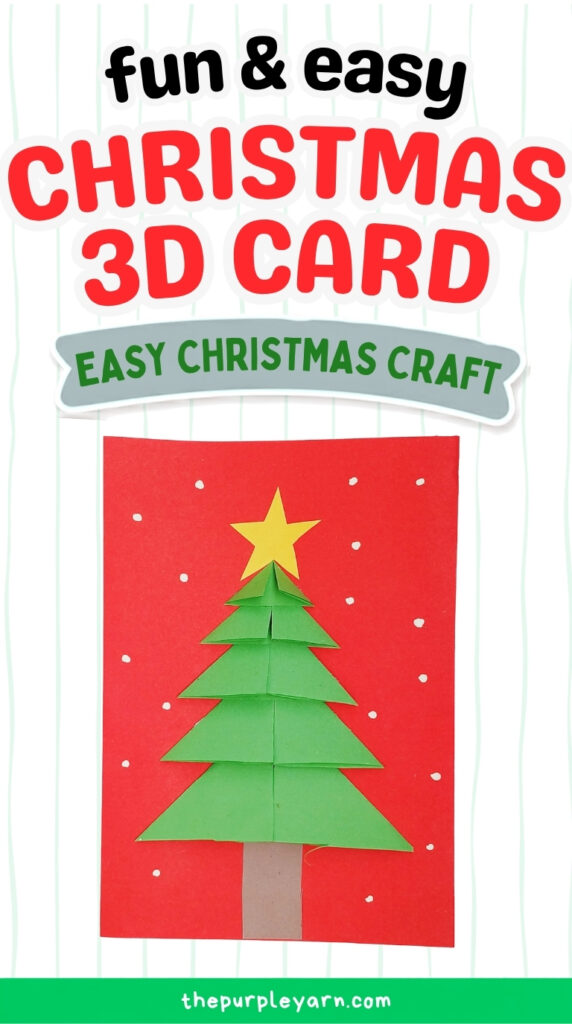
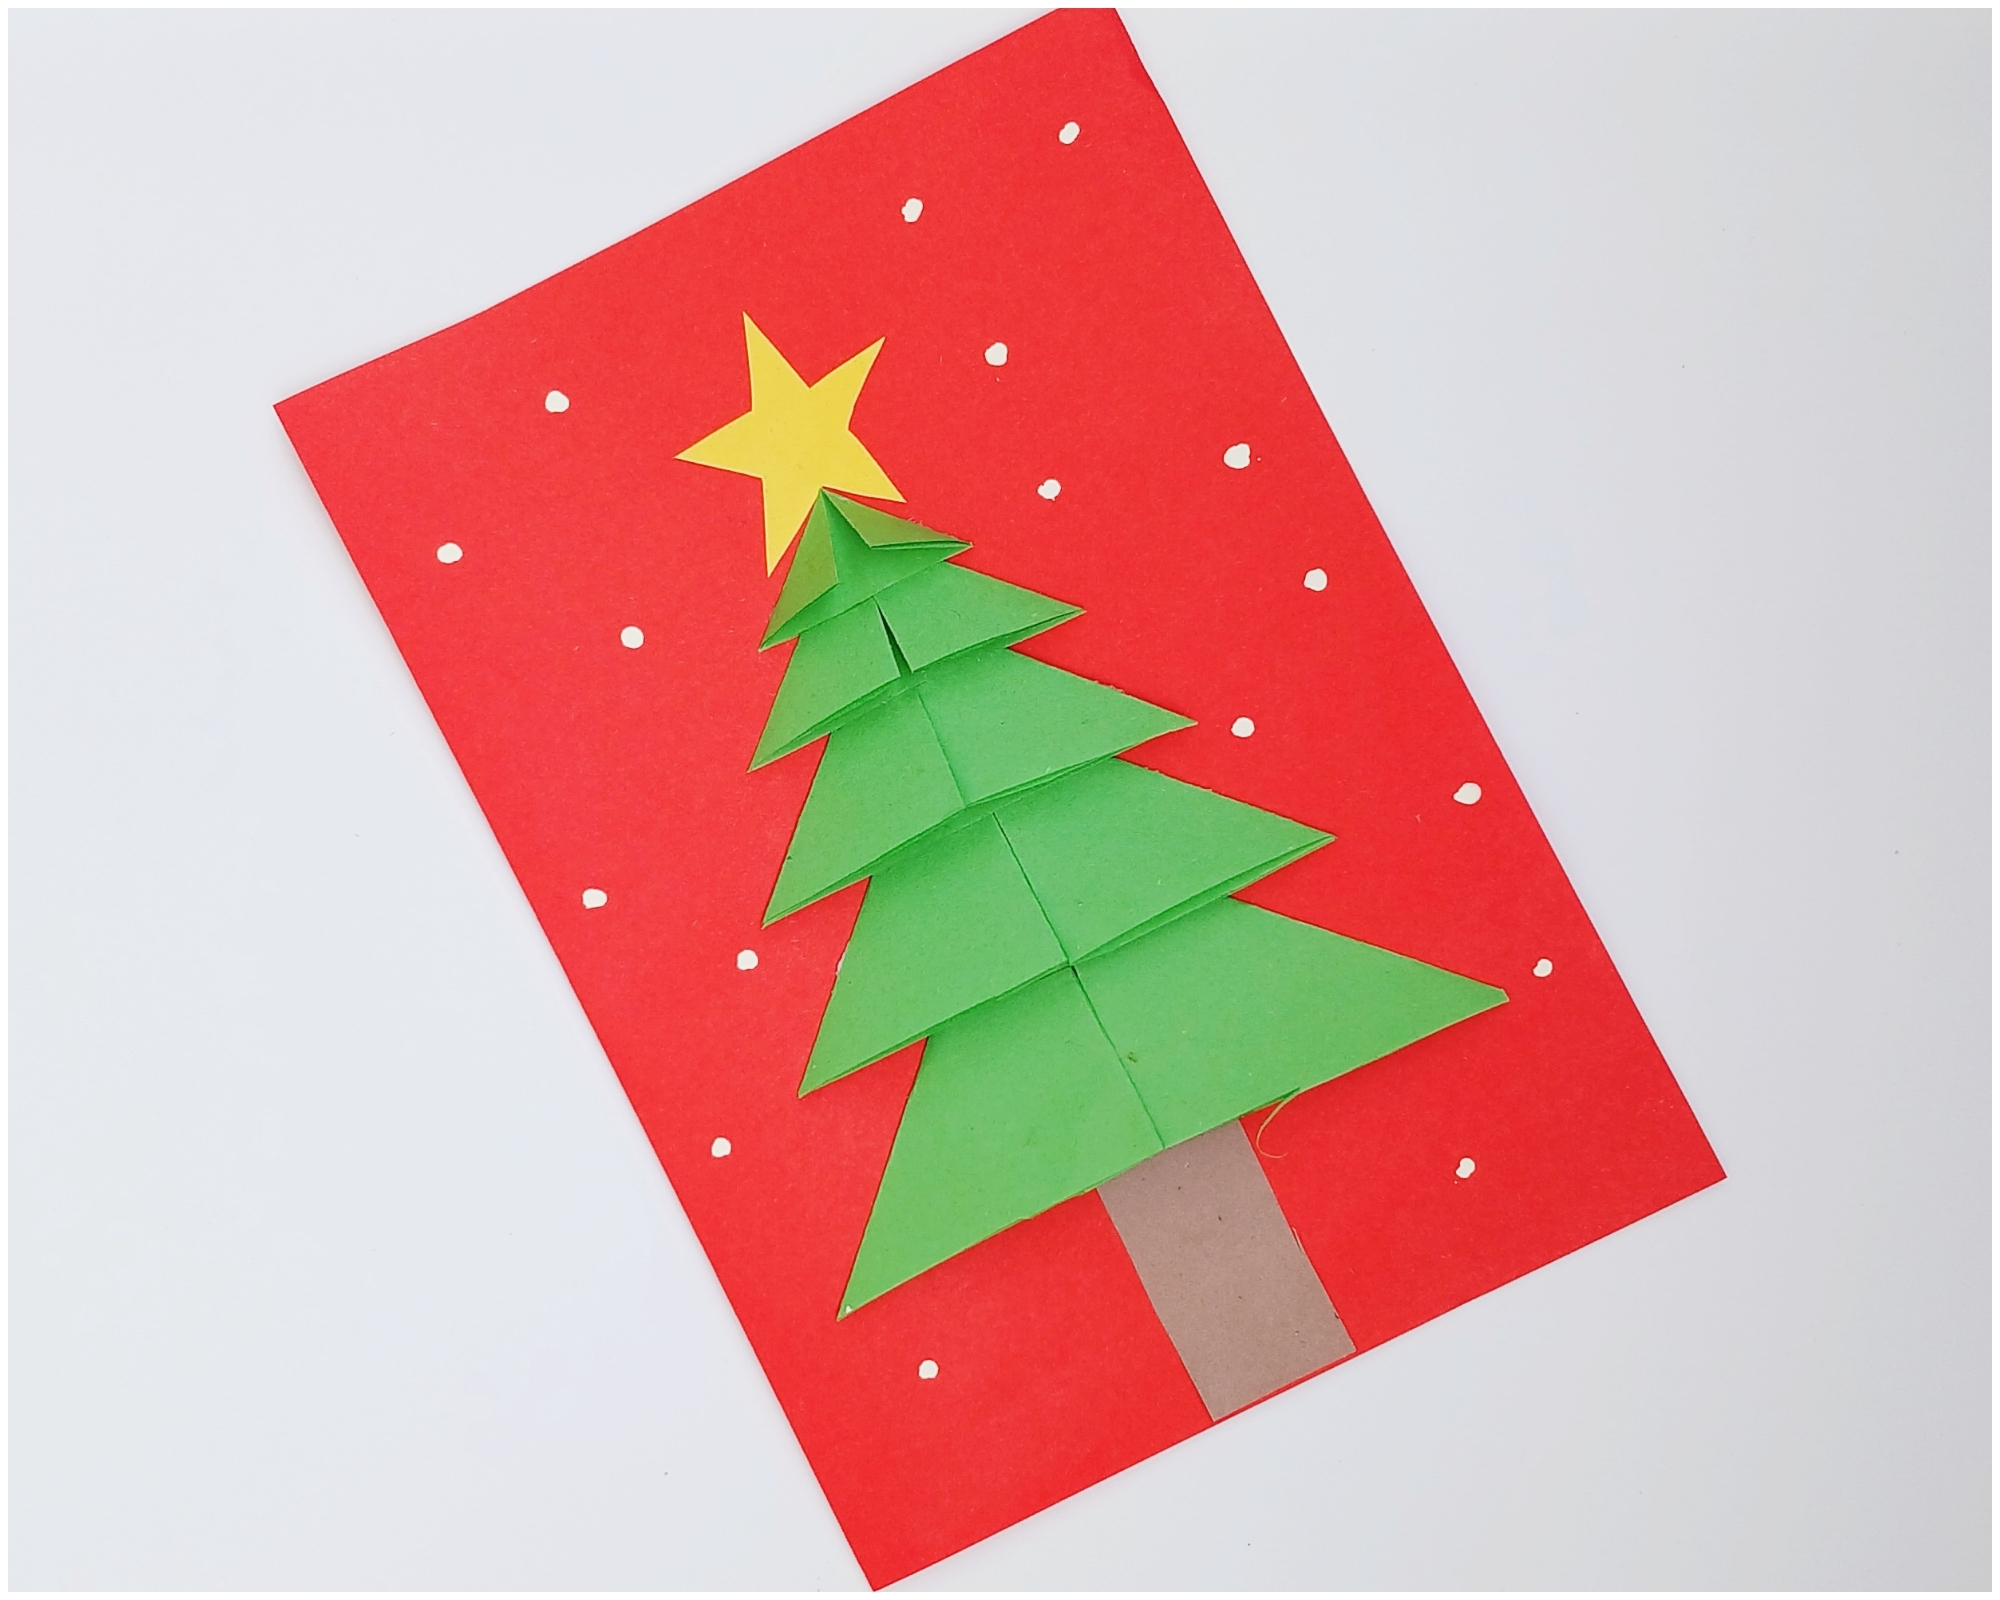
Add a handmade touch to your Christmas greetings with this cheerful Christmas Tree Card Craft!
This simple paper craft turns a few sheets of colored paper into a layered Christmas tree that looks beautiful on the front of a handmade card.
Kids can enjoy folding, gluing, and decorating their own Christmas tree while creating a special card to give to family, friends, teachers, or anyone they want to send a little holiday cheer to.
The best part? You can change the colors and decorations to make every card a little different. Add stars, dots, glitter, or any other festive details you like!
So, grab some paper and let’s make a Christmas card that’s ready to spread some holiday cheer.
Before moving on to the craft, we would appreciate it very much if you would check out our YouTube channel and subscribe to it.
We upload new easy craft tutorials there that are different from what we publish on the blog. Thank you!
What You’ll Need
- Red A4 paper
- Green construction paper
- Brown construction paper
- Yellow construction paper
- Scissors
- Glue
- White paint
How to Make a Christmas Tree Card
Step 1: Prepare the Card
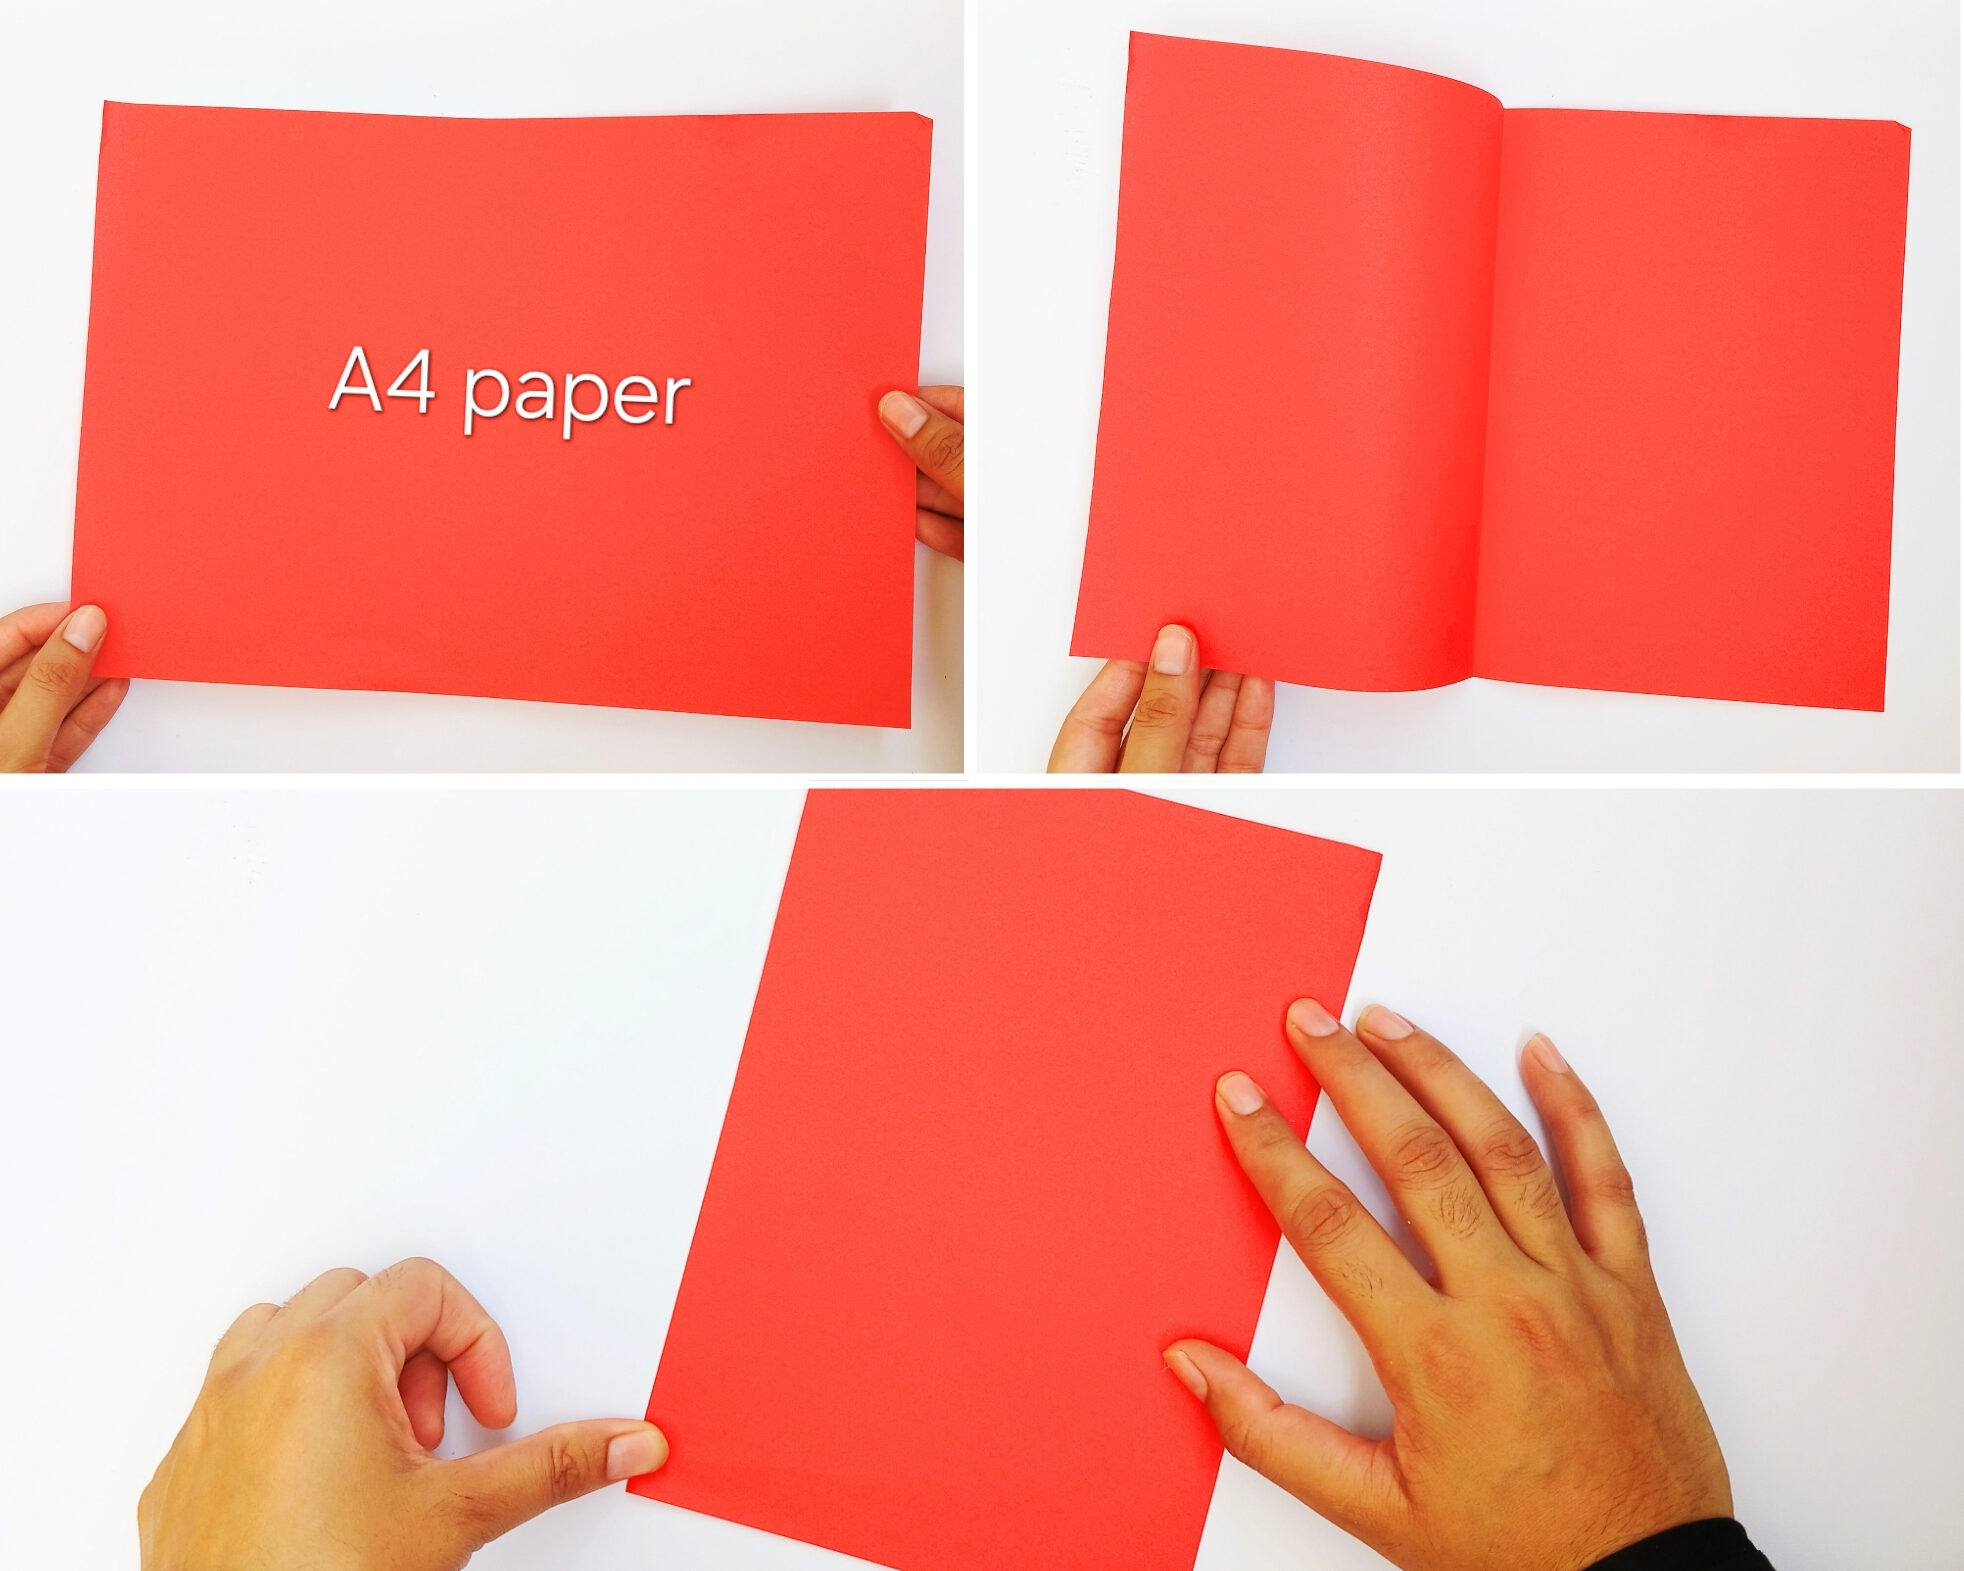
Start with a sheet of red A4 paper.
Fold the paper in half to create the base of your Christmas card.
Press along the fold to make a neat crease, then set the card aside while you prepare the Christmas tree.
Step 2: Prepare the Green Paper
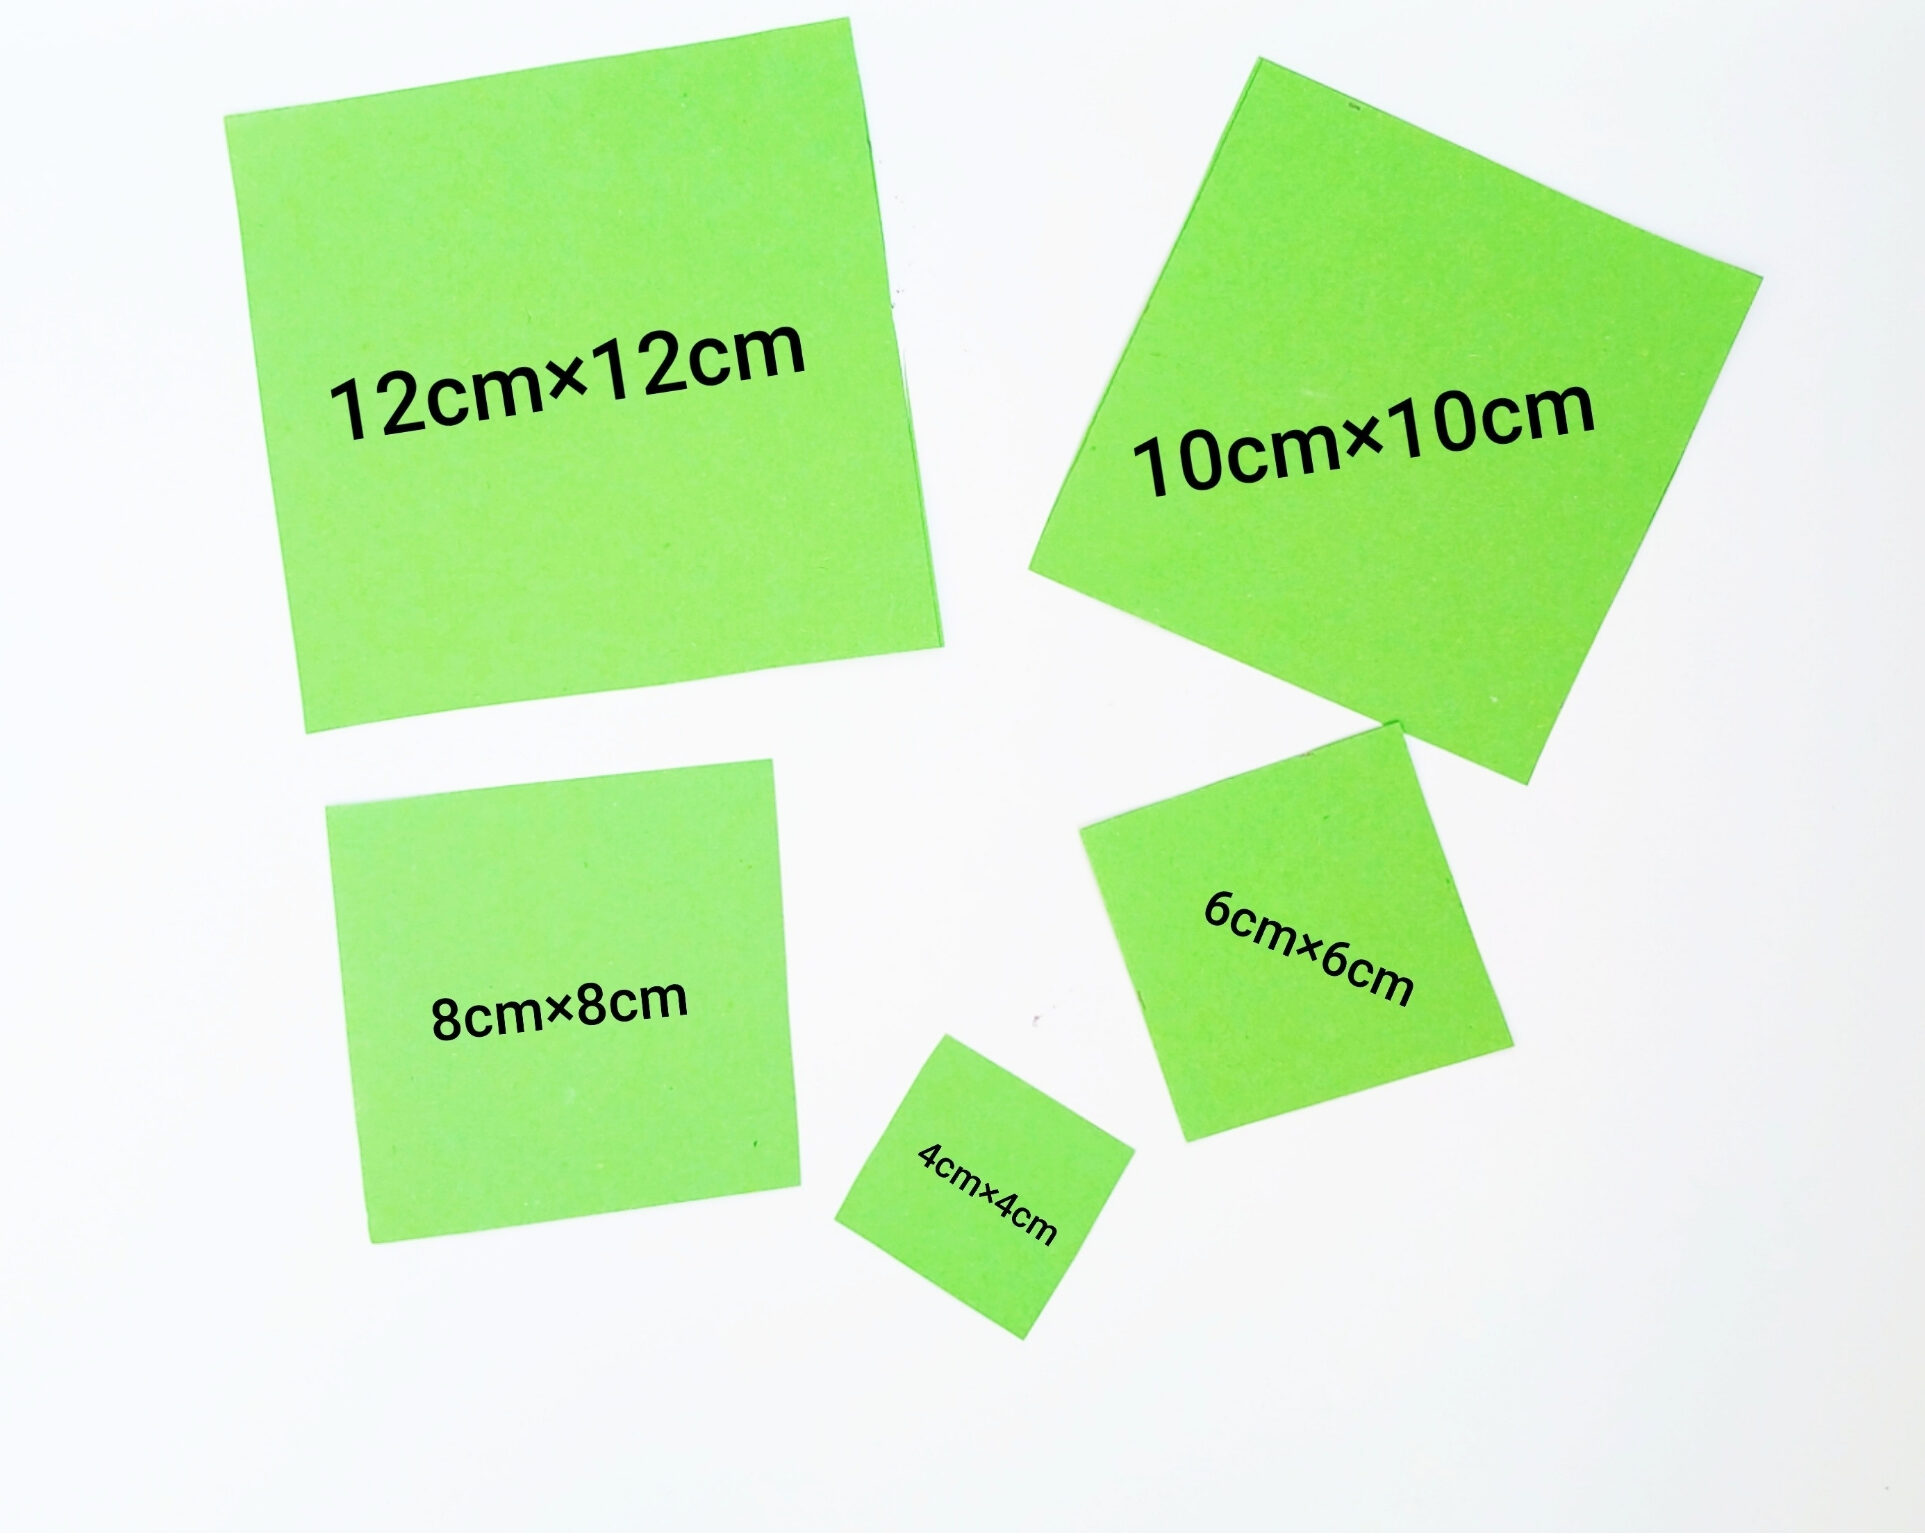
Now it’s time to make the different layers of the Christmas tree!
Cut several green paper squares in different sizes. You can use squares such as 12 cm × 12 cm, 10 cm × 10 cm, 8 cm × 8 cm, 6 cm × 6 cm, and 4 cm × 4 cm.
These different sizes will create the layered shape of the Christmas tree.
Step 3: Fold the Green Squares
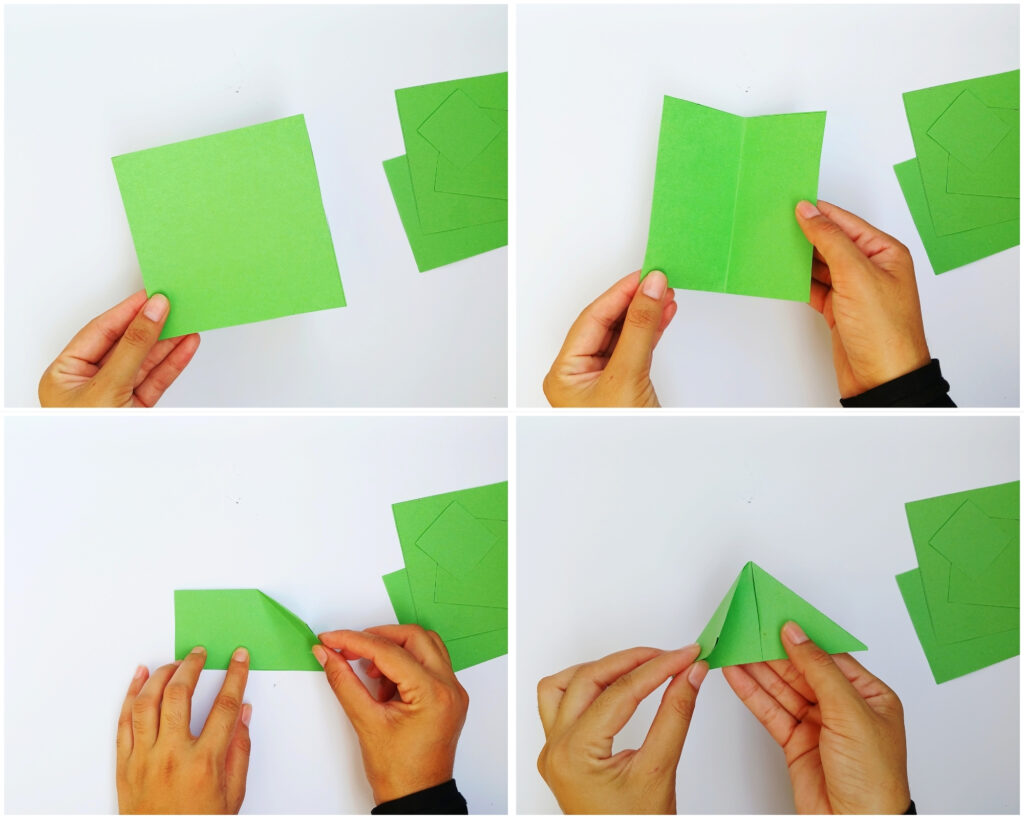
Take one of the green squares and fold it in half.
Open it back up, then fold the paper from both sides toward the middle crease. This will bring the two sides together and create a triangular shape.
Press firmly along each crease so the folded piece holds its shape.
Repeat the same process with all the green squares.
Step 4: Arrange the Tree Layers
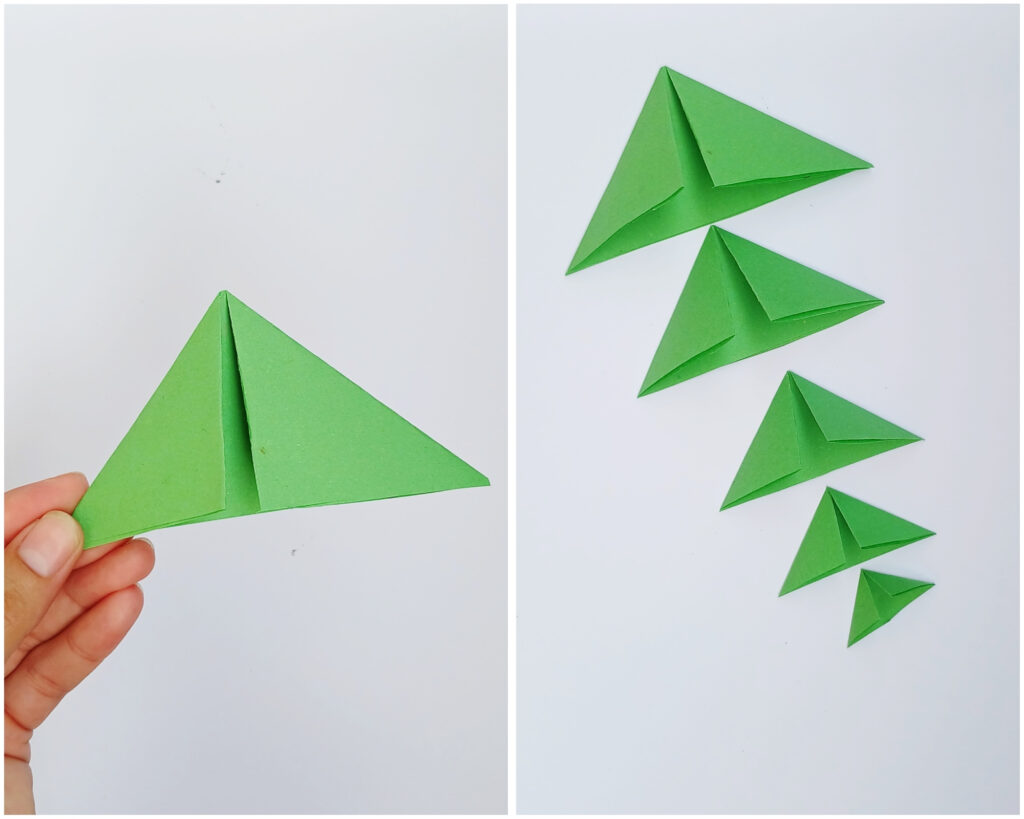
Now fold all the green squares using the same method from the previous step.
Once folded, you will have different-sized triangular pieces. These folded triangles will come together to form the shape of the Christmas tree.
Step 5: Glue the Tree Onto the Card
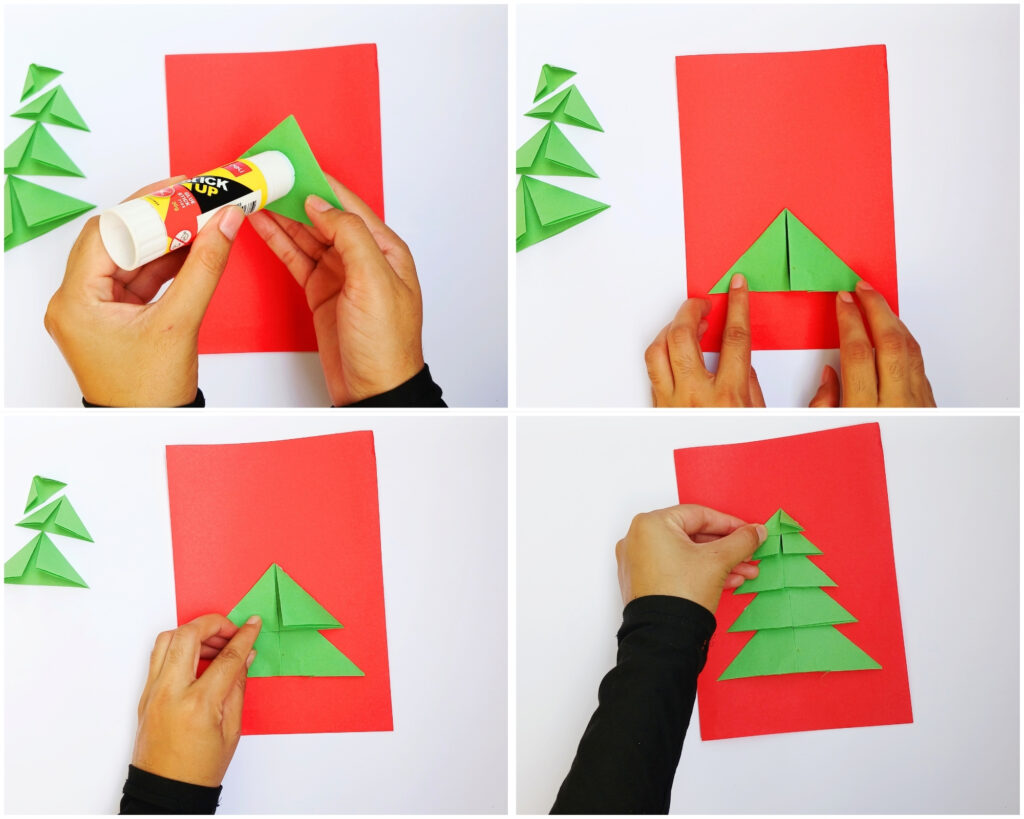
Apply glue to the back of the folded green pieces.
Starting with the largest piece, glue it onto the front of the red card.
Continue adding the smaller pieces above it, making sure they are centered to create the shape of a Christmas tree.
Press each piece gently so it sticks securely.
Step 6: Add the Tree Trunk
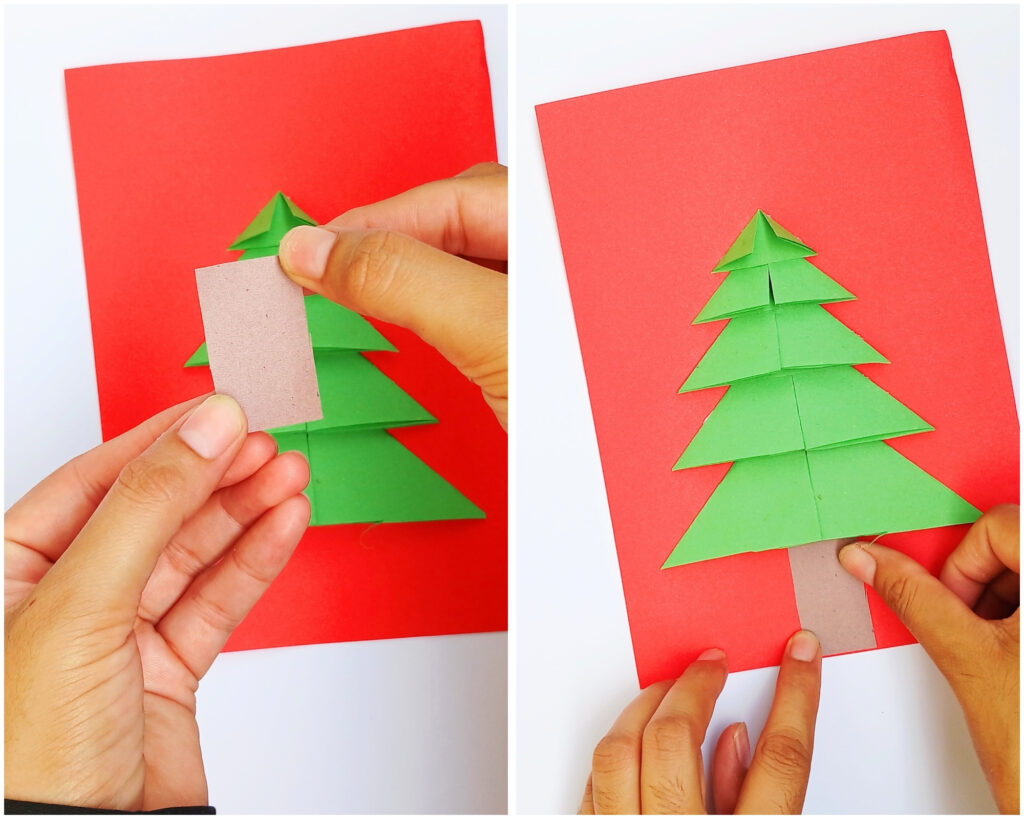
Cut a small rectangle from brown construction paper to make the tree trunk.
Glue it underneath the bottom layer of the Christmas tree.
Make sure the trunk is centered with the tree.
Step 7: Add the Star
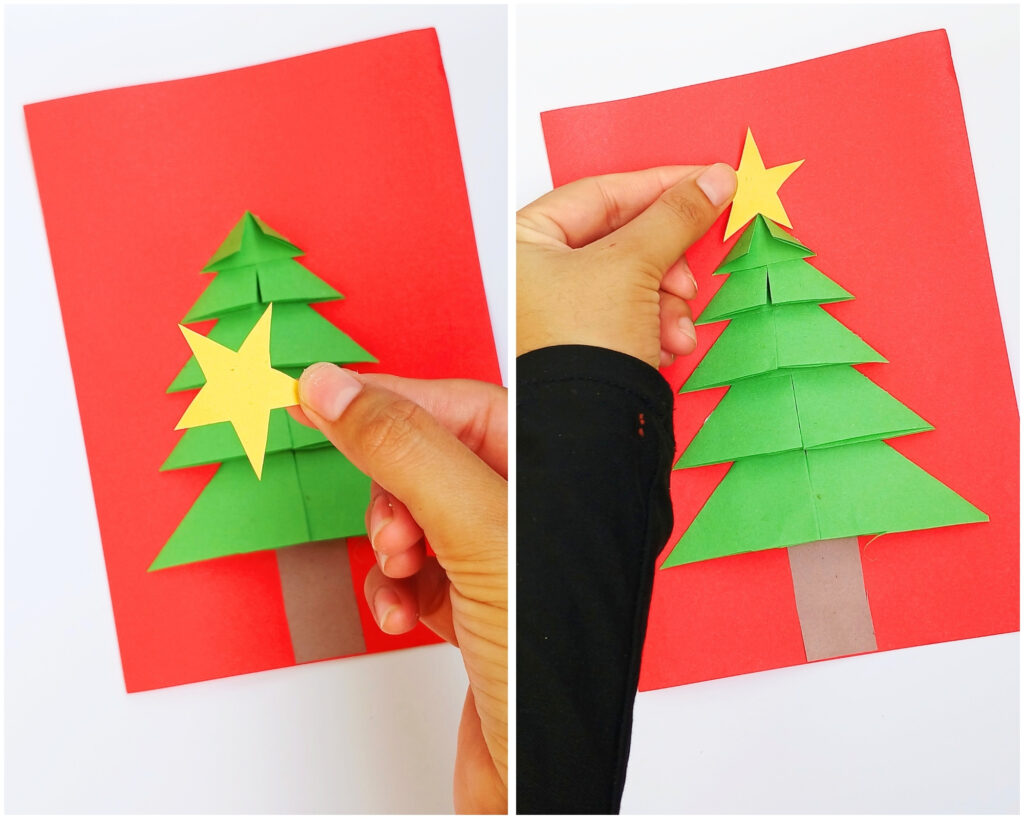
Give your Christmas tree a proper finishing touch with a bright star!
Cut a small star from yellow construction paper and glue it above the top of the tree.
Position it in the center so it looks like the star is sitting right on top of the tree.
Step 8: Decorate the Card
Now comes the fun part — decorating!
Use small pieces of colored paper, a marker, or other craft materials to add ornaments to your Christmas tree.
You can also add small white dots around the tree to look like falling snow.
Let kids choose their own colors and decorations to give each card its own special look.
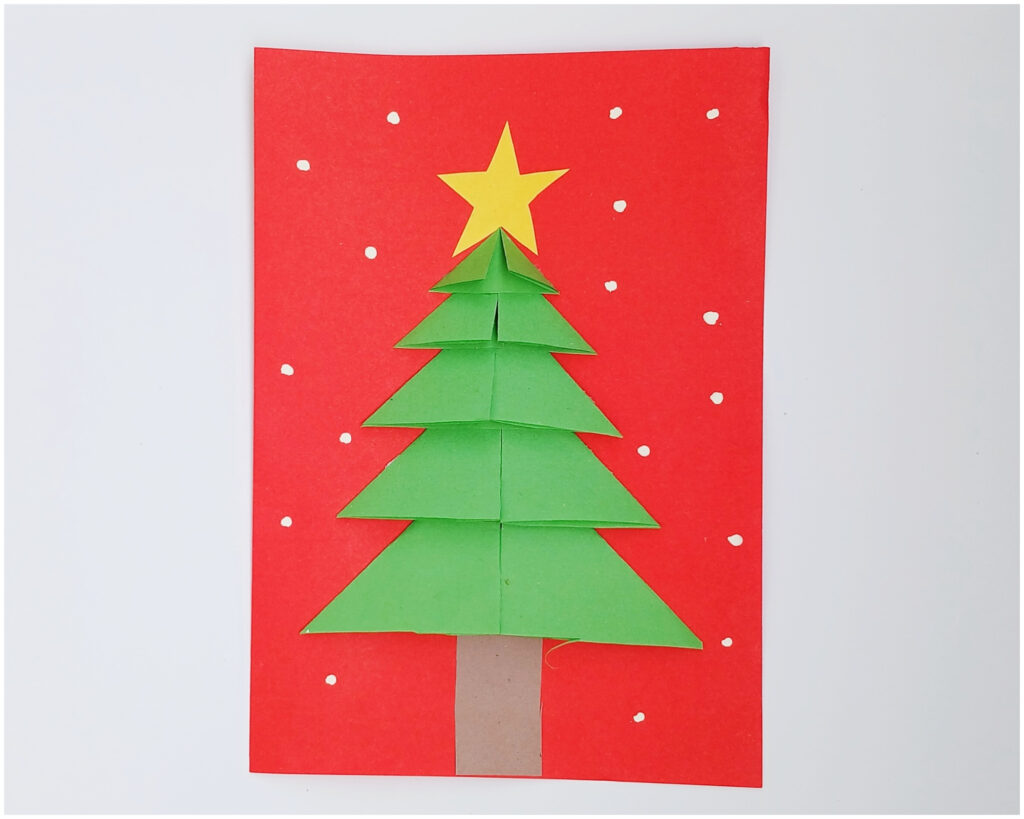
Your handmade Christmas Tree Card is ready to give to someone special!
The layered paper tree gives the card a fun 3D look, while the star, ornaments, and snowy dots bring the whole design together.
Give it to a parent, grandparent, teacher, friend, or anyone who would love a handmade Christmas greeting.
Ways to use this craft
Here are some ways to use this folded paper Christmas tree card craft:
- Create a classroom Christmas card exchange project
- Display finished cards on a bulletin board for a festive classroom decoration
- Add them to a holiday scrapbook or memory book
- Attach a gift card inside and use them as Christmas gift holders
- Make one for grandparents as a keepsake Christmas gift
- Create a set of cards to mail to relatives during the holiday season
- Use them as Christmas craft fair items for kids to make and sell
- Turn them into holiday invitations for Christmas parties or family gatherings
- Add photos and messages inside to create personalized Christmas keepsakes
- Use them as thank-you cards for teachers, neighbors, or caregivers
- Give them to nursing home residents or community members to spread holiday cheer
Final Words
There’s something extra special about receiving a Christmas card that was made by little hands, right?
This Christmas Tree Card Craft is easy enough for kids to make but looks festive enough to become a keepsake. Let them choose the tree colors, add their own decorations, and write a personal message inside.
We hope you enjoy making this Christmas card with kids.
Let us know how it went in the comments below!
More Christmas Crafts:
- Paper plate Christmas tree craft
- Paper bag Santa Claus craft for kids
- Paper plate Santa Claus craft for kids (with free template)
- Paper jingle bell ornament craft for kids (step-by-step pictures)
- 45+ Easy Christmas crafts for kids of all ages
- Santa Claus ornament craft for kids
- Paper plate Christmas wreath craft for kids (with free template)
- Cute christmas tree craft using cardboard (with free template)
- Christmas Paper elf craft idea for kids
- DIY elf Christmas ornament
Explore more Winter Crafts here