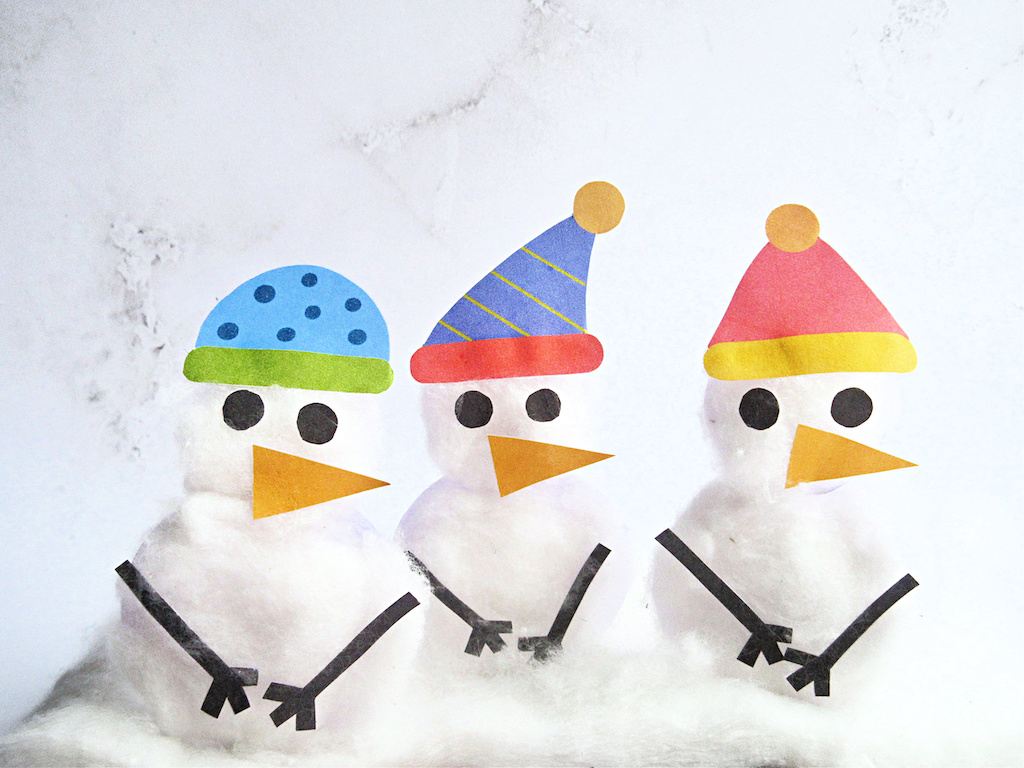
Easy snowman craft with paper and cotton (with free snowman template)
Snowman craft for kids with cotton balls
Winter is here. Since you are going to spend more time indoors, this winter craft will help you to engage kids creatively.
Using the free snowman cutout printable, kids can easily make this snowman using some cotton balls and glue.
I love making kids do seasonal crafts because it helps them to learn more about each season and thus understand how their environment changes during each season.
Kids love making snowmen using snow. If it’s not possible for you, why don’t we try making a snowman at home easily using our free template?
Before moving on to the craft, we would appreciate it very much if you will check out our Youtube channel and subscribe to it. We upload new easy craft tutorials every week there that are different from what we publish on the blog. Thank you!
So, let’s start!
Some of the links in this post are affiliate links, which simply means that if you happen to purchase something, I get a small commission at NO extra cost to you.
Materials Required:
- Cotton balls
- Scissors
- Glue
- Paper for making stand
- Template #12 – Cotton ball snowman craft template (available in our free resource library – get the password by signing up using the form in step 1)
How to make a Snowman at home using paper and cotton (step-by-step tutorial)
Step 1: Download and print the free snowman template

Download and print the snowman template. You can download them from the library by signing up using the form available in the next section.
There are two versions available – colour and black&white. If your kids would love to colour before making the snowman, you can download the black and white version.
Free printable template for snowman craft
Get the free template for this craft and password for the library to your email by filling out the form below.
Step 2: Cutting and assembling the snowman

Cut all the parts of the snowman out from the template. You can make up to three snowmen using this template.

First, take the body parts of the snowman – the two circles.
Apply glue on them and stick the cotton balls to the circles.

Now, take the other body parts and stick them one by one as shown in the picture above.

Step 3: Making the stand for snowman

Next, we are going to make a stand for the snowman so that it can stand on its own.
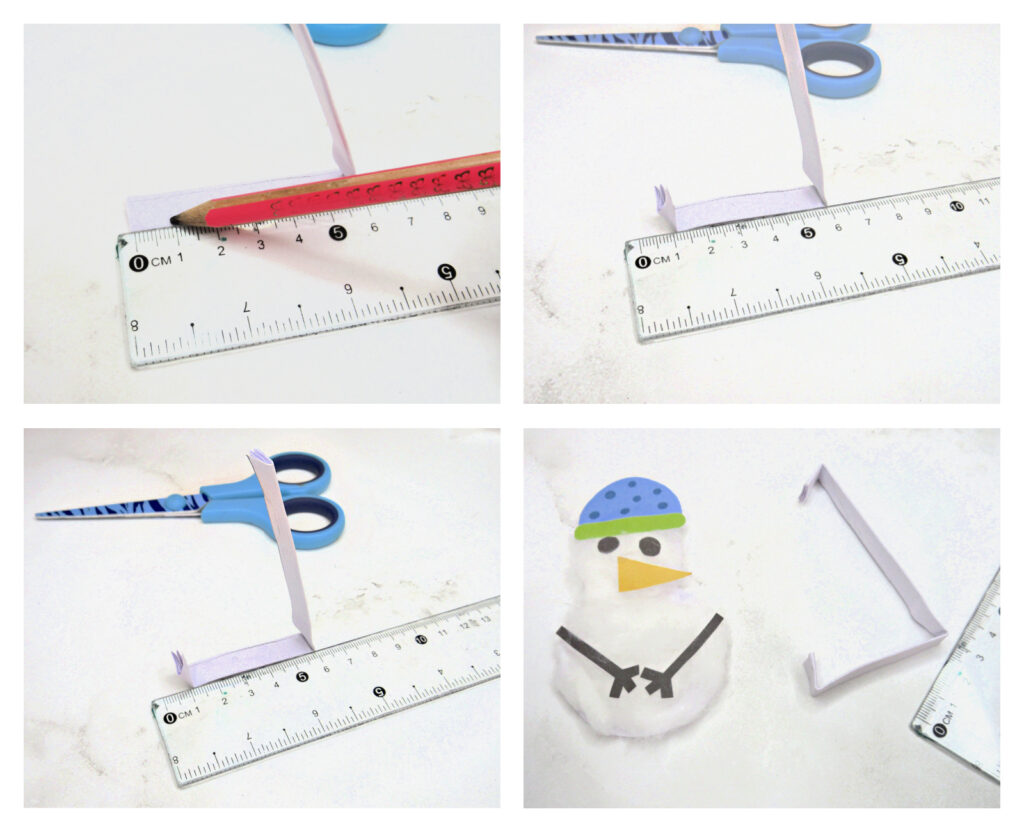
Take a rectangular piece of paper as shown in the figure. The size of the paper we took is 15cm * 8cm.
Fold the paper in half and apply glue on the edges. Now, stick one edge to the other.
Now, we fold the paper again in half. And apply glue to the edges (see the fourth picture in the collage above).

After applying the glue, stick both the edges together.
And fold the paper again in half (as seen in the bottom left image in the collage). And apply glue again and stick them together.
So, in order to make the stand for the snowman, we folded the paper three times altogether.
Let’s move on to the folding part now.
As shown in the first picture in the above collage, mark 1 cm on the paper. And make a mark at 6 cm too. Fold the paper on both the points – at 1 cm and 6 cm. Fold the paper at 1 cm mark at the opposite end too.
So, now the paper is folded at the 1 cm mark on both the ends and in between at the 6 cm mark.

Apply glue on the outer portion of the folded ends. And stick it to the backside of the snowman as shown in the picture above.
Thus, the snowman is ready! You can see that it can stand on its own too!
