How to make a 3D paper apple easily (step-by-step photo tutorial)
Creating paper versions of objects we come across in life is not only fun, but also opens up new way of thinking for kids.
When we want to replicate daily life objects, be it food, animals, or nature – it requires kids to put some thought into how they can do it.
It helps them to develop thinking skills and by practicing doing arts and craft activities, their hand-eye co-ordination also improves.
Even if they do crafts by learning from tutorials, it helps them to get used to the idea of making things and eventually can create things on their own when left to their imagination.
Here, we are making a paper apple step-by-step using construction paper. So, let’s move onto the tutorial.
Before moving onto the craft, we would appreciate it very much if you will check out our Youtube channel and subscribe to it. We upload new easy craft tutorials every week there.
Some of the links in this post are affiliate links, which simply means that if you happen to purchase something, I get a small commission at NO extra cost to you.
Materials Required:
The following are the materials needed to make paper apple:
– Compass and pencil
– Scissors
– Glue
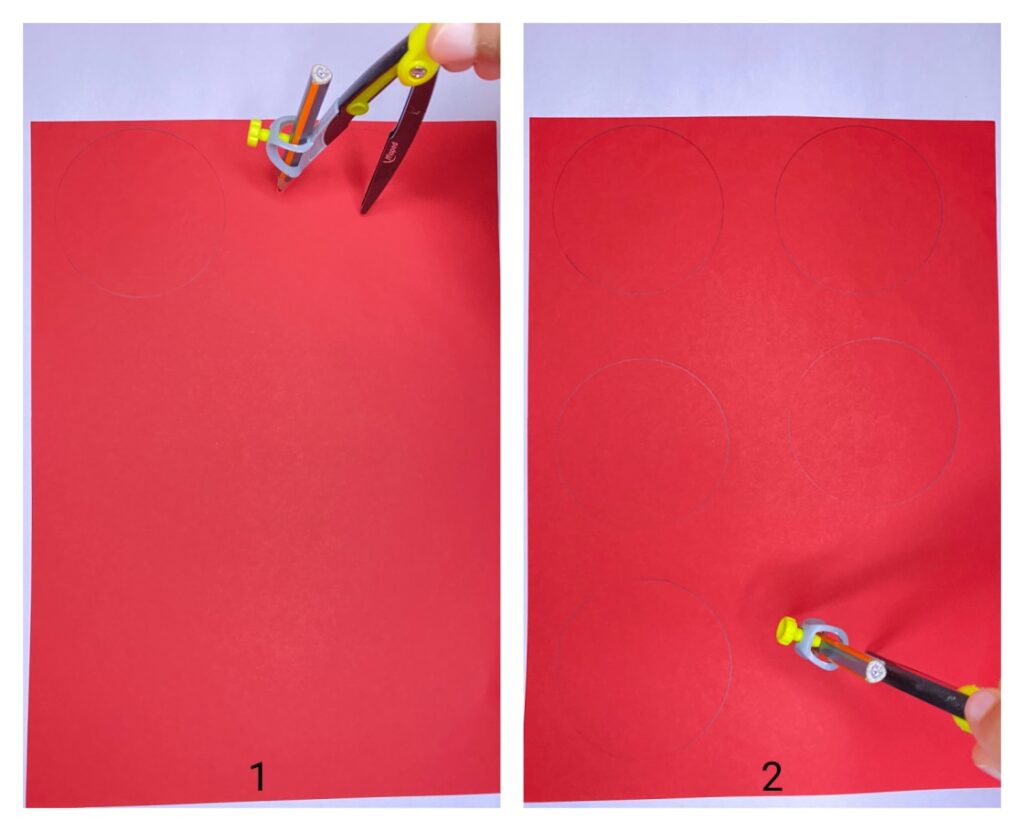
1. Start by taking the construction paper. We chose red color.
2. Draw 9 small circles with a radius of 4 cm.
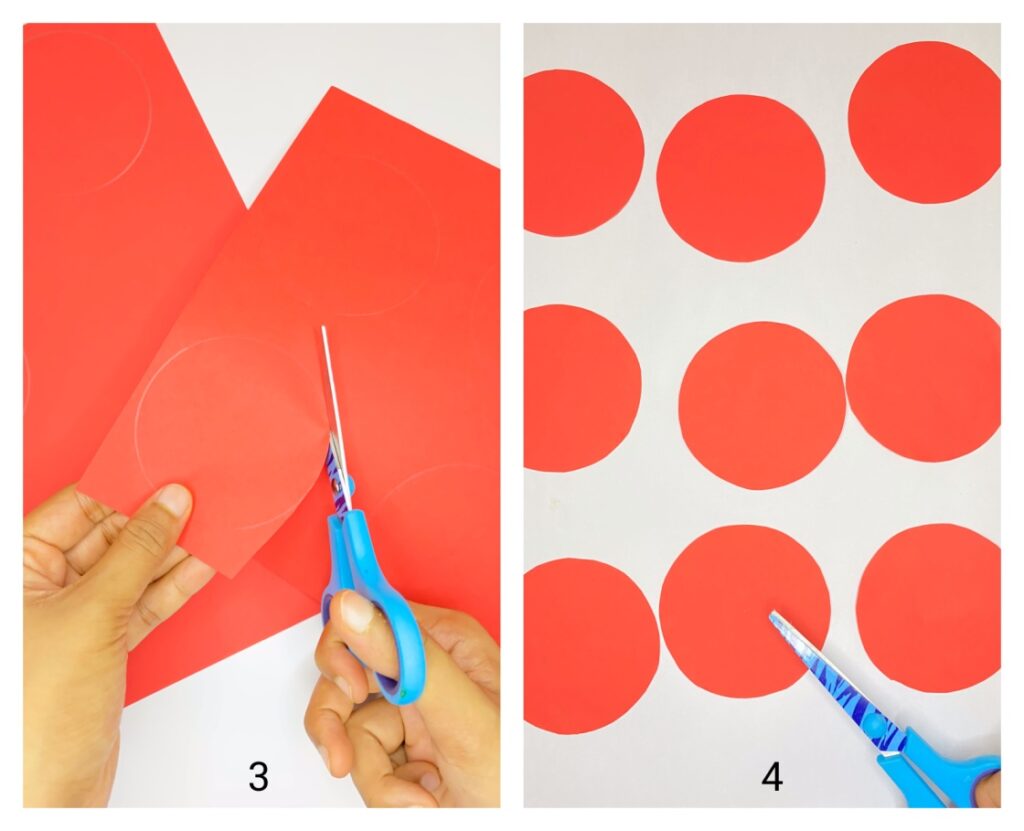
3. Cut along the outlines.
4. We have 9 circles here.
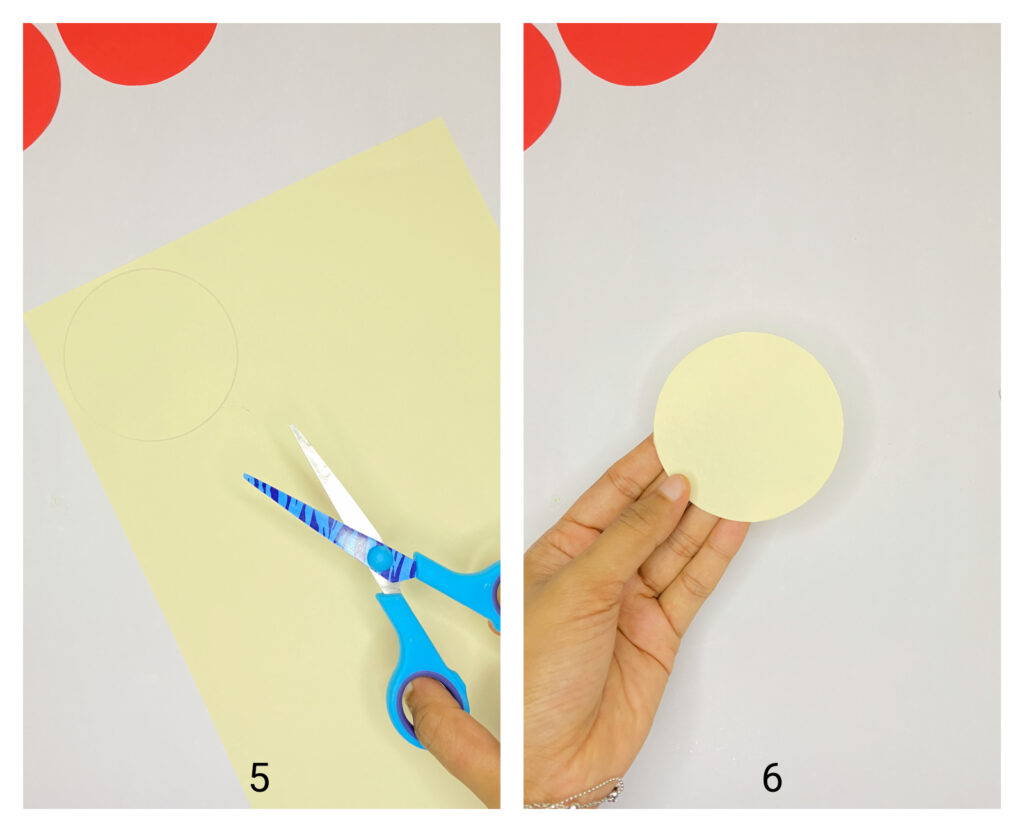
5. Take another color sheet, preferably light yellow color. This would be the flesh of the apple. So choose the color accordingly.
6. Draw a circle of radius 4 cm and cut it out.
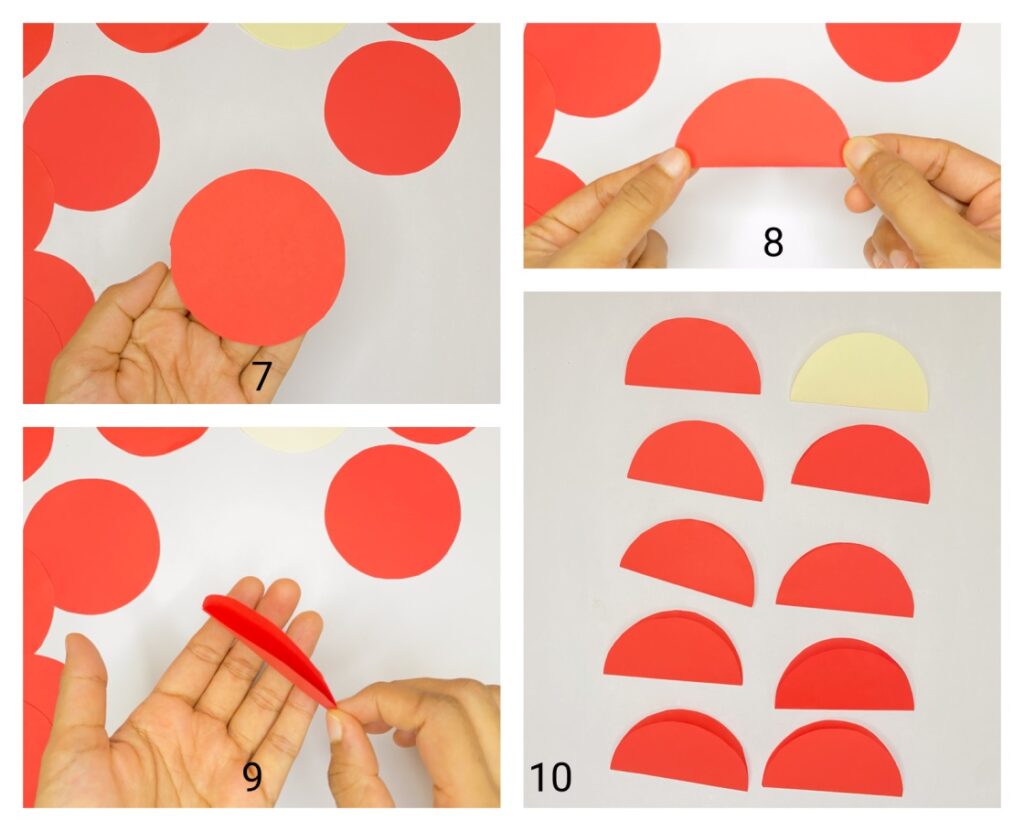
7-8. Take each red circle, and fold them in half.
9-10. Fold all circles to form semi-circles.
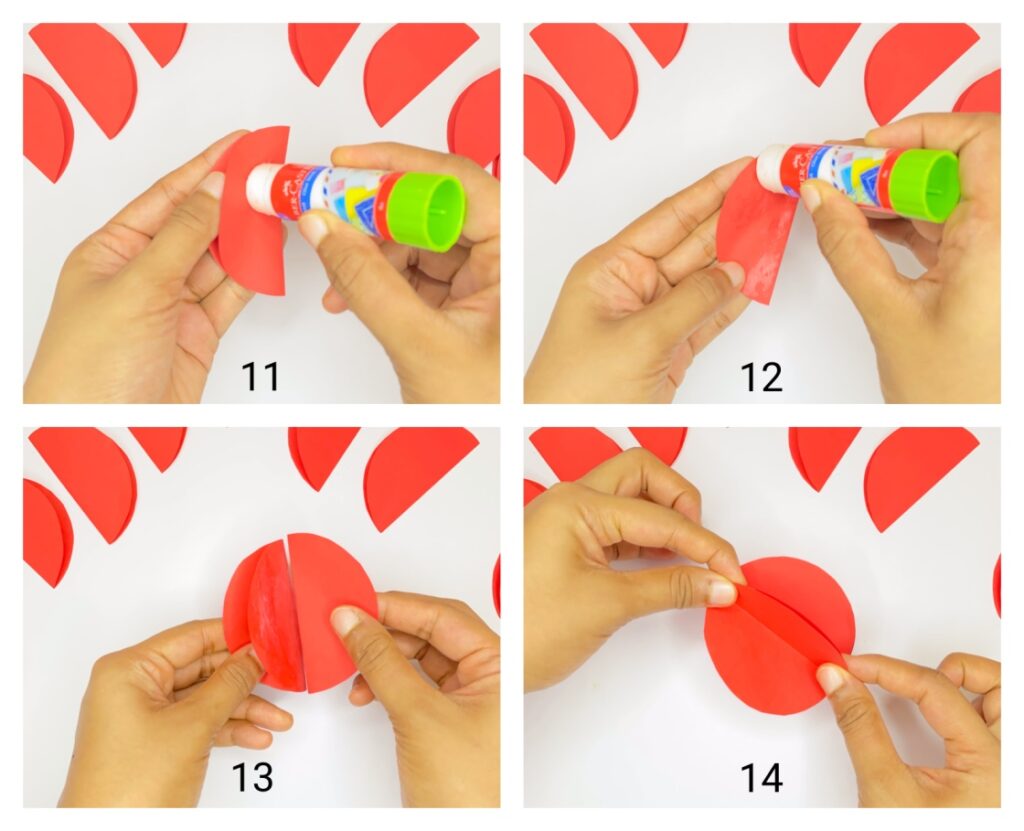
Now, what we are going to do is, stack each semi-circle on top of each other and stick them together. We will do it one-by-one.
As shown in pic 14, we need to stick one end of each semi-circle with each other. So let’s start.
11. Take a semi-circle piece and apply glue on one side.
12. Similarly, take another semi-circle piece and apply glue on one side.
13. Stick them together.
14. Press for a few seconds to make sure the pieces are stuck properly.
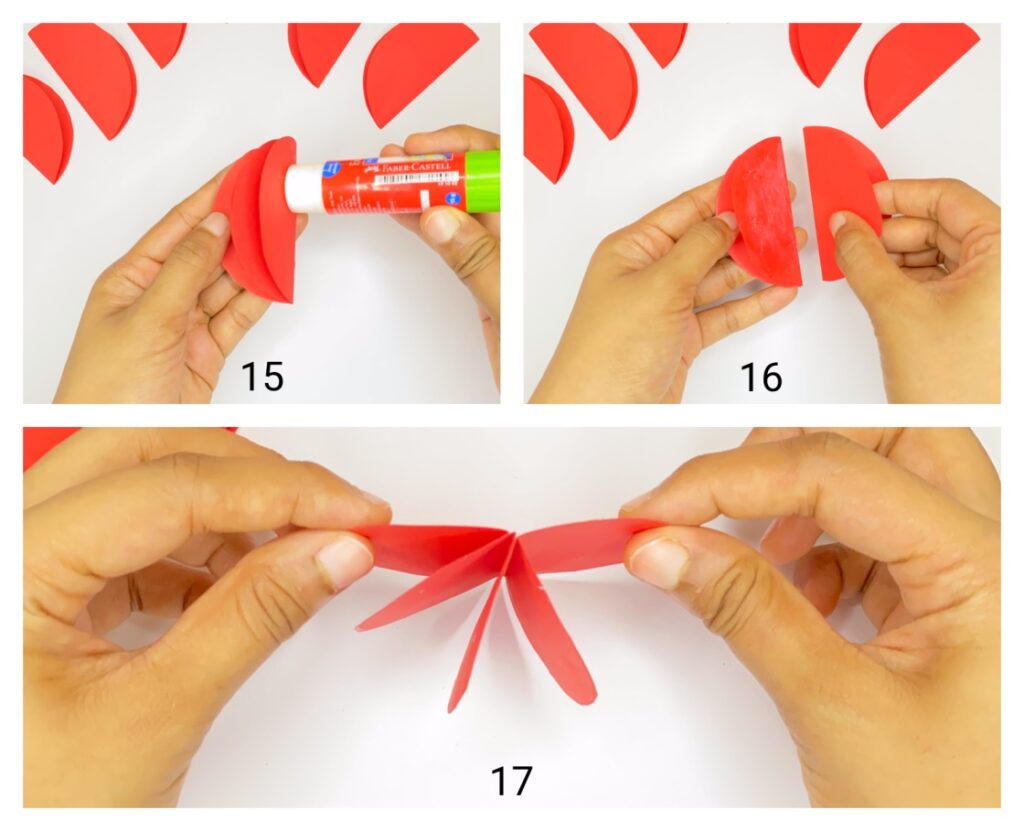
15. Now, take the third semi-circle piece and apply glue on one side.
16. Stick it to the end of the second semi-circle piece we made earlier in step 14.
17. The completed shape will look like this.
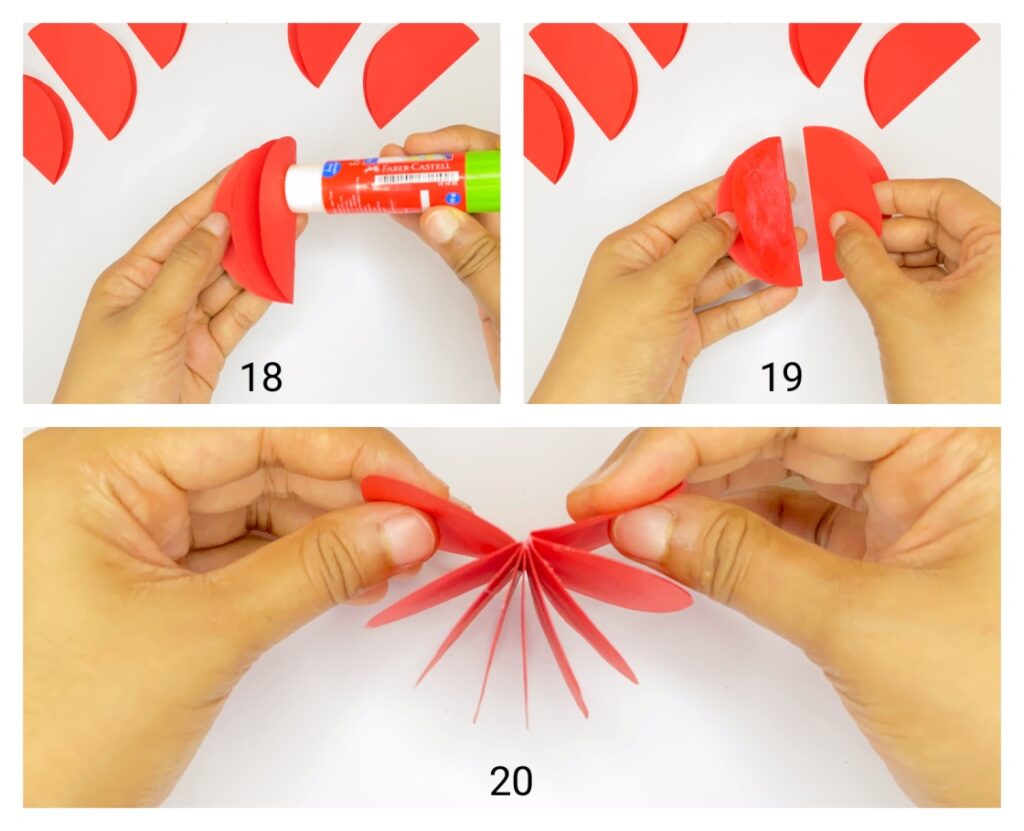
18-20. Repeat the steps until you stick all the nine semi-circle pieces together end-to-end.
Next, in the same way, stick the yellow semi-circle piece in the end and complete the circle.

21-22. Apply glue to both sides of the yellow semi-circle piece and stick both ends to red semi-circle pieces on the right and left sides to complete the circle.
23. Make sure all pieces are stuck properly.
24. Using a marker pen, draw some apple seeds.
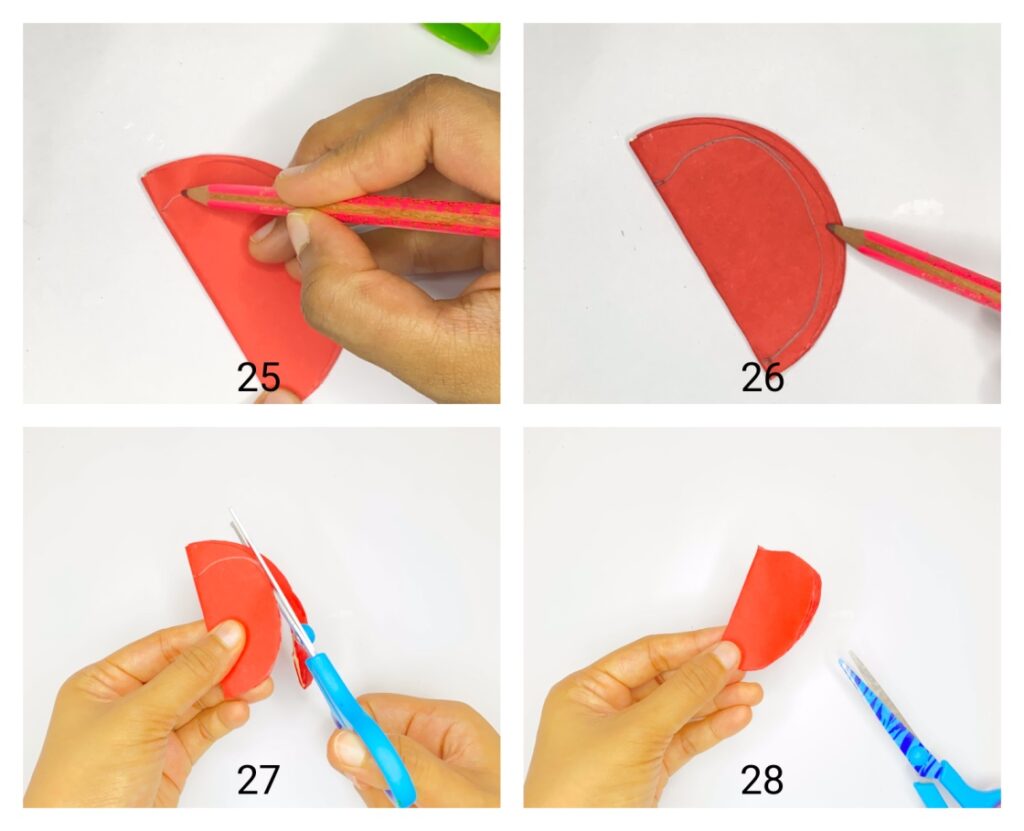
25. Now, close the figure as shown in pic 25. At this stage, the paper apple is more in a circular shape, so we are going to shape it like an apple to make it look more realistic.
26. Draw an apple’s outline as seen in pic 26.
27-28. Cut along the outline.
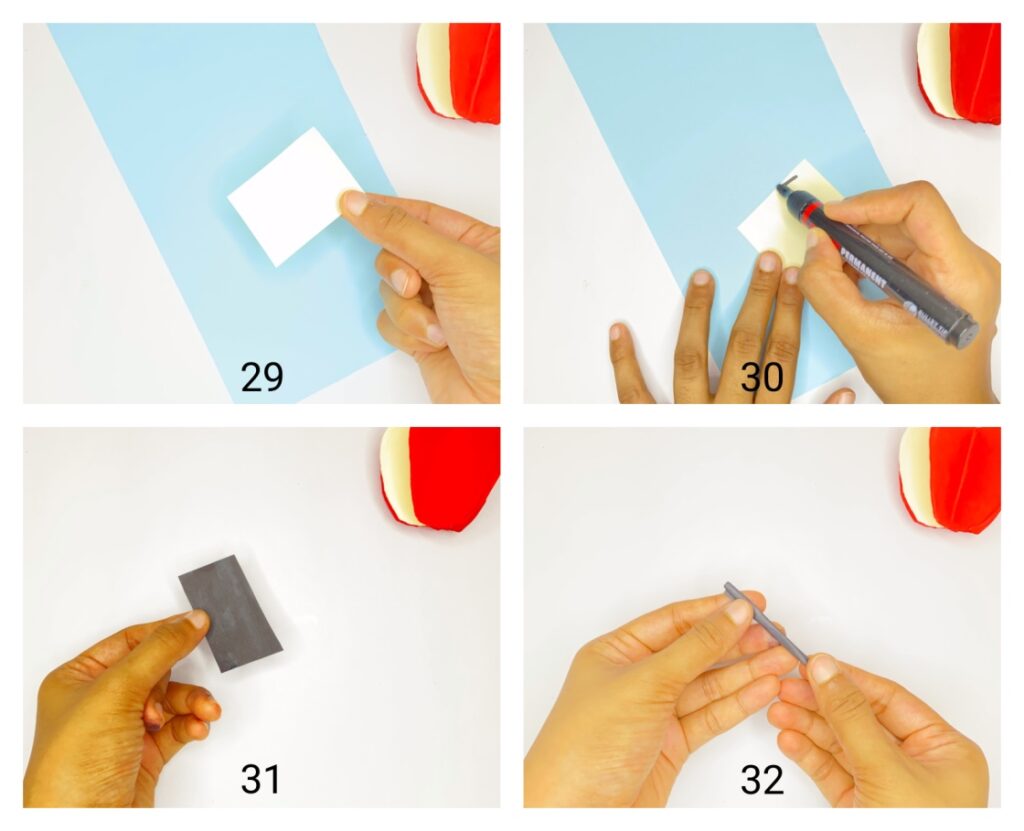
29. Cut a small rectangular piece of paper. This is to make the stem of apple.
30-31. If you have black or brown paper, you can use that. Or else, color the piece of paper using a black coloured pen or marker.
32. Roll it thinly.
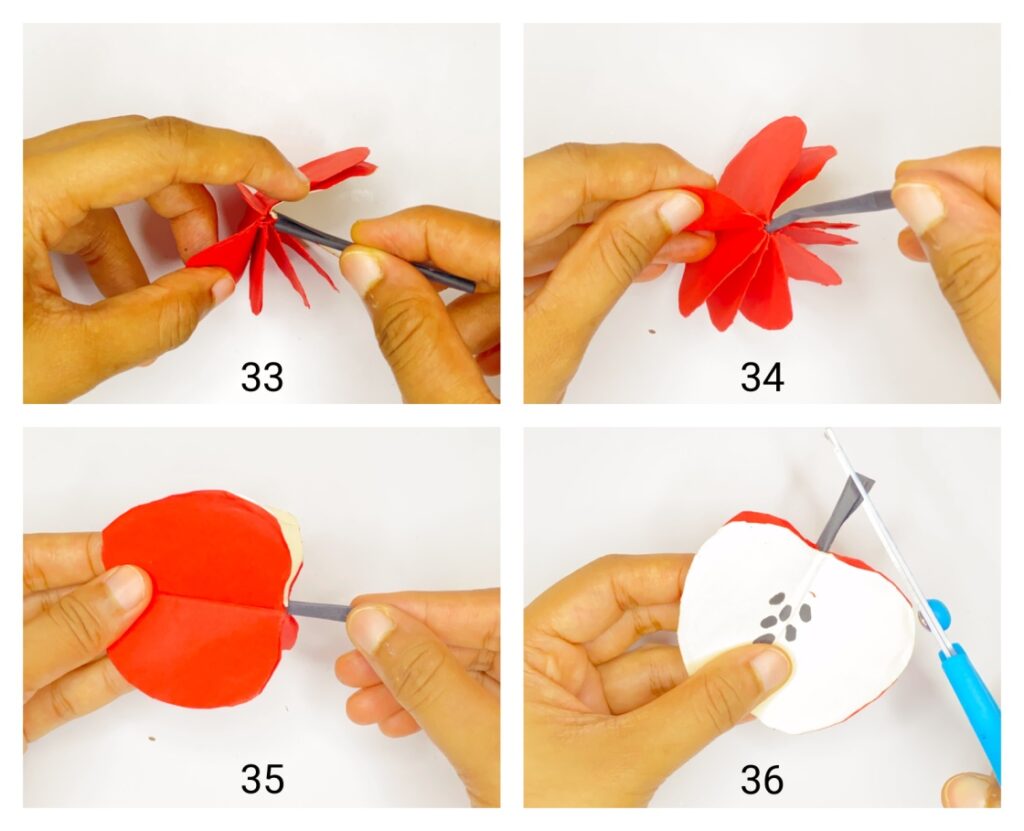
33-34. Now, insert the stem into the hole as seen in pics 33 and 34.
35. Make sure it is inserted well.
36. Cut the tip of the stem in a slanting way.
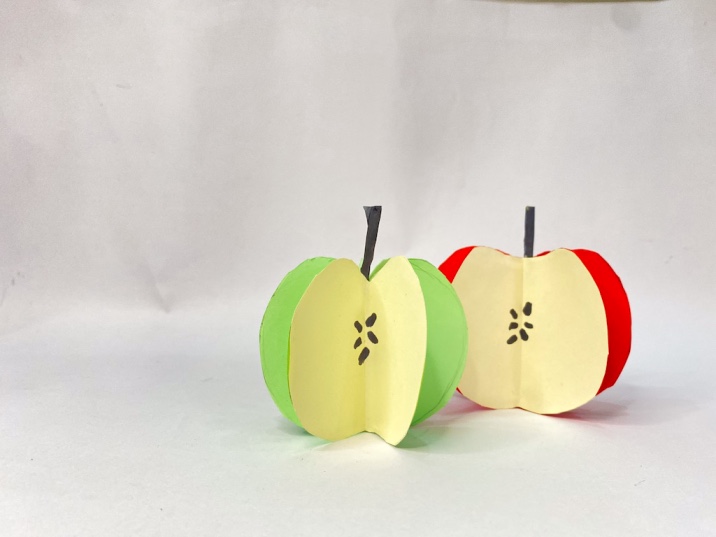
And the paper apple is ready!
Video tutorial to make paper apple
In case you have any doubt regarding any step, feel free to watch the step-by-step video tutorial below. Please make sure you also subscribe to our Youtube channel to get more craft ideas every week.
More craft tutorials:
– Easy summer ice cream popsicle craft (with free template)
– How to make paper fish step-by-step
– Easy paper plate flower garden wreath (with free template)
