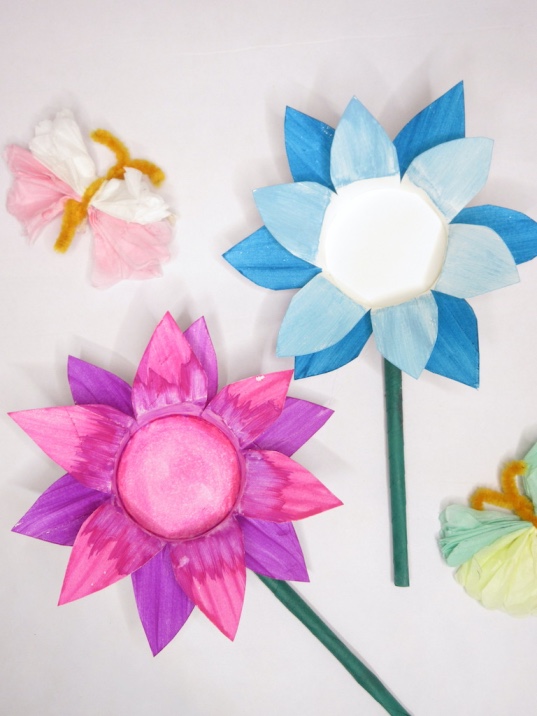
How to make easy paper cup flowers(step-by-step pictures)
Easy paper cup flower craft for kids
Making a paper cup flower is an easy, fun craft for kids and adults alike. It’s also a great way to reuse those old paper cups laying around the house!
These paper cup flowers are easy to make, need only minimal supplies and look pretty, so you can display them as decor too.
But before moving on to the craft, we would appreciate it very much if you will check out our Youtube channel and subscribe to it. We upload new easy craft tutorials every week there that are different from what we publish on the blog. Thank you!
So, let’s start!
Some of the links in this post are affiliate links, which simply means that if you happen to purchase something, I get a small commission at NO extra cost to you.
Materials Required:
- Paper cups
- Scissors
- Marker or pen to draw outline
- Construction paper
- Watercolor, Acrylic or any other coloring tool
- Hot glue
Paper cup flower craft step-by-step tutorial

Take two paper cups. Start by making a small cut on the edge of the paper cup. And cut the rim off.
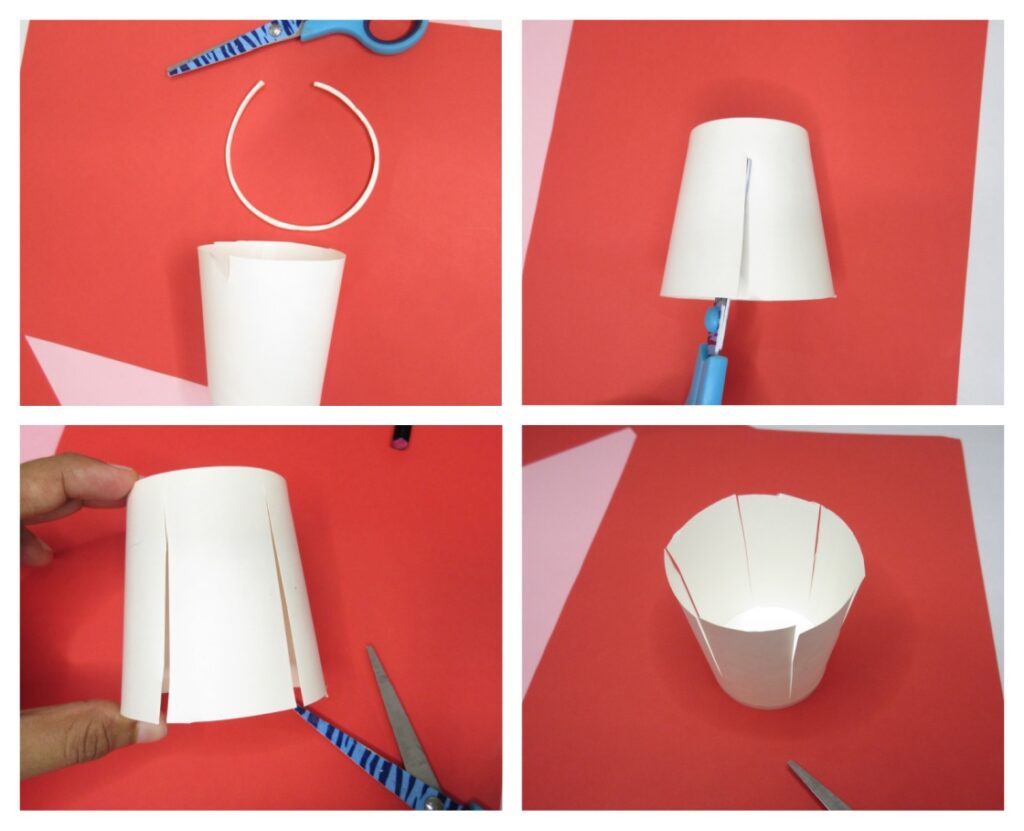
Now, make a cut, going towards the base of the cup, leaving some space at the base. Don’t cut all the way down, leave some space at the bottom, as shown in the above pics.
Make 5 more cuts. In total, we need 6 cuts as we are making a flower with 6 petals. Make sure you leave equal space between each flap, as these are the petals of the flowers.
If you want, you can measure and mark the distance between each flap using a pencil first, to make sure they are of equal width.
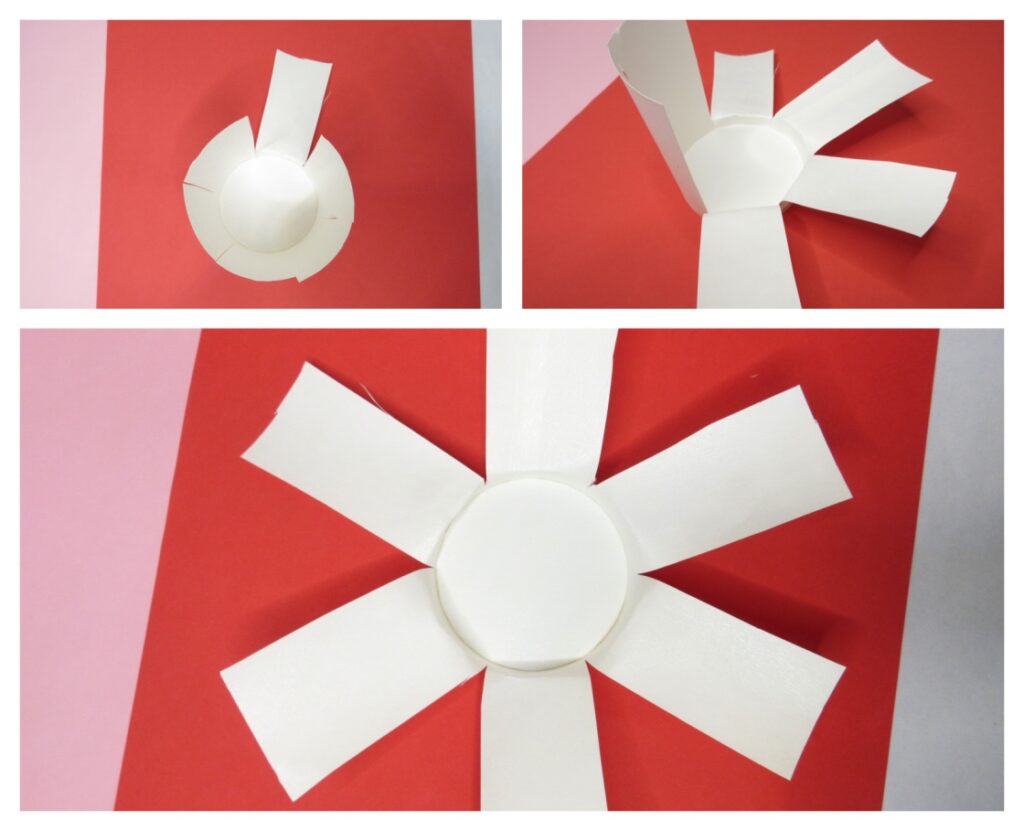
Now, open these flaps one by one, as shown in the collage above.
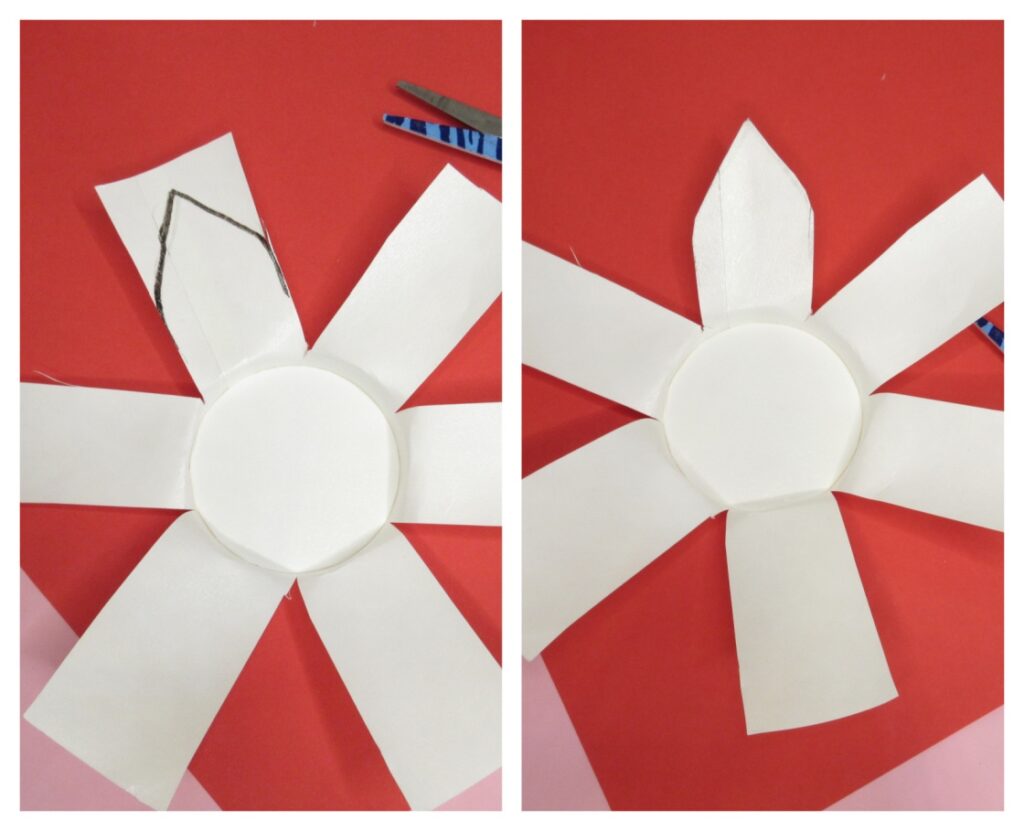
Draw the pointed edge of a petal on each flap. And cut along the outline.
Do it on all the flaps. Repeat the same steps with the second paper cup too.
Note: Make the petals of the second paper cup flower which comes on the top a tiny bit shorter than the first one. So when you draw pointed petal edges on the second paper cup, make them a little bit shorter – not too short by the way.
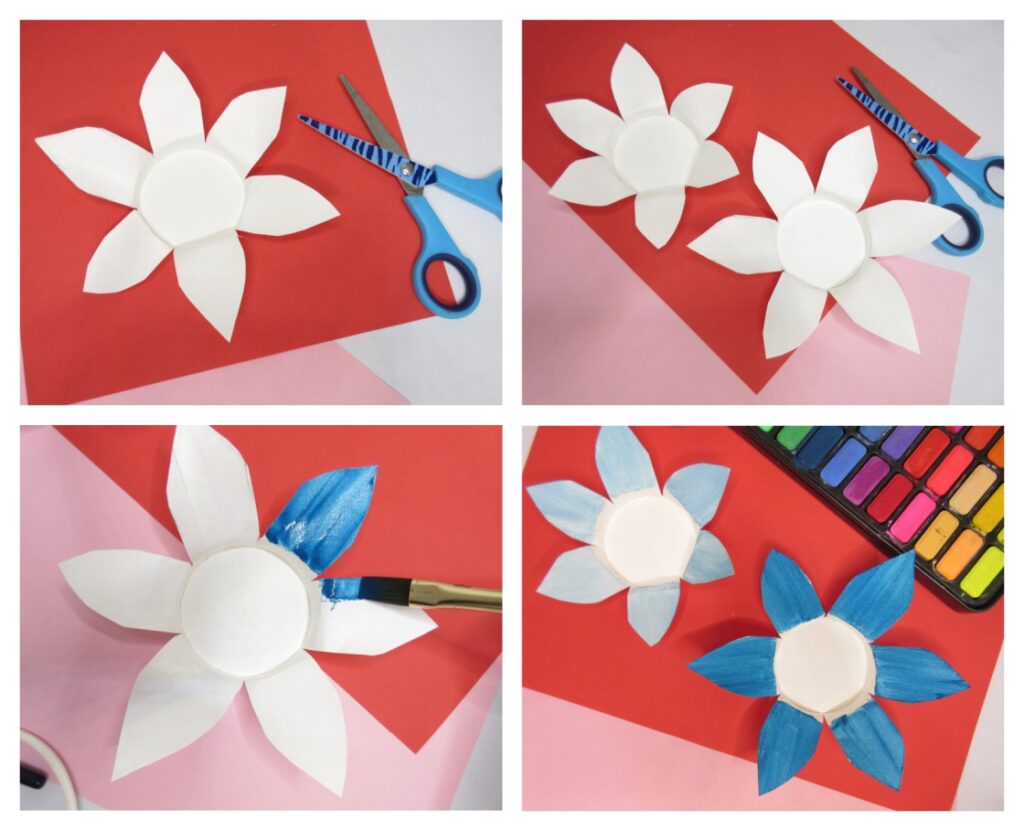
Now, let’s start colouring.
Give your preferred colour to the petals. Here we used watercolour.
You can use other colouring materials too. Remember, some colouring materials may not stick well to the waxy surface of paper cups. So choose accordingly.
If you want, you can colour the centre portion of the flower. Here we left them white.
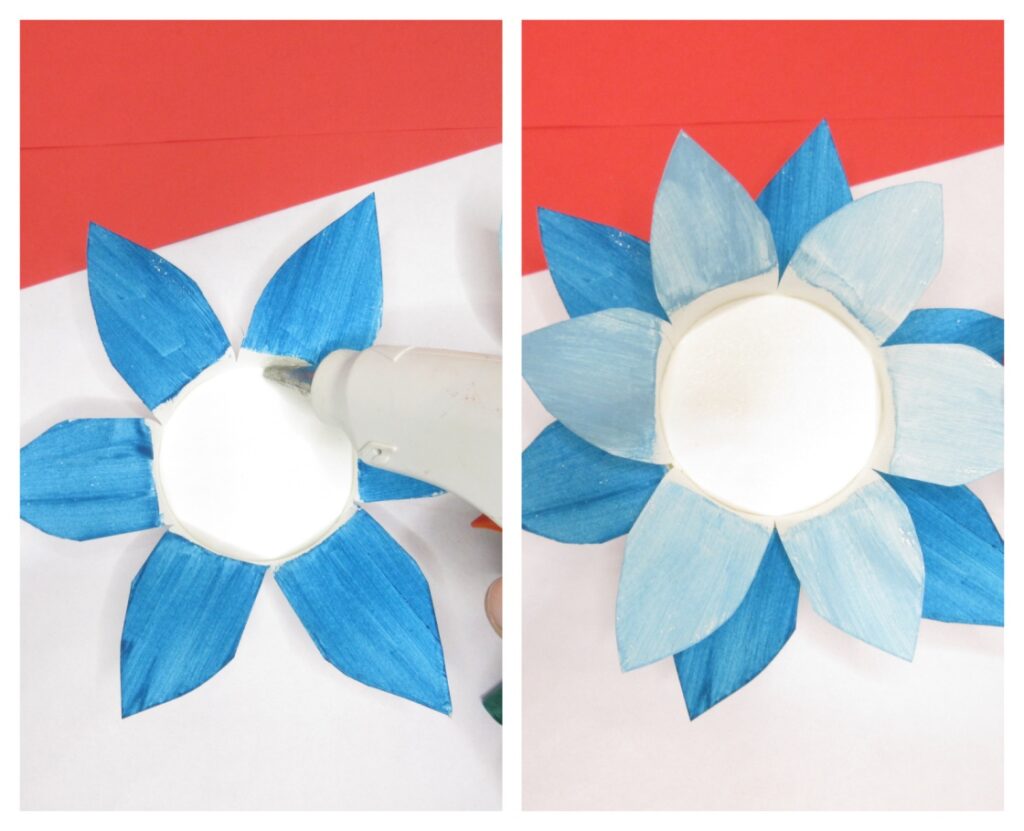
Now, apply some hot glue onto the centre and stick the flower with shorter petals to the other paper cup flower.
Thus, we are done with making the flower.
The next step is to make a paper stem for the flower.
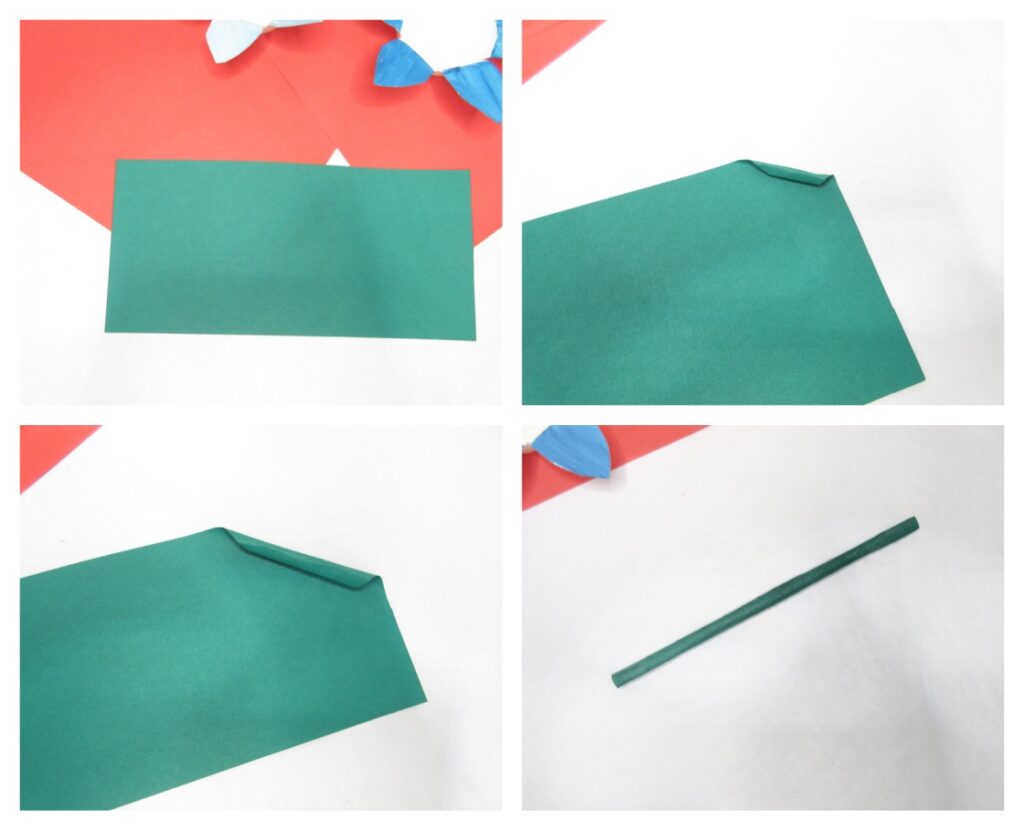
Take a rectangular sheet. Start by rolling from one end of the paper as thinly as possible, diagonally. When you reach the end, apply glue and stick it.

Apply some hot glue to the back of the paper cup flowers and stick the paper stem to it.
And the paper cup flower is ready!