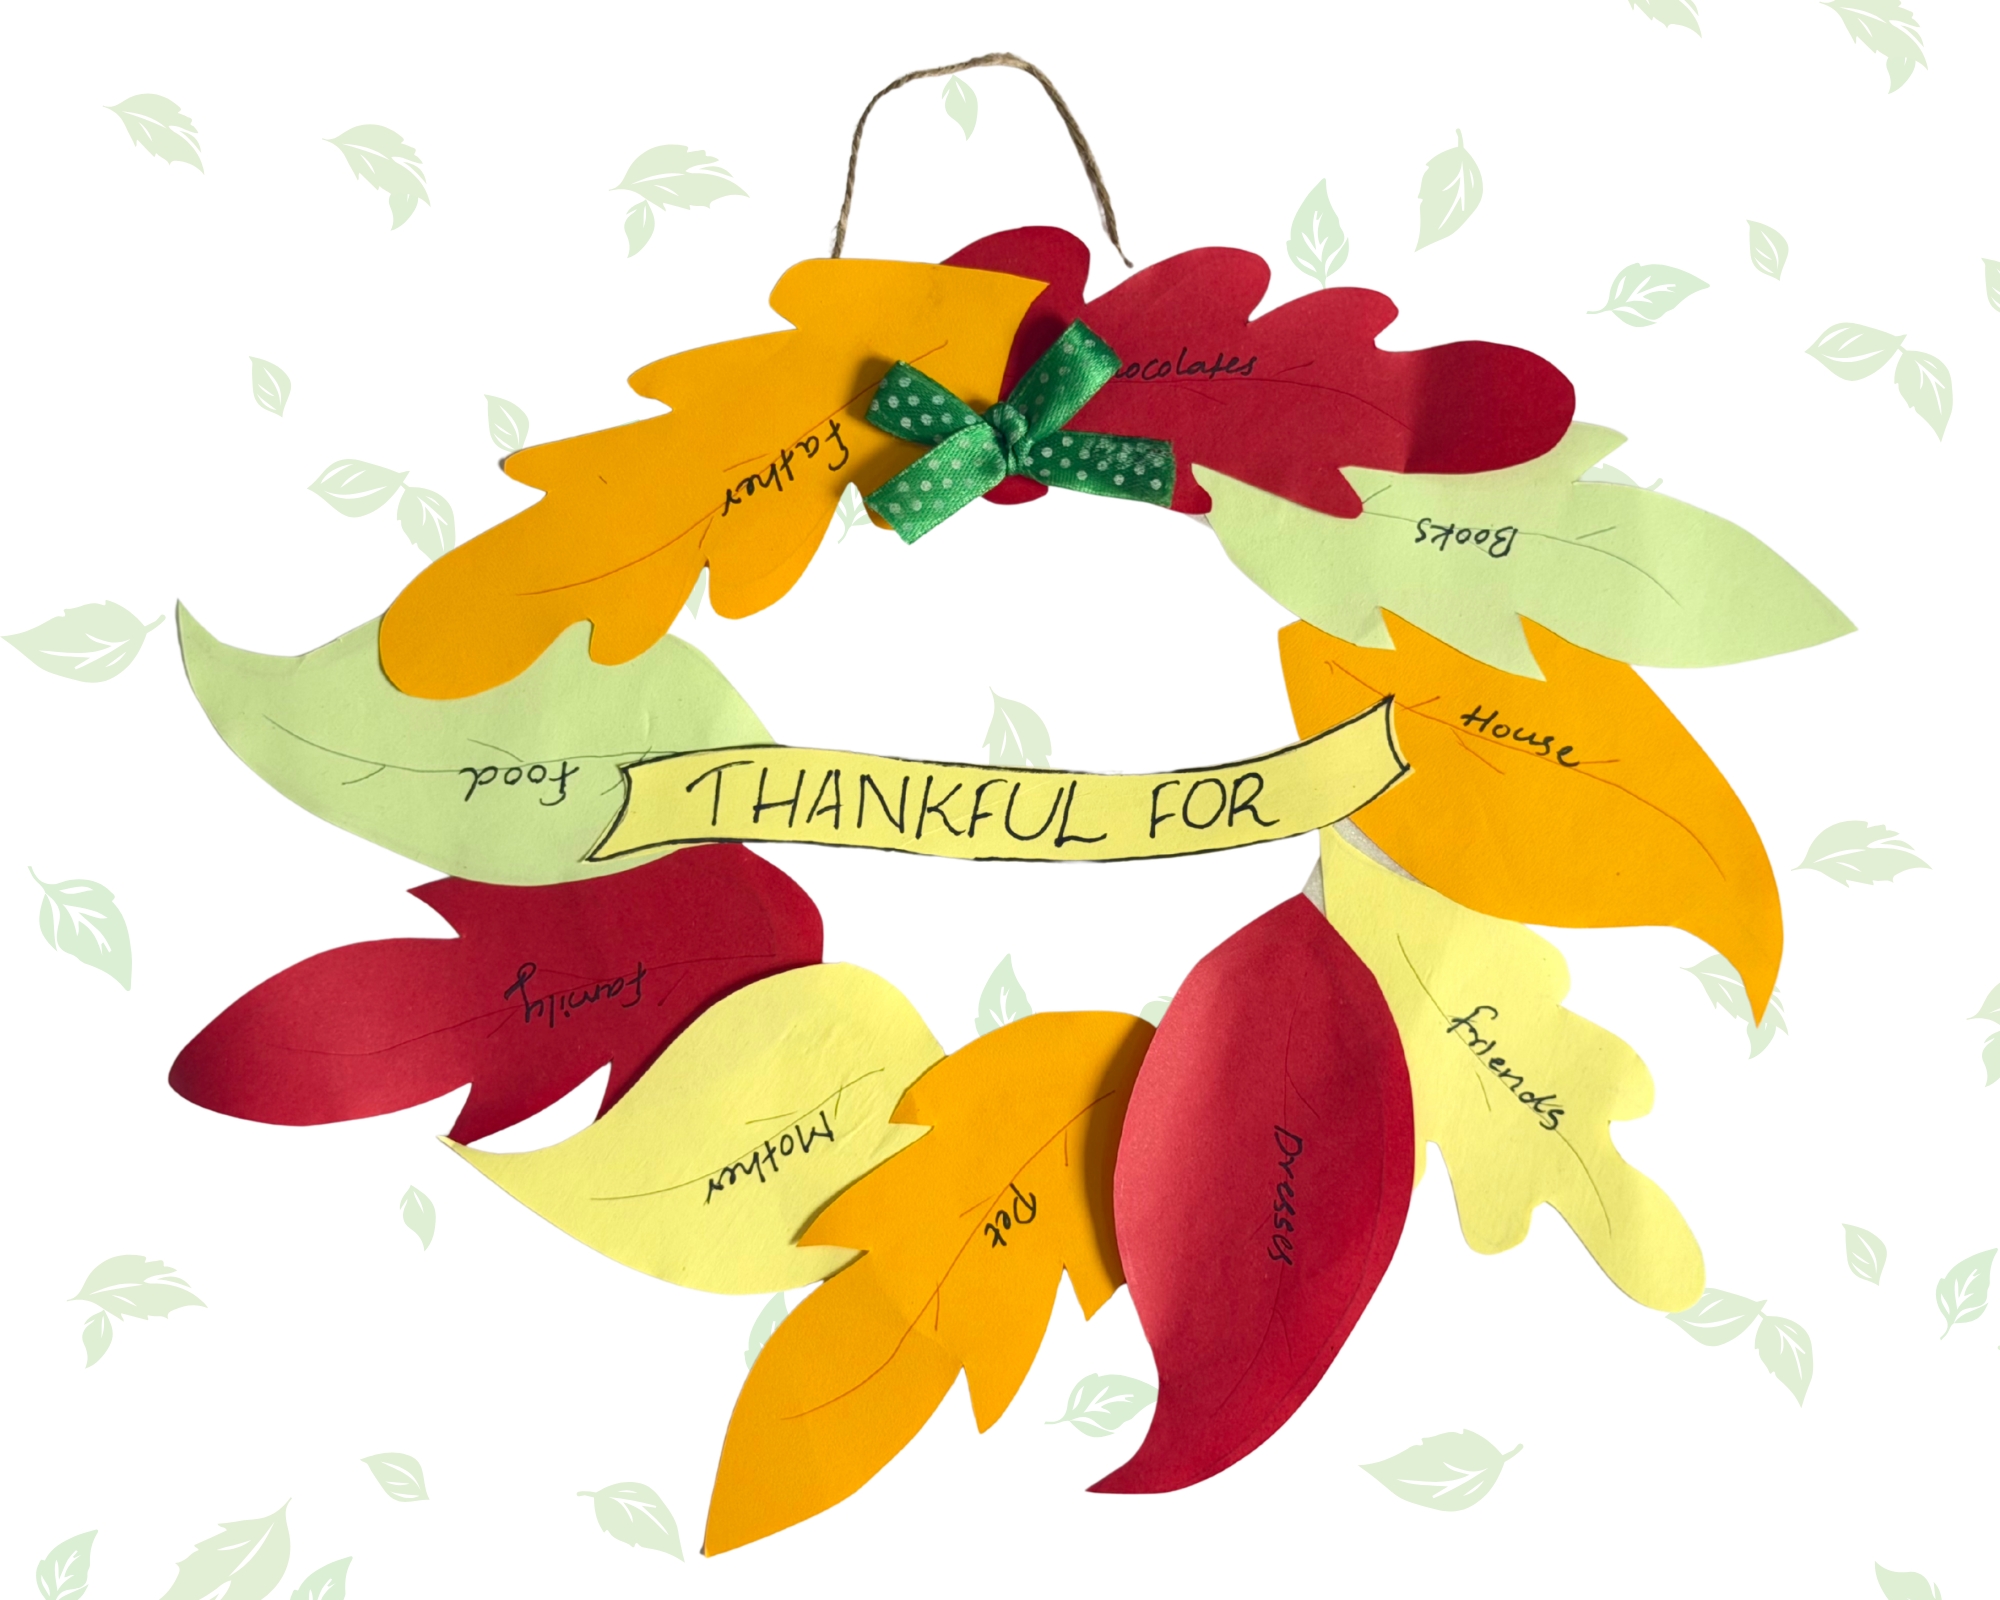
Gratitude Wreath Craft for Kids
Fall leaf gratitude wreath craft
Ready to make something colorful, cheerful, and full of happy thoughts?
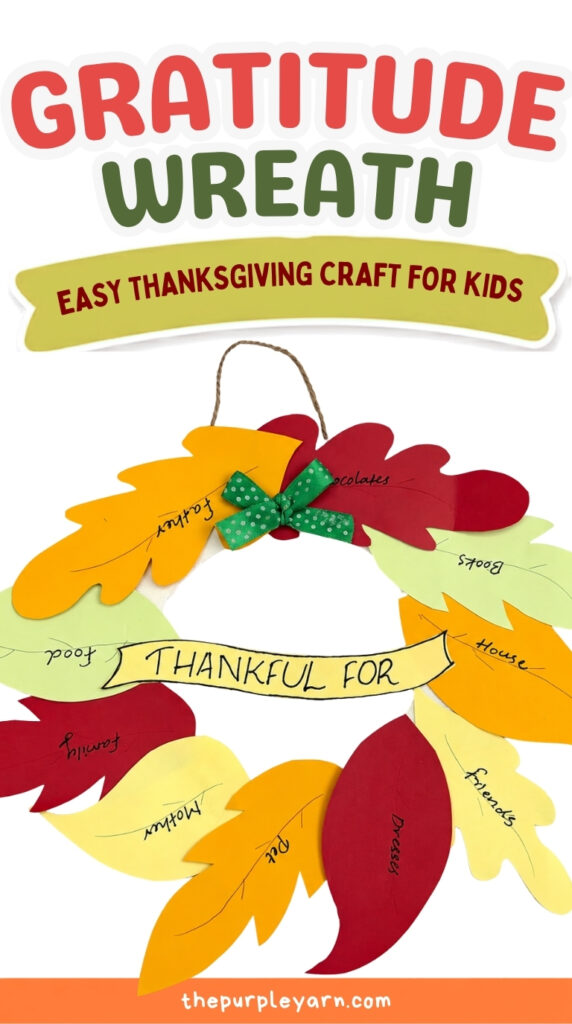
This Gratitude Wreath craft is a fun Thanksgiving activity that lets kids turn simple paper leaves into a beautiful wreath filled with all the things they are thankful for.
From family and friends to pets, favorite foods, toys, and little everyday joys, each leaf gets its own special thankful thought. By the end, you’ll have a bright autumn wreath that is not only fun to make but also tells a little story about what makes you smile.
This Thanksgiving gratitude wreath craft for kids is great for classrooms, preschool, family craft time, or simply making a festive decoration at home.
Grab your paper, scissors, and markers, and let’s get crafting!
Before moving on to the craft, we would appreciate it very much if you would check out our YouTube channel and subscribe to it.
We upload new easy craft tutorials there that are different from what we publish on the blog. Thank you!
What You’ll Need:
- Paper plate
- Yellow construction paper
- Orange construction paper
- Red construction paper
- Light green or green construction paper
- Small green ribbon or bow
- Light-colored paper
- Scissors
- Pencil
- Glue
- Black or blue marker
- String for hanging
How to Make a Gratitude Wreath
Step 1: Prepare the wreath base
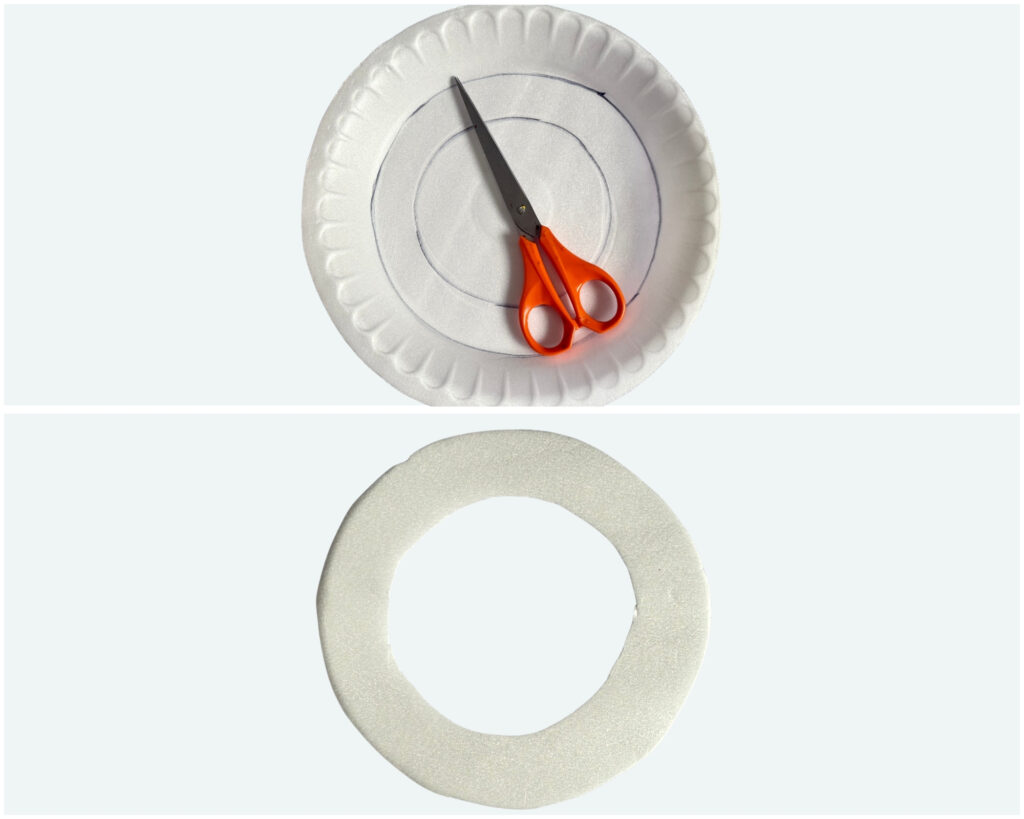
Start with a paper plate.
Using scissors, carefully cut out the center of the plate, leaving the outer rim intact. This will create the base for your Gratitude Wreath.
For younger children, an adult can help with cutting the center of the plate.
Step 2: Make the fall leaves
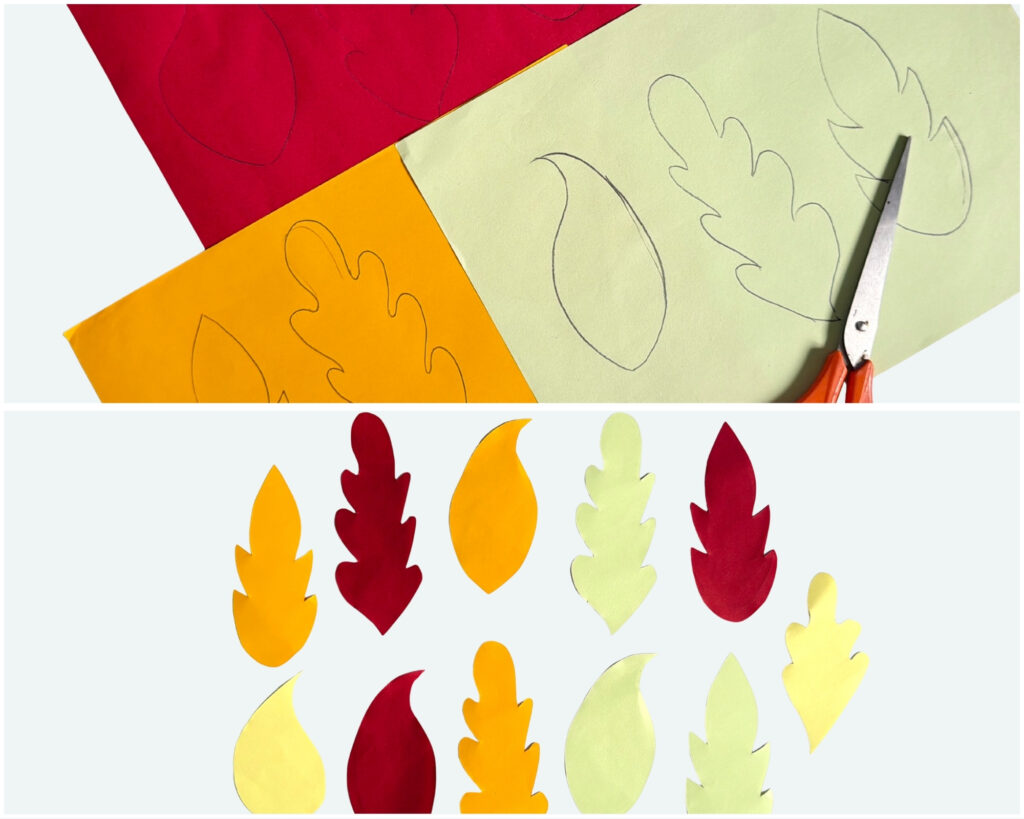
Now it’s time to make some colorful fall leaves!
Take yellow, orange, red, and green construction paper and draw simple leaf shapes on each color using a pencil.
Cut out several leaves in different sizes and shapes. You can also add small details or leaf veins using a marker to give them a more finished look.
Make plenty of leaves so your wreath looks full and colorful.
Step 3: Write what you are thankful for
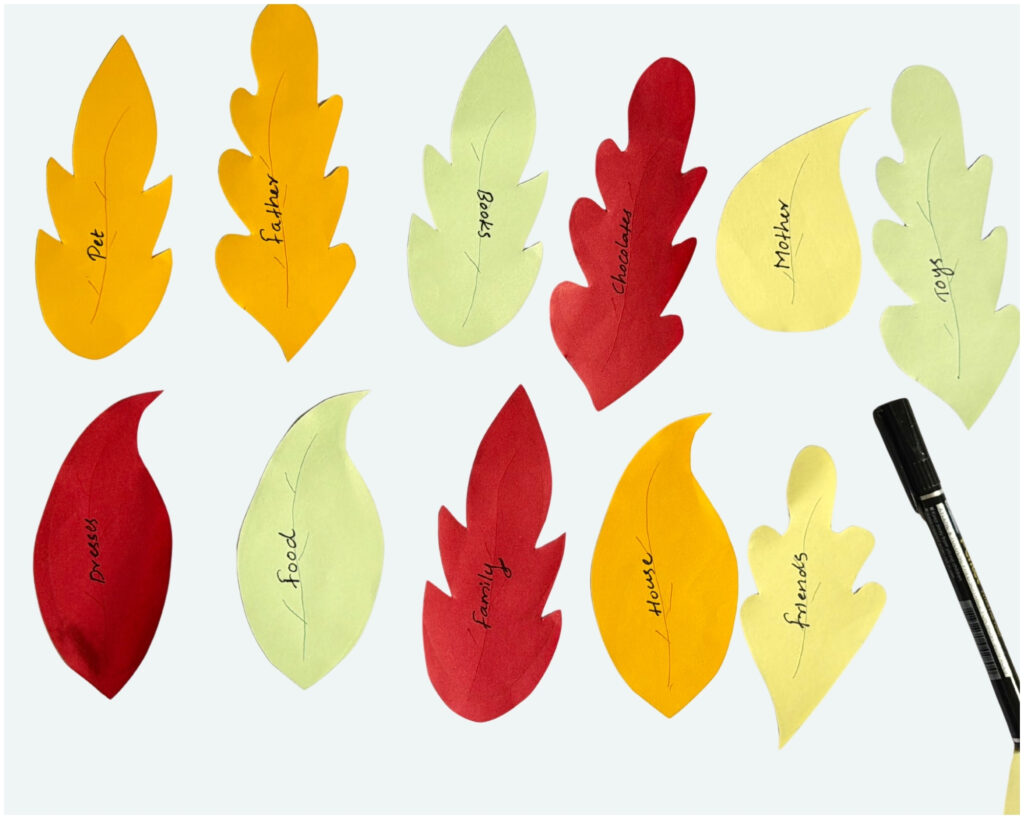
Here comes the fun part!
Before gluing the leaves onto the wreath, write something you are thankful for on each leaf.
Children can write about their family, friends, pets, teachers, favorite foods, toys, hobbies, special memories, or anything that makes them happy.
For younger children, an adult can help write their answers while they choose their favorite leaves.
Step 4: Arrange and glue the leaves
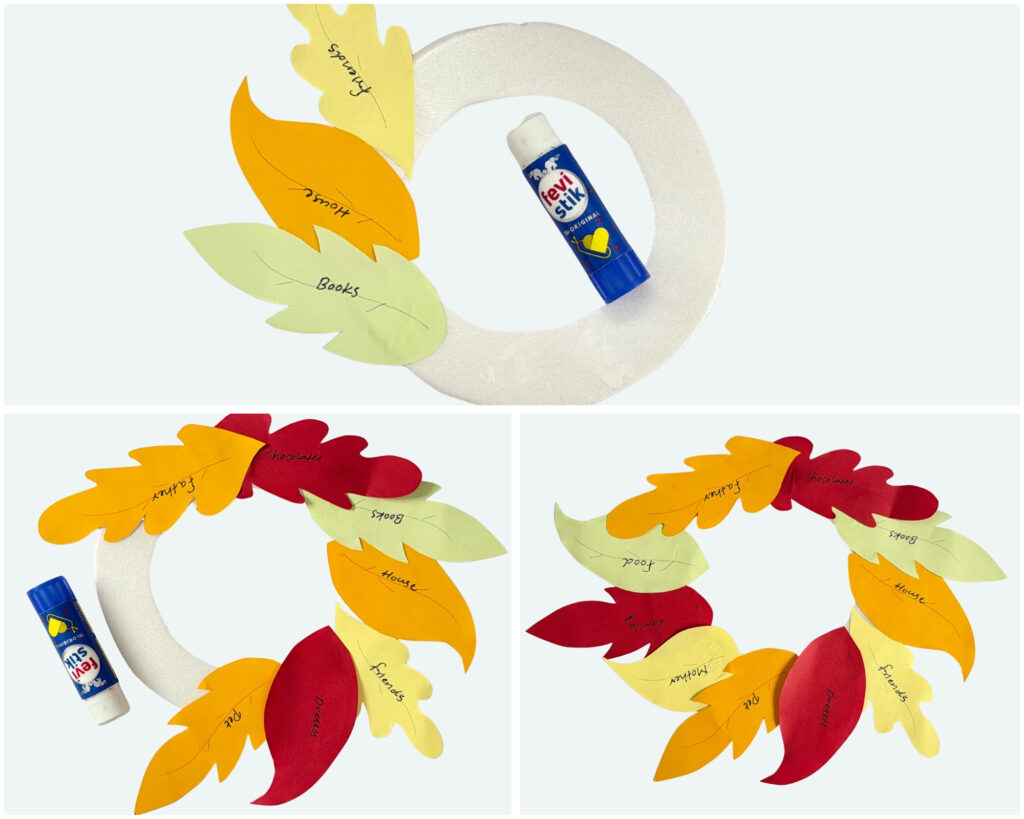
Place the leaves around the paper plate ring, arranging the different colors and shapes in a fun pattern.
Try placing some leaves at different angles and overlapping a few of them to make the wreath look fuller.
Once you like the arrangement, glue the leaves onto the paper plate.
Keep adding leaves until the entire wreath is covered.
Step 5: Add a tiny bow and banner
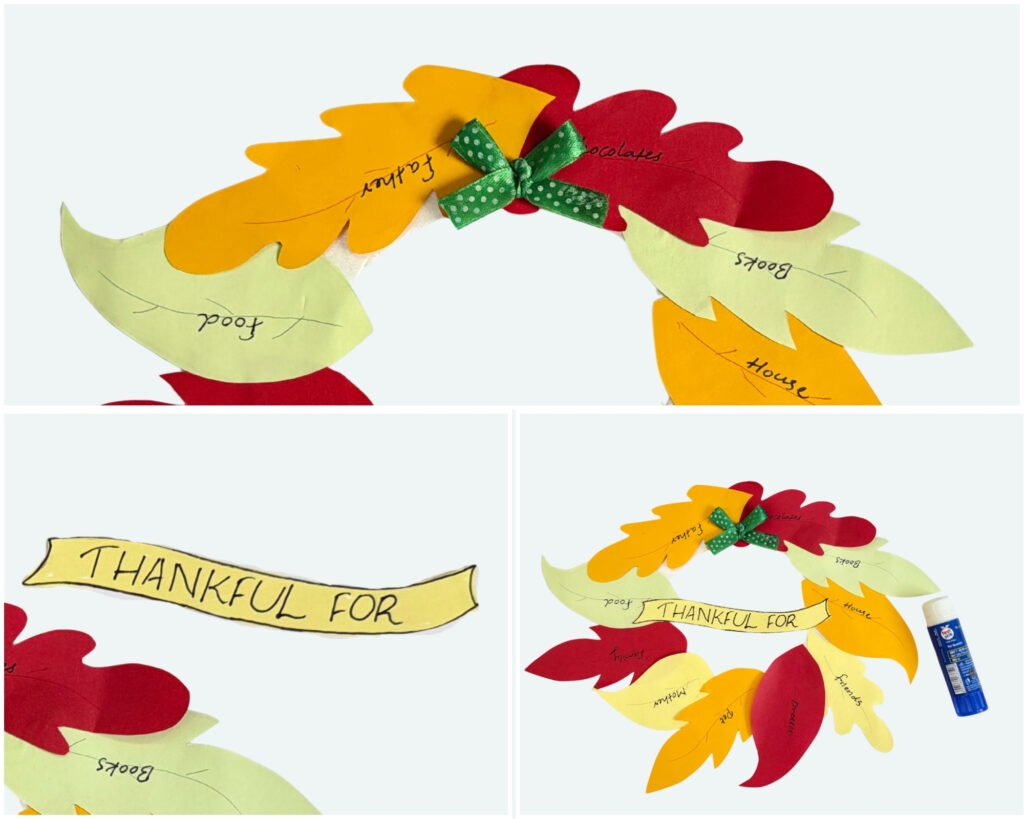
Give your wreath a little finishing touch by adding a tiny green bow. (Or any color!)
Glue the small green bow near the top of the wreath, between the colorful leaves.
Next, take a small strip of light-colored paper and cut it into a simple banner shape.
Write “THANKFUL FOR” across the banner using a black or blue marker.
Glue the banner across the center of the wreath.
The little green bow adds a cute pop of detail and makes the wreath feel extra festive!
Step 6: Add the hanging string
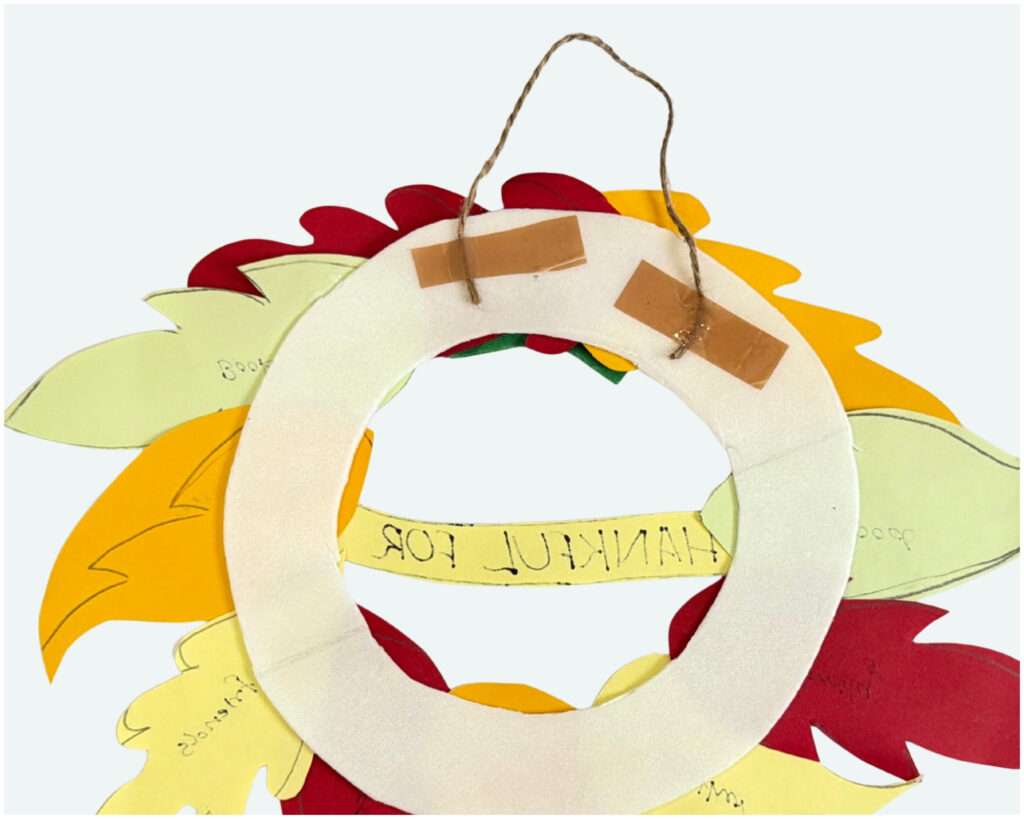
Now it’s time to make your wreath ready to hang.
Turn the wreath over so you are looking at the backside.
Take a piece of string and glue or securely attach both ends to the back of the wreath, creating a small loop for hanging.
Allow the glue to dry completely before turning the wreath back around.
Step 7: Display your gratitude wreath
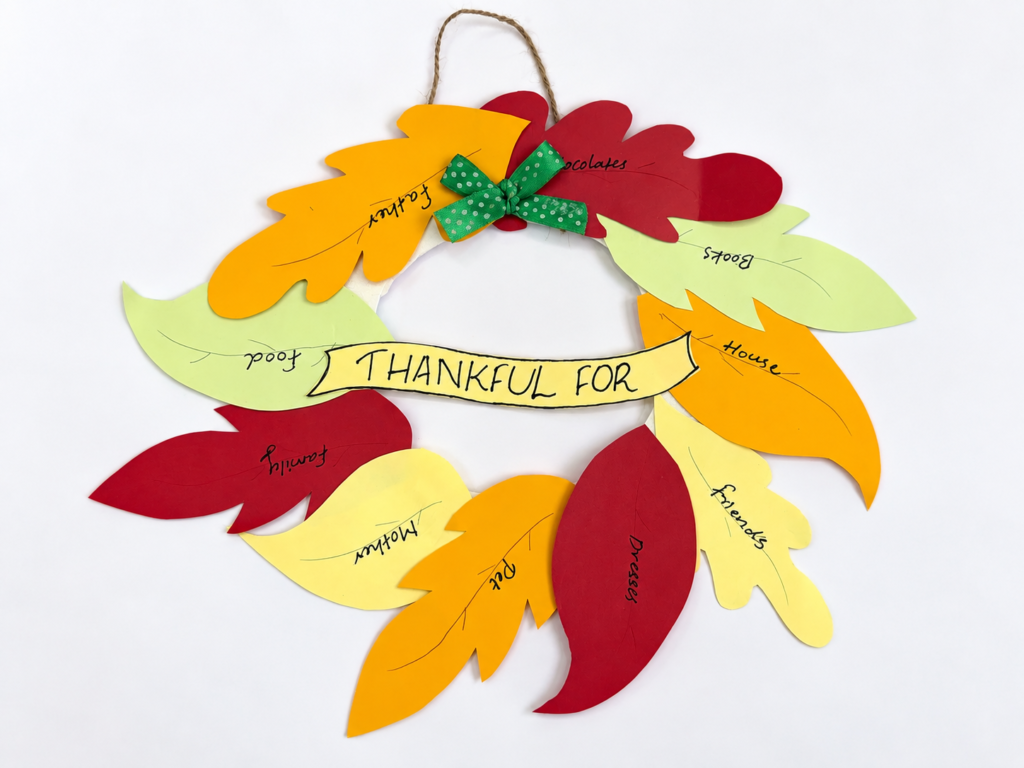
Your colorful Gratitude Wreath is finished!
Hang it on a wall, classroom door, bulletin board, or anywhere at home where everyone can see it.
Take a moment to read all the thankful messages on the leaves. You might even discover a few things you hadn’t thought about before!
Ways to use this craft
Here are some ideas to use this craft:
- Create a beautiful fall decoration to display on classroom bulletin boards, doors, walls, or windows throughout the autumn season.
- Use the gratitude wreath craft as a meaningful Thanksgiving activity that encourages children to reflect on the people, experiences, and things they appreciate.
- Write one thing to be thankful for on each leaf to create a colorful and personalized gratitude display.
- Add the craft to a fall or Thanksgiving lesson plan to teach gratitude, mindfulness, and positive thinking.
- Display the finished wreath at home as a festive centerpiece or seasonal decoration that celebrates thankfulness.
- Use the completed wreath as a conversation starter and invite family members or classmates to share what they are grateful for.
Final Words
And just like that, a simple paper plate has turned into a wreath bursting with color, creativity, and gratitude!
The best part is that every wreath will be different because every child has their own special things to be thankful for. Encourage kids to write specific things they are thankful for, instead of general ones. This will help them think deeply about their blessings in life.
It’s a lovely way to bring a little creativity and lots of happy thoughts to your Thanksgiving celebrations.
Make one for yourself, make one with your class, or get the whole family involved and see what everyone puts on their leaves!
Cut, write, glue, and fill your wreath with all the things that make your heart happy!
More Fall and Thanksgiving crafts:
- Superman turkey in disguise craft (with free template)
- 62 Fun Thanksgiving Crafts for Kids(DIY & Printables)
- Popsicle stick turkey craft for kids
- Turkey paper plate mask kids can make
- Easy paper cup turkey craft for kids
- Turkey handprint craft for kids
- Paper plate scarecrow craft for kids
- Rocking apple craft for kids
- Paper plate monster craft for kids
- Candy corn garland craft idea for kids (with free template)
- Easy fall leaf craft for kids (with free printable template)
- Fall paper plate hedgehog craft for kids (with free printable template)
- Fall apple picking craft for kids (with free printable template)
- Fall pumpkin puzzle craft idea for kids (with free template)