Toilet Paper Roll Mushroom
If your kids love making things with paper and paint, they’ll adore this cute little mushroom craft!
It’s easy, colorful, and perfect for using up empty toilet paper rolls.
Plus, it makes the sweetest woodland decoration for their room or a classroom nature corner.
Before moving on to the craft, we would appreciate it very much if you would check out our YouTube channel and subscribe to it.
We upload new easy craft tutorials every week that are different from what we publish on the blog. Thank you!
Now, let’s dive into the tutorial.
Materials Required:
- Toilet paper roll or cardboard tube
- White paper (for the mushroom cap)
- Paint set or watercolors
- Paintbrush
- Scissors
- Green paper
- Glue or tape
Toilet Paper Roll Mushroom Craft (Step-by-step tutorial)
Step 1: Gather Your Materials

Lay out everything you’ll need – a clean toilet paper roll, a circle cut from white paper (diameter approximately 14-15 cm), paints, scissors, and a brush.
Step 2: Cut the Toilet Paper Roll

Cut your toilet paper roll in half using scissors. You’ll use one half for the mushroom stem. Save the other piece for your next craft.
(Tip: Younger kids might need a grown-up to help with the cutting.)
Step 3: Paint the Mushroom Cap

Take your white paper circle and use red paint to make spots all over it.
Once it’s dry, cut a small slit from the edge toward the center. This slit will help you shape it into a curved mushroom cap.
Step 4: Shape the Mushroom Cap
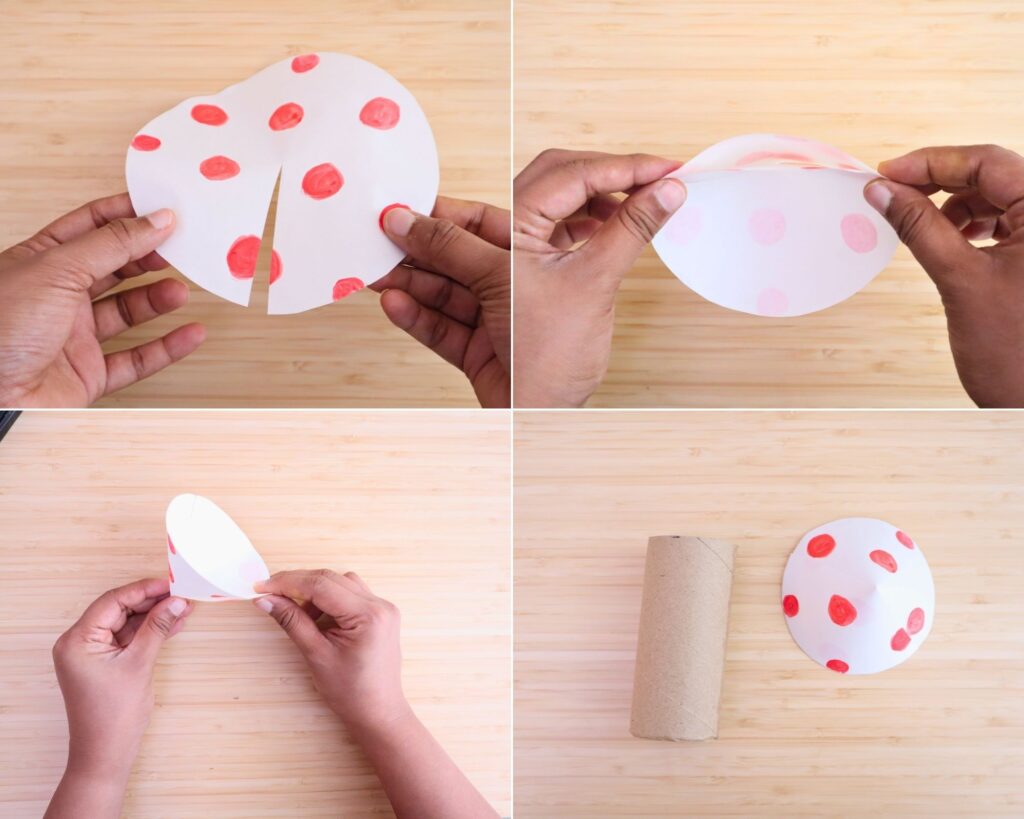
Gently overlap the edges of the slit and glue or tape them together to form a dome shape. This will give your mushroom cap a realistic curve. Let it dry for a bit.
Step 5: Attach the Mushroom Cap
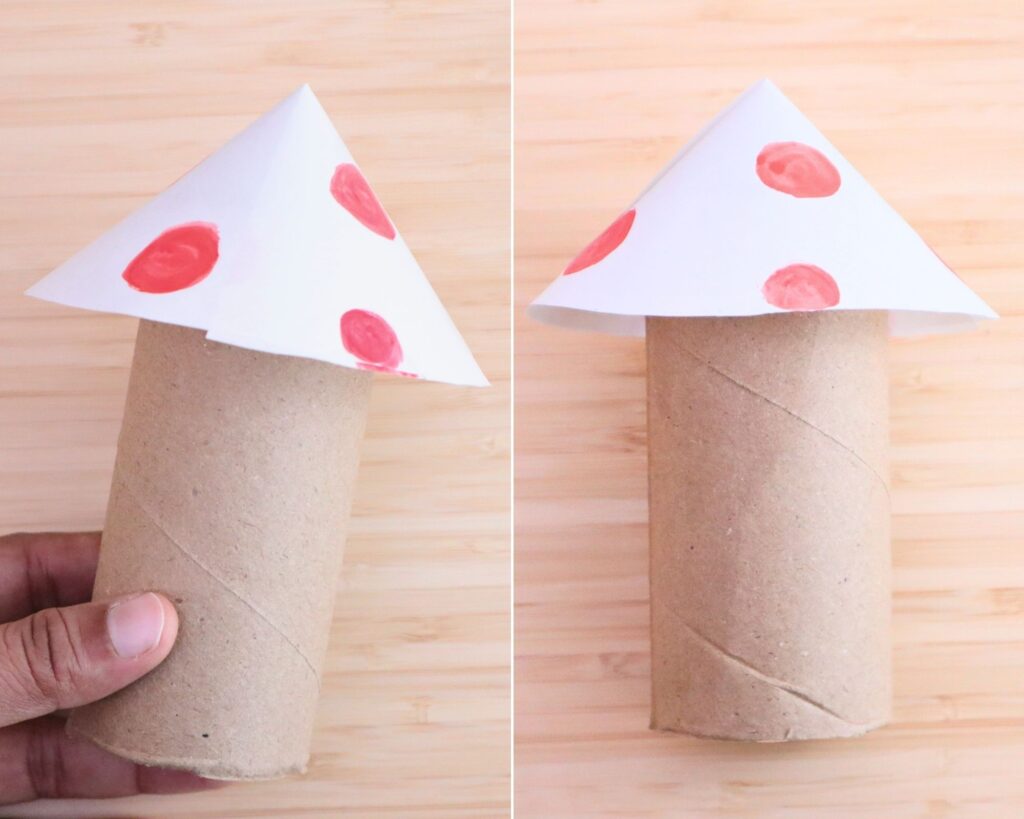
Once your mushroom cap is dry and shaped, place it gently on top of the toilet paper roll. This will form the top of your mushroom.
Adjust it so it sits evenly, then secure it with glue or tape inside the cap. Hold it for a few seconds to help it stick firmly.
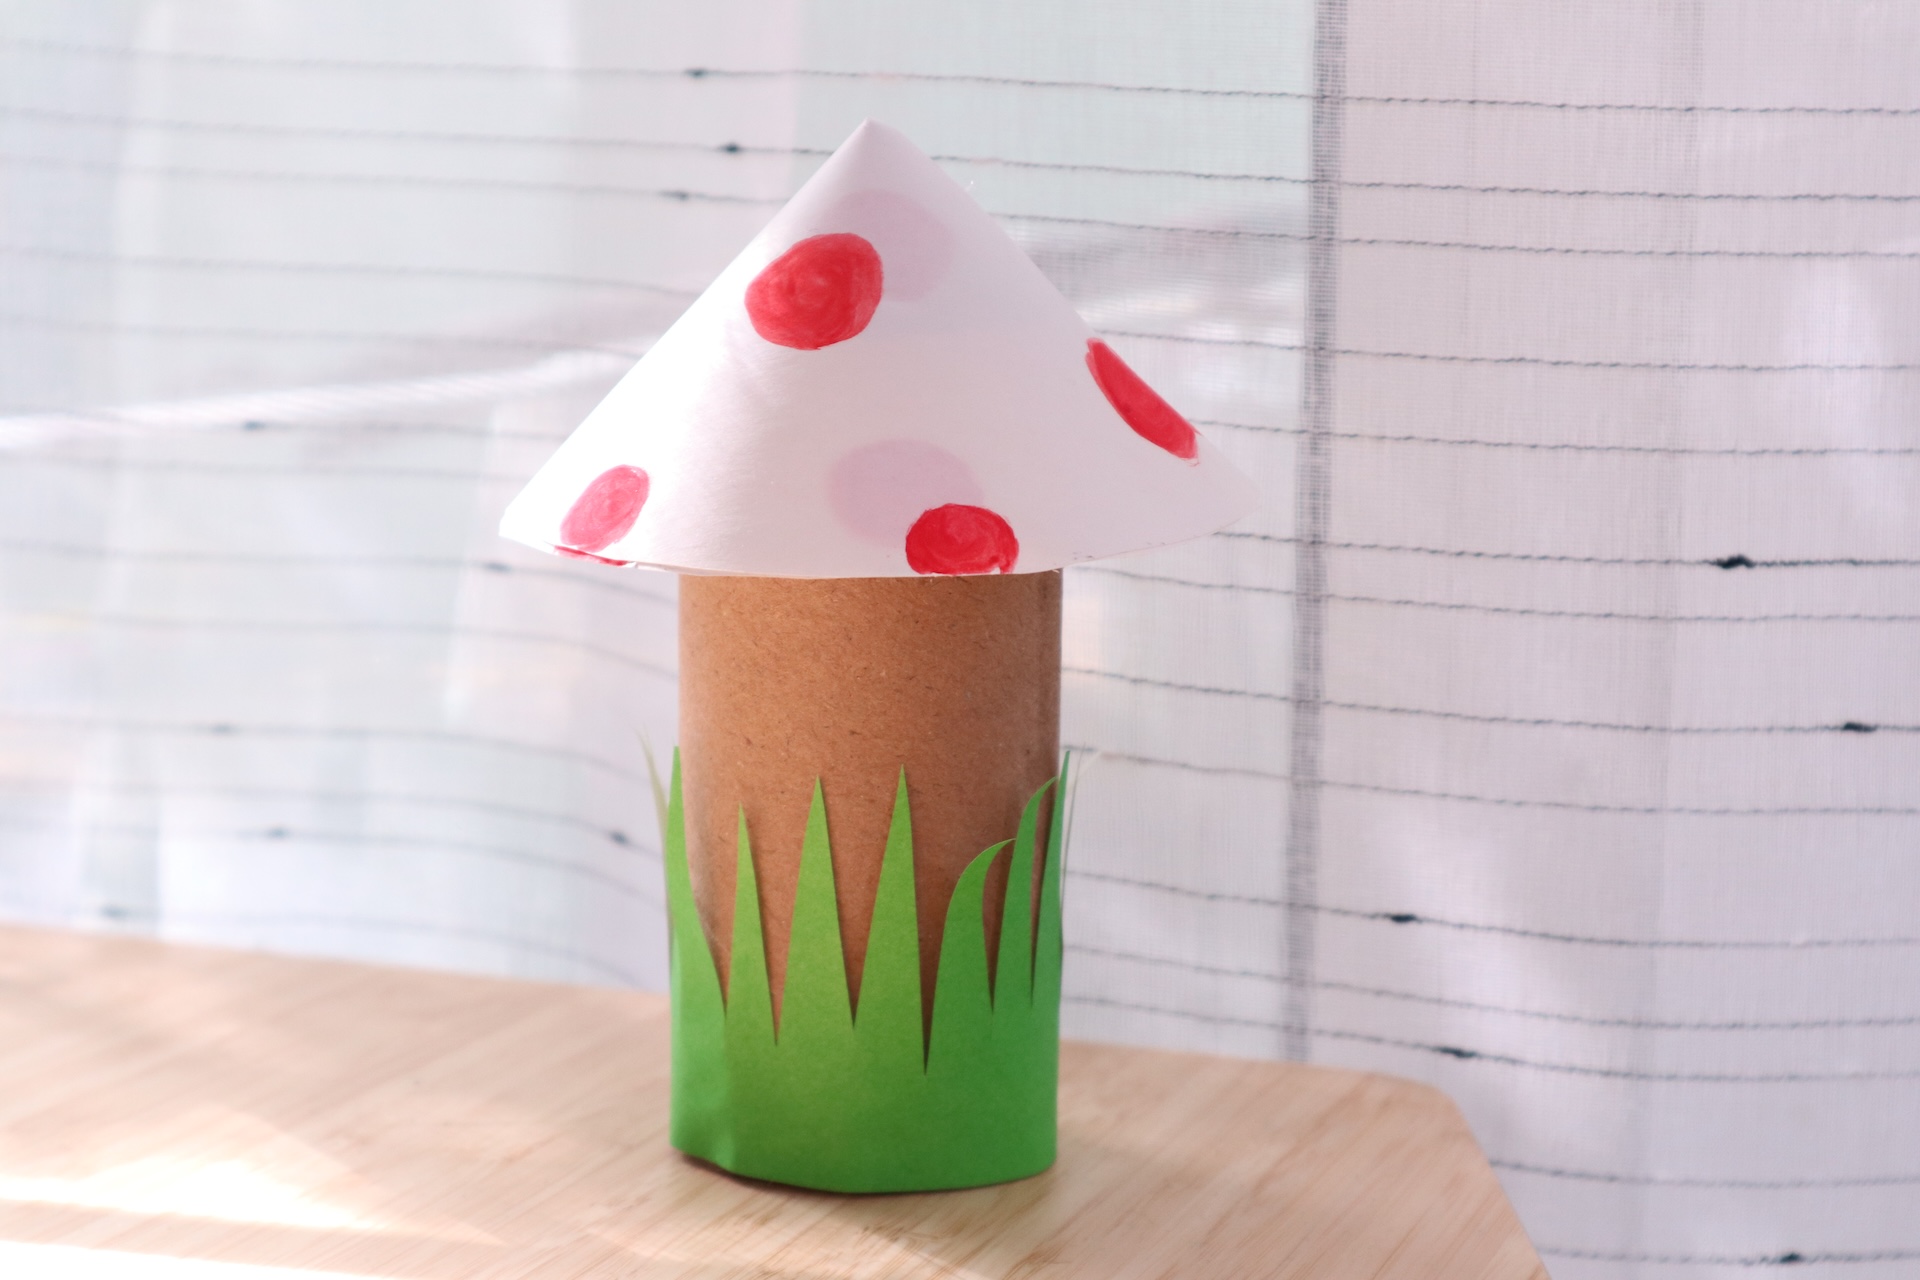
Now your mushroom looks just like the real thing. Let’s decorate it with a grassy base!
Step 6: Make Some Grass
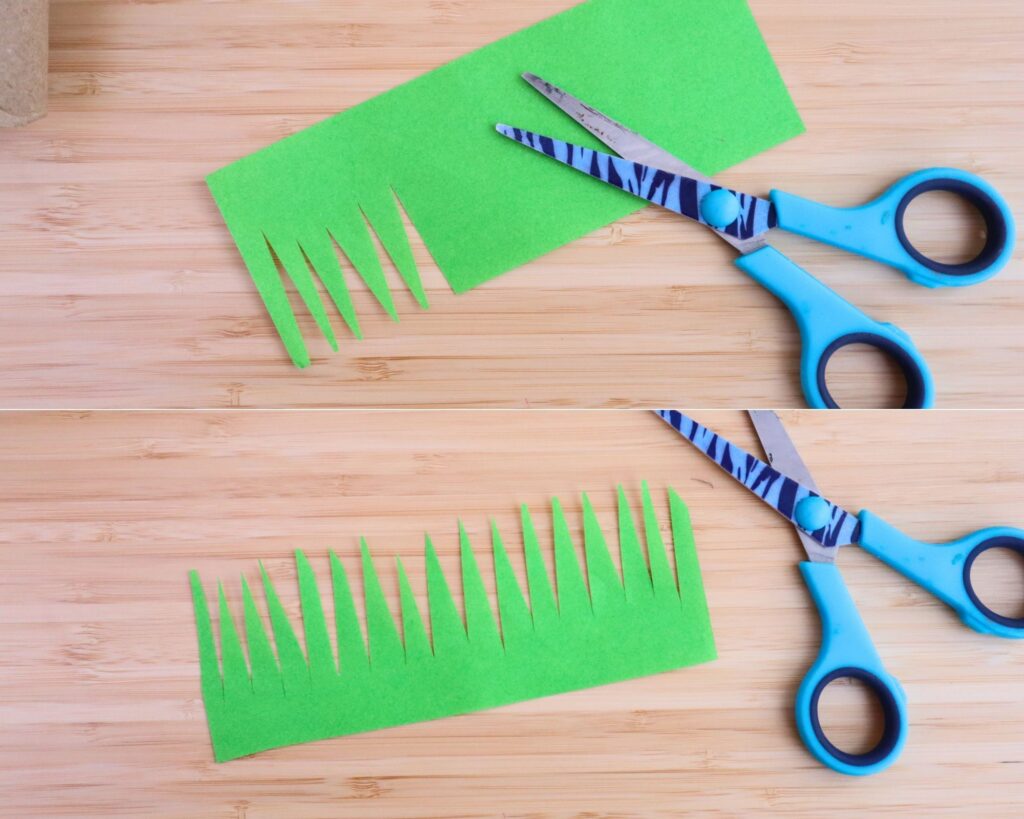
Cut a strip of green paper and use scissors to make snips along one side – this will look like grass. You can make your blades tall, short, or even wavy!
Step 7: Display Your Mushroom
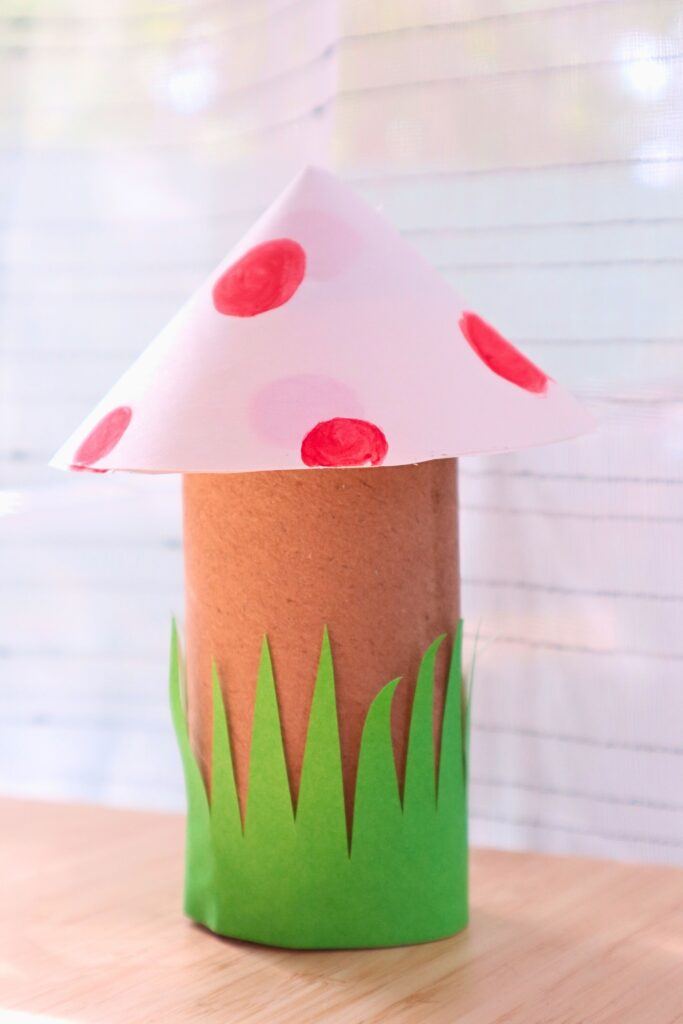
Your adorable mushroom is ready! Let it dry completely and then display it on a windowsill, shelf, or nature-themed play table. You can even make a few in different sizes to create a mini mushroom forest.
Final Thoughts
Wasn’t that fun? This toilet paper roll mushroom craft is such an easy way to spark creativity and fine motor skills in kids. Plus, it turns a few simple supplies into something adorable!
You can make a whole family of mushrooms in different sizes and colors — perfect for pretend play or as part of a fairy garden scene.
If your kids enjoyed this one, check out my other paper craft ideas that turn everyday materials into magical little projects!
More Crafts:
- Toilet paper roll Rocket craft for kids
- Tissue paper butterfly craft for kids
- Paper Cup House Craft
- How to make easy paper cup flowers(step-by-step pictures)
- Easy Paper cup bird feeder craft for preschoolers