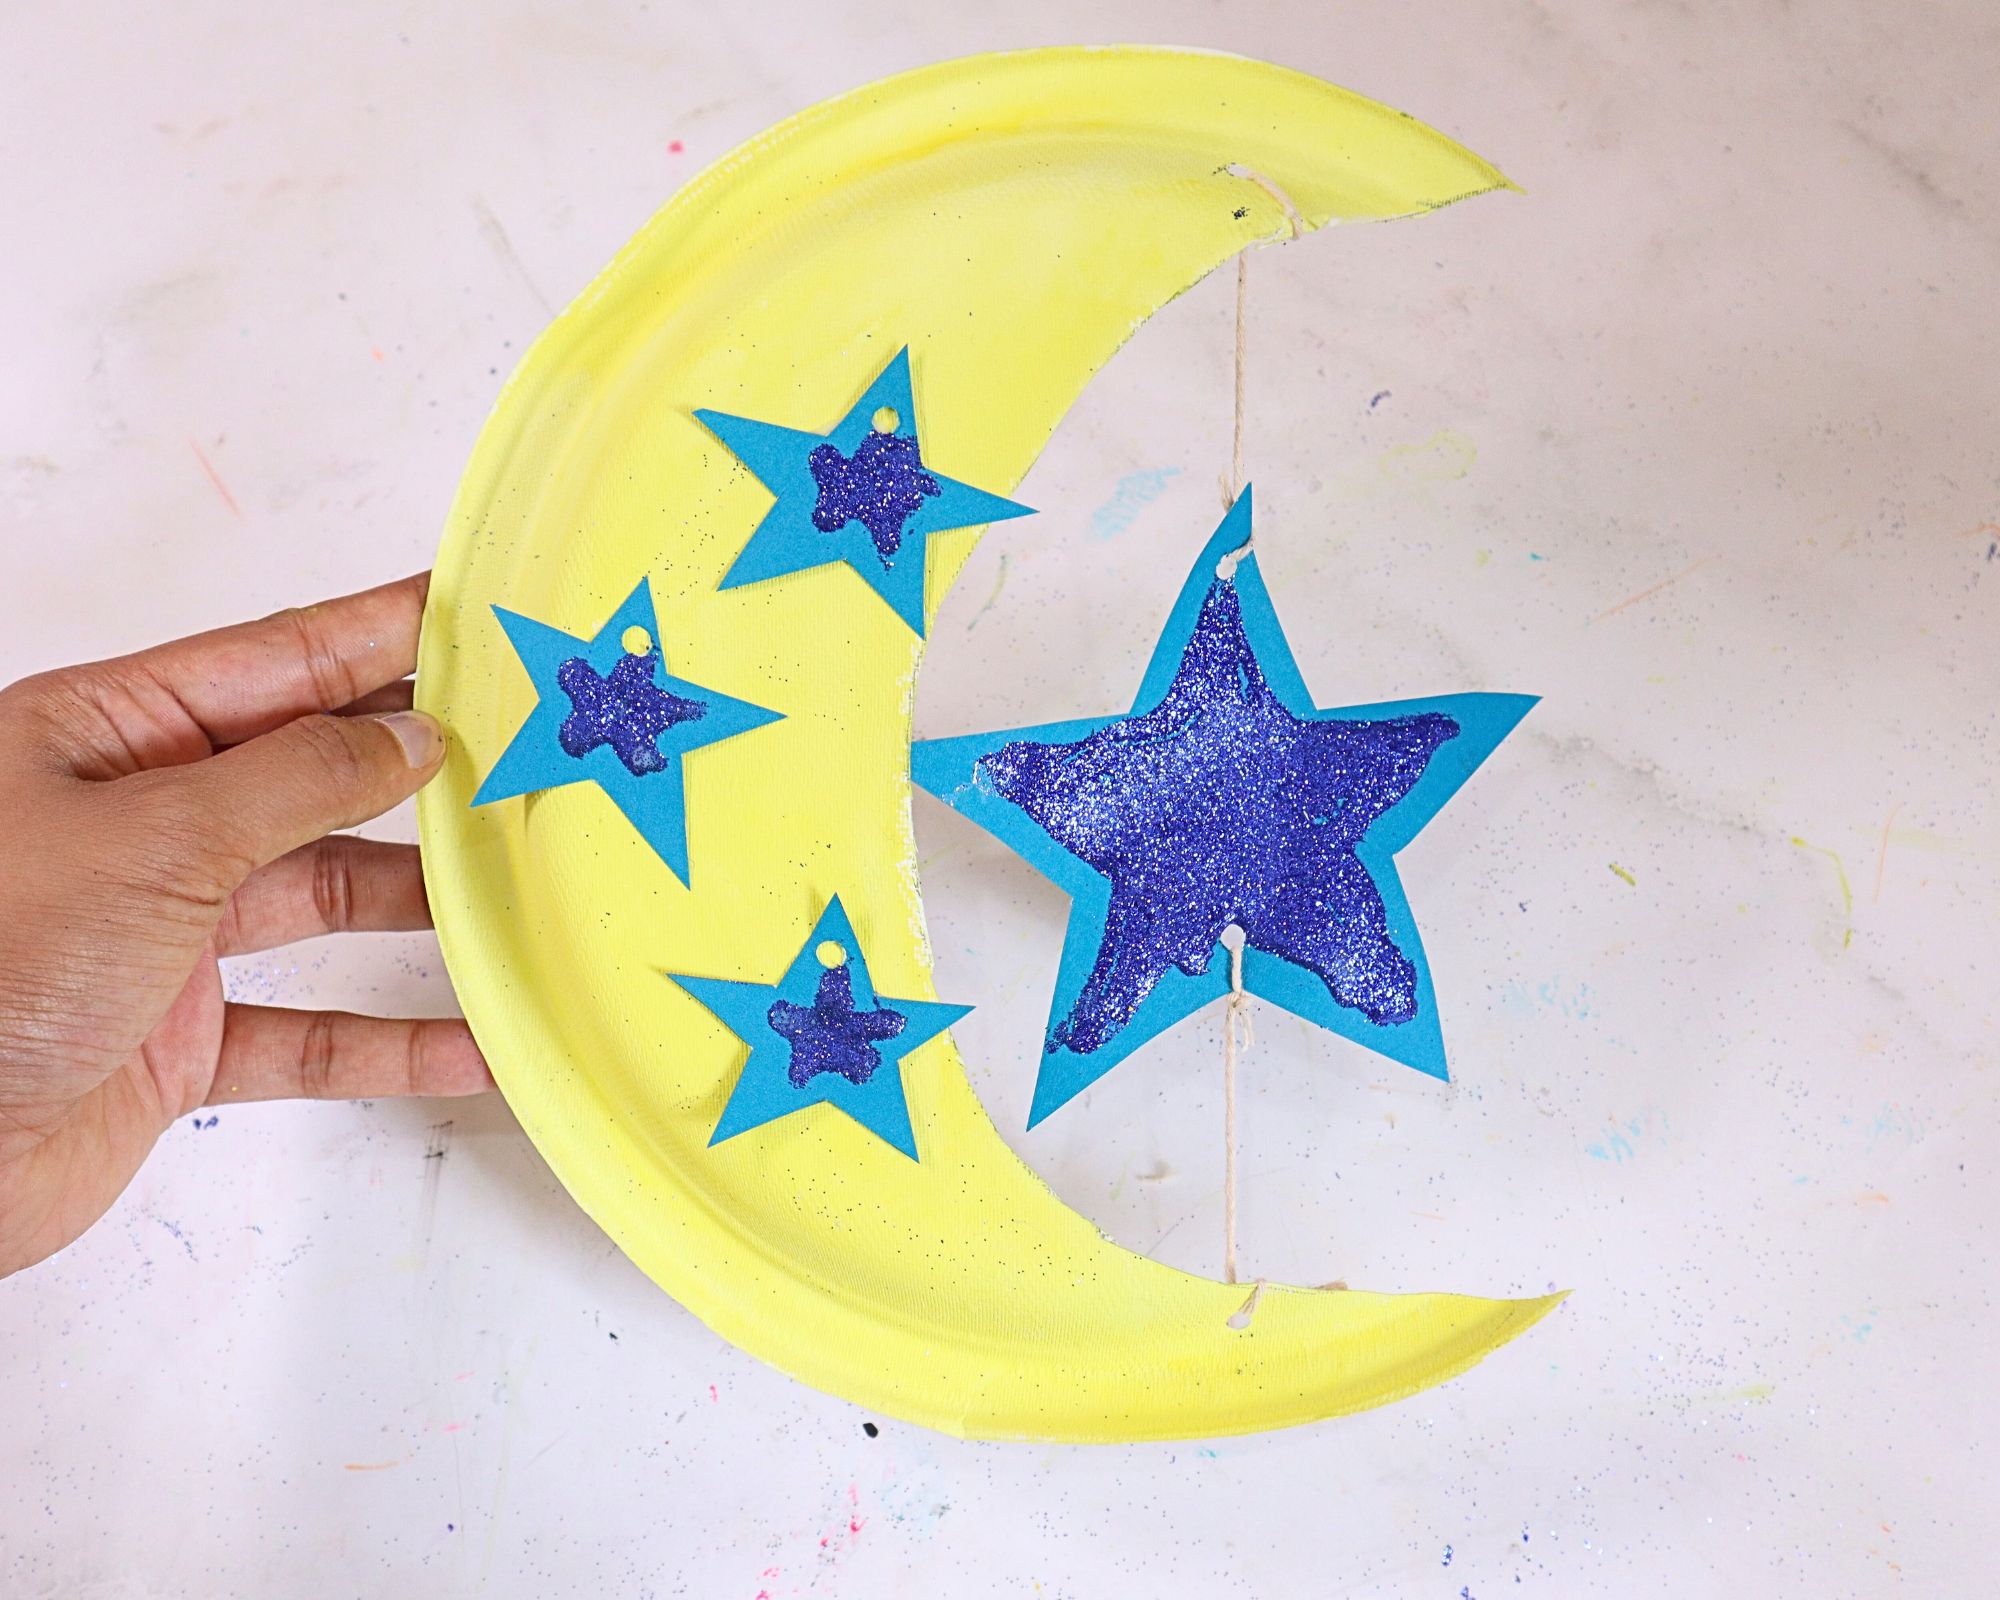
Paper Plate Crescent Moon & Star (Ramadan Craft)
This crescent moon and star craft is one of those simple projects that feels a little magical the moment it comes together.
With just a paper plate, a few star cutouts, and a touch of glitter, kids can create something bright, playful, and perfect for pretend play or room decor.
It’s an easy craft you can do as a Ramadan-themed craft, a quiet afternoon activity, a space-themed lesson add-on, or even a bedtime craft to wind down the day.
Made using paper plates, paint, and glitter, it works beautifully as a hanging decoration for classrooms, homes, or prayer corners.
The steps are easy to follow and suitable for preschool and early elementary children.
Before moving on to the craft, we would appreciate it very much if you would check out our YouTube channel and subscribe to it.
We upload new easy craft tutorials every week that are different from what we publish on the blog. Thank you!
So, let’s get started.
Materials Needed
- Paper plates
- Pencil
- Scissors
- Yellow paint (or gold paint)
- Paintbrush
- Blue craft paper
- White glue
- Purple or blue glitter
- Hole punch
- String or yarn
- Scrap paper or tray (for glitter)
Step-by-step Instructions for the paper plate moon craft
Step 1: Draw the crescent moon
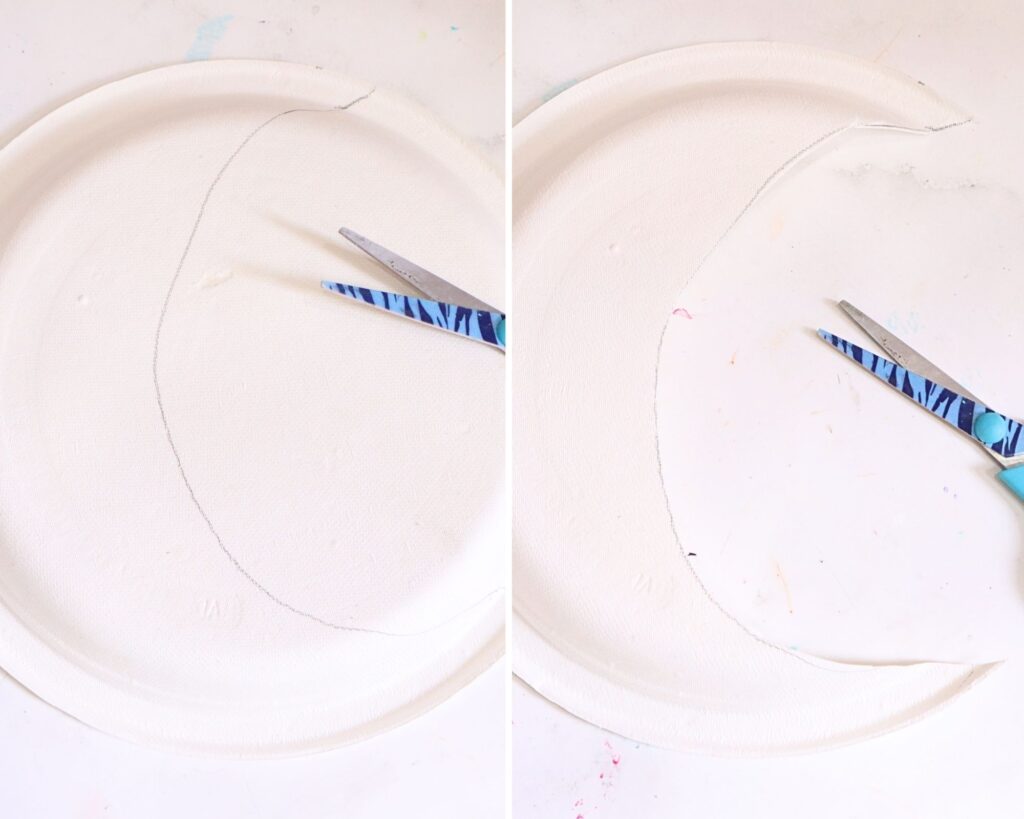
Take a paper plate and lightly draw a crescent moon shape using a pencil. Draw a large curved shape, leaving a thick border so the moon stays sturdy.
Carefully cut along the pencil lines to remove the inner part of the plate. You should be left with a crescent moon shape.
Step 2: Paint the crescent moon
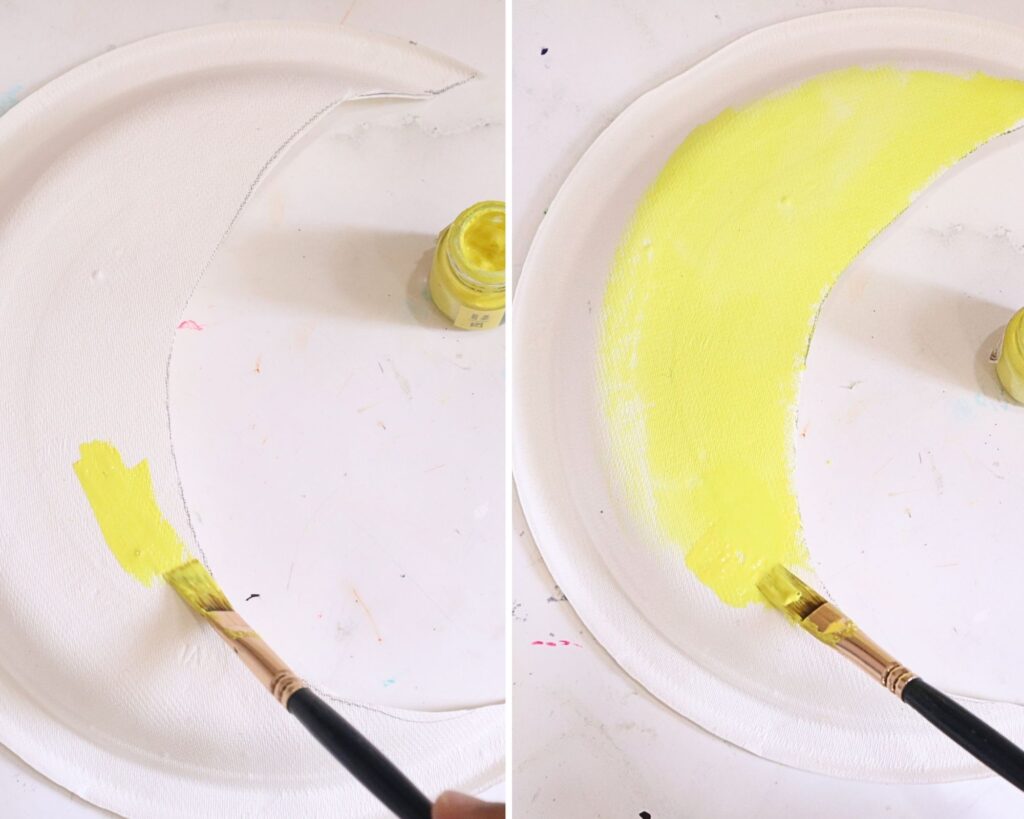
Paint the entire crescent moon using yellow paint. Apply an even coat and let it dry completely. A second coat can be added if needed.
Step 3: Cut out the stars
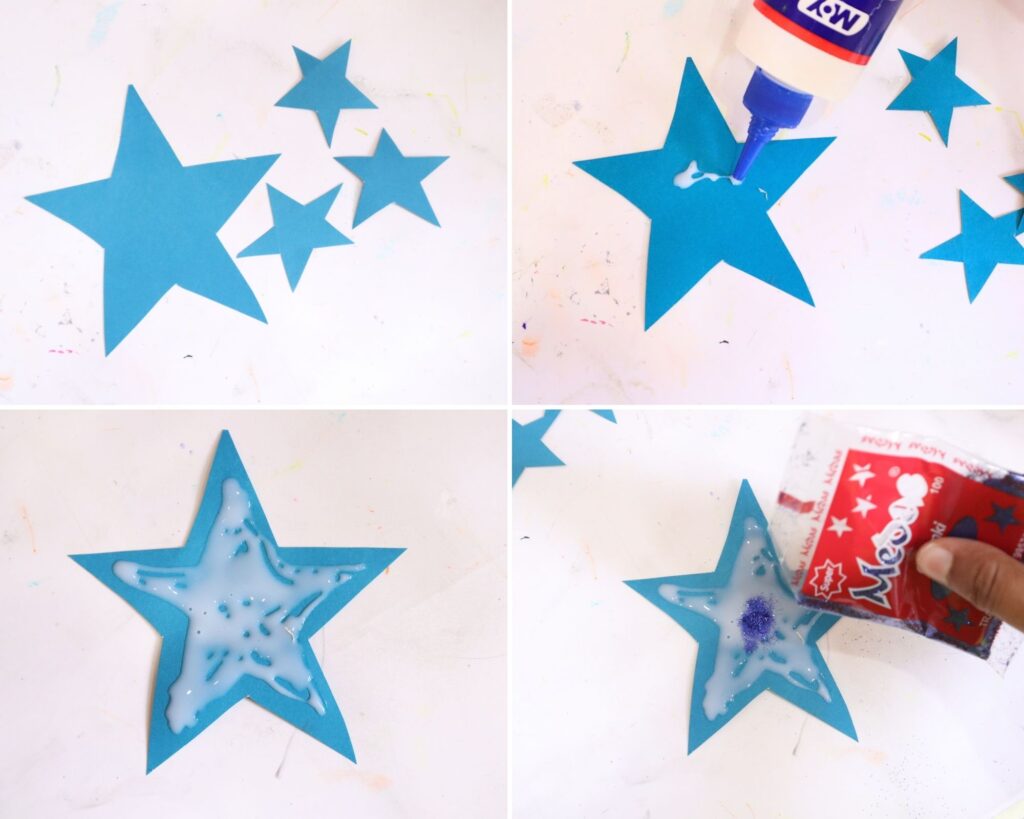
From blue craft paper, cut out one large star and a few smaller stars. You can make them in different sizes for a nice layered look.
Step 4: Add glue to the stars
Squeeze white glue inside each star shape. Spread it gently using the glue nozzle or a brush, keeping it inside the edges.
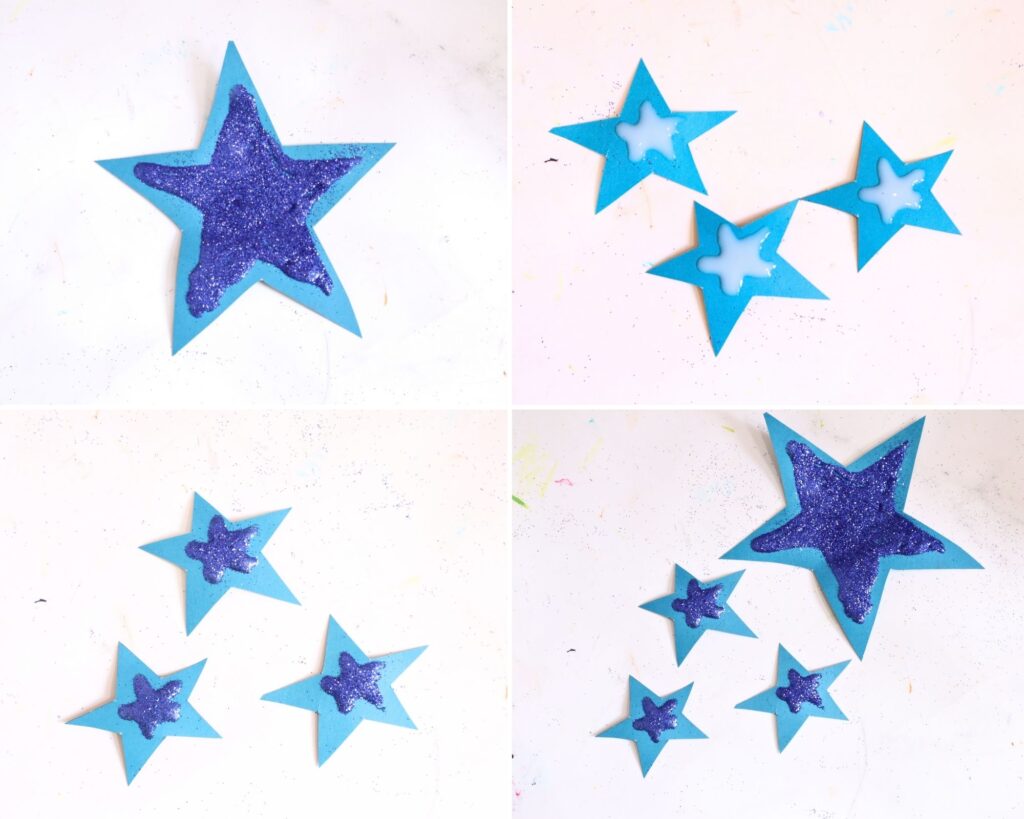
Place the star on scrap paper or a tray and sprinkle glitter over the glued area. Tap off the excess and let the stars dry fully.
Step 5: Punch holes
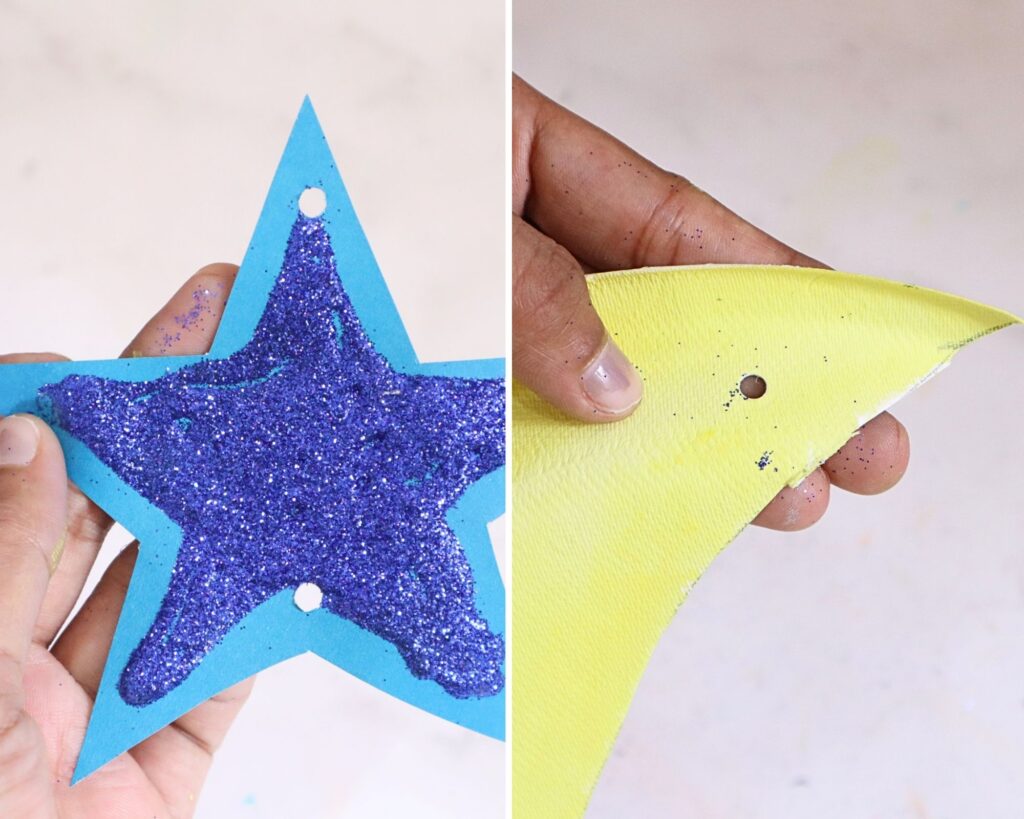
Once everything is dry, use a hole punch to make:
- One hole near the top of the crescent moon
- One hole near the bottom of the crescent moon
- One hole at the top and bottom of the big star
We chose to glue the smaller stars directly onto the crescent moon to keep this craft simple and sturdy for younger kids.
Step 6: Attach the hanging strings
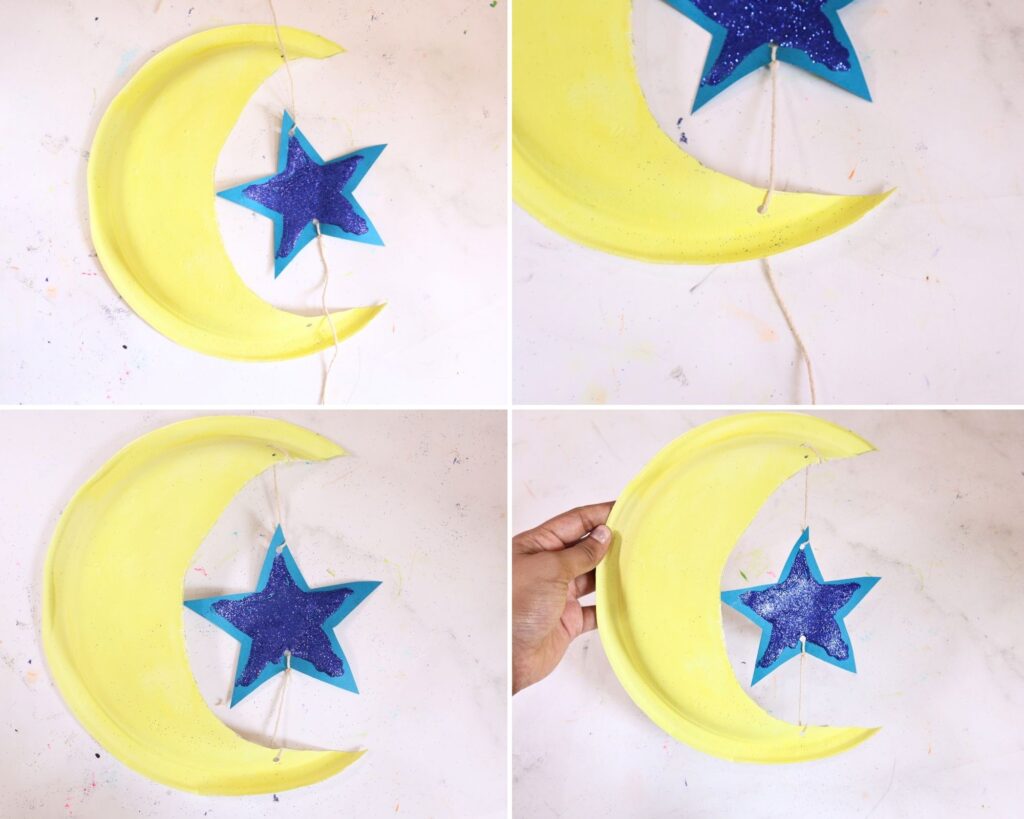
Cut pieces of string or yarn.
Thread one string through the top hole of the crescent moon for hanging.
Use another string to hang the large glitter star from the bottom of the moon.
Smaller stars can be glued directly onto the moon or hung separately if you like.
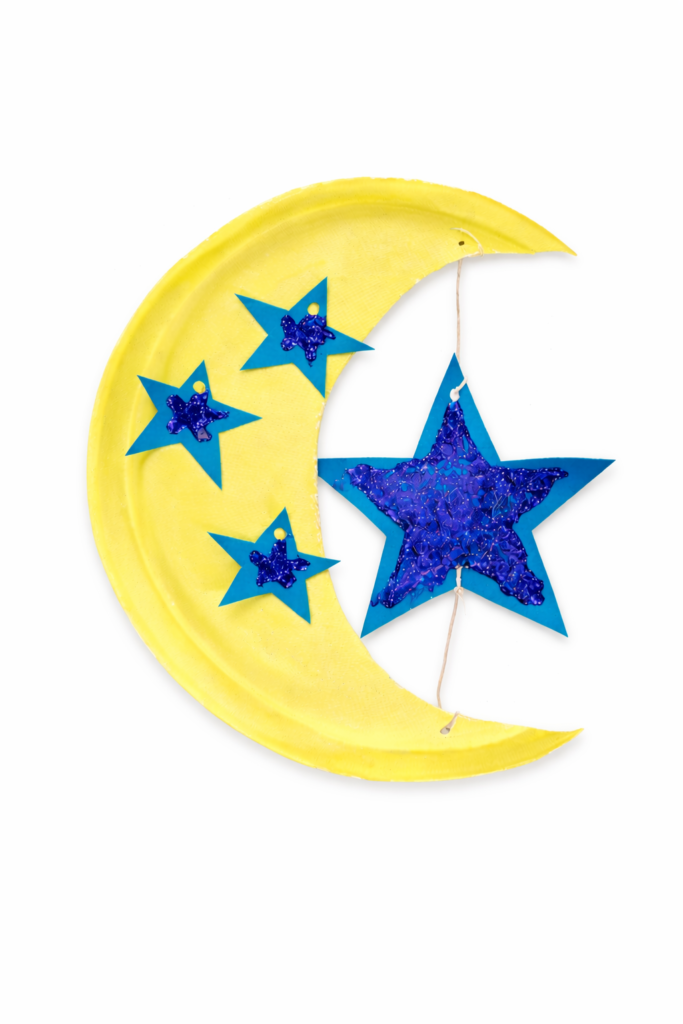
And it is ready!
Optional Variations
- Use gold paint or metallic markers for extra shine
- Replace glitter with sequins or foil paper for a mess-free option
- Write “Ramadan Mubarak” on the moon for older kids
Conclusion
This craft comes together quickly but leaves kids with something they can proudly display.
Once it’s finished, it works well as a simple wall decoration, bulletin board piece, or keepsake. The crescent moon and star design is timeless, making it easy to reuse for different themes and learning moments throughout the year.
It’s a gentle, hands-on activity that kids enjoy creating and adults appreciate for its simplicity.
We hope you enjoyed making this craft as much as we enjoyed sharing it with you.