Paper Bag Penguin Craft
Who is ready for a fun winter craft?
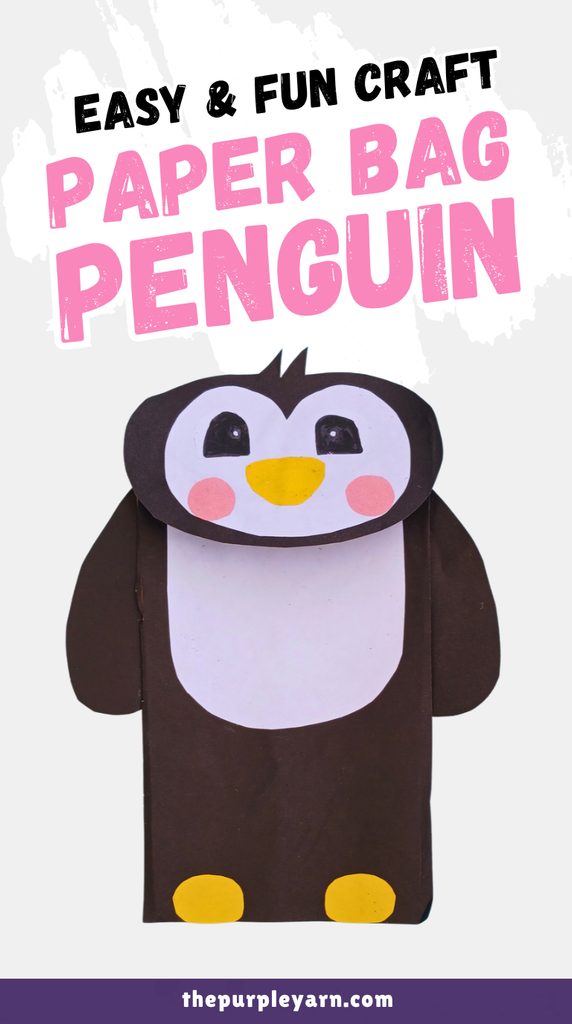
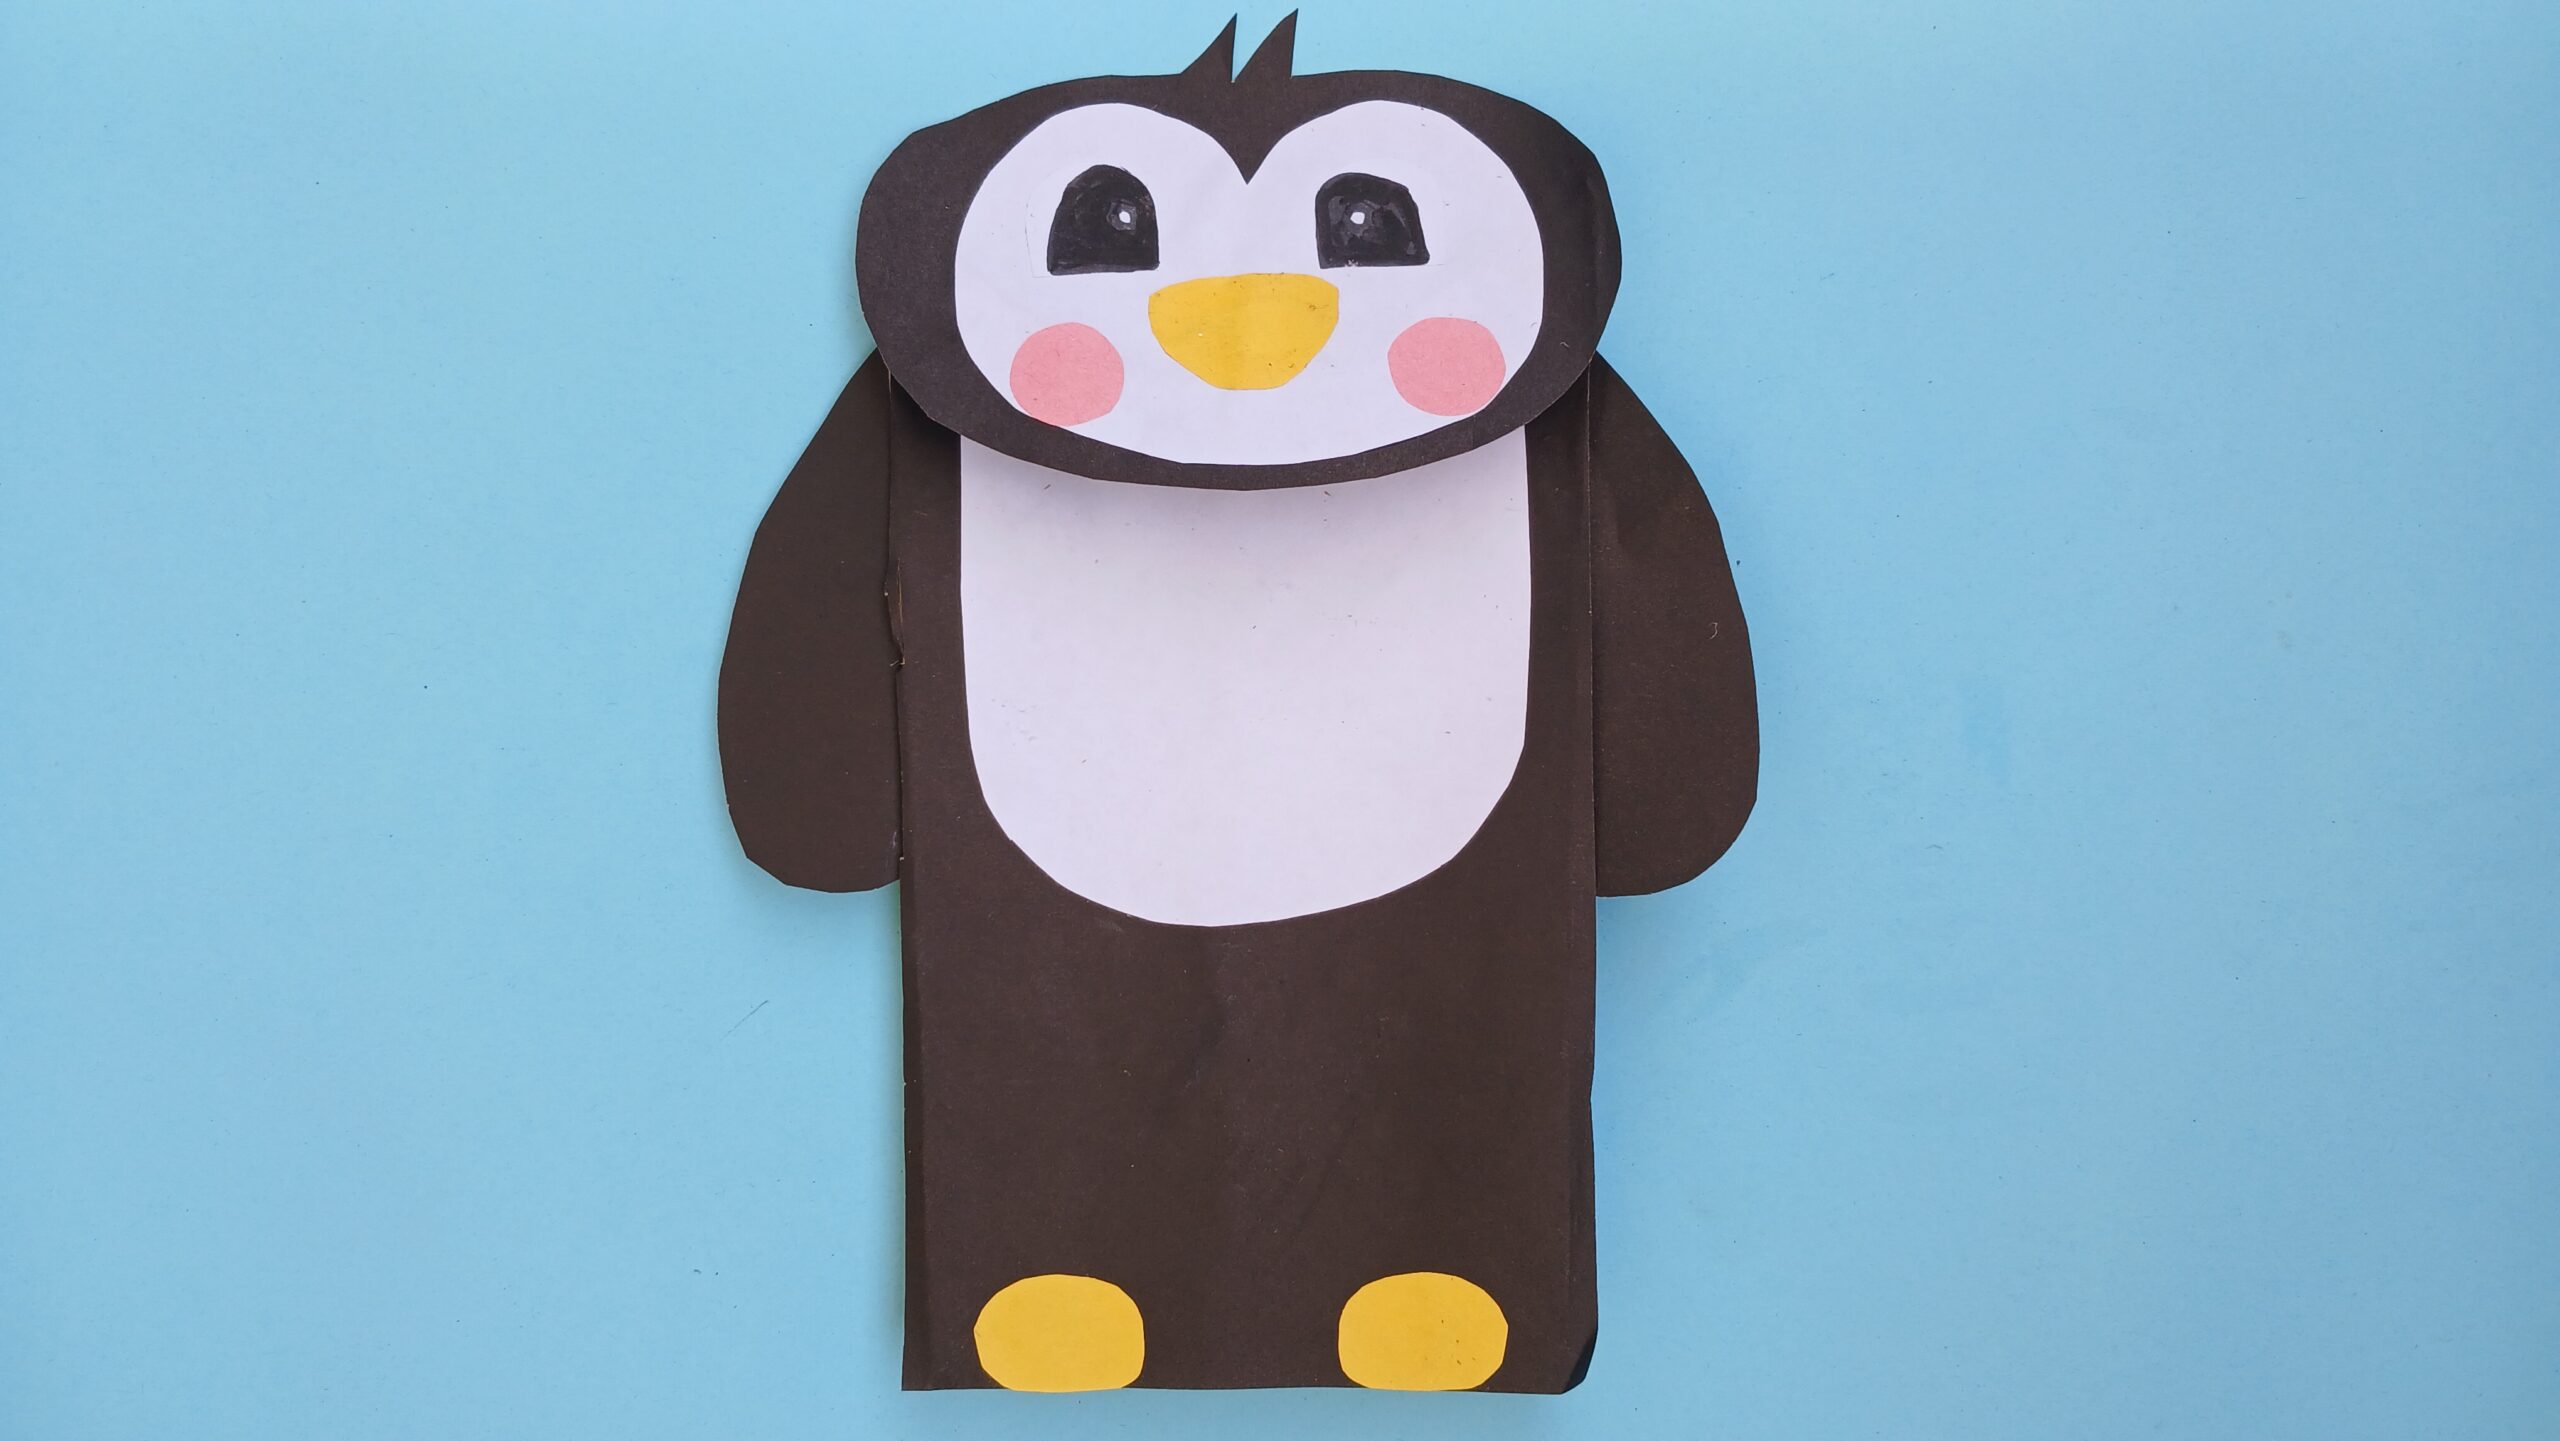
Turn a simple paper bag into an adorable little penguin with this easy paper bag penguin craft!
With some black paper, a few colorful pieces, and simple drawing and gluing, kids can create their own cute penguin friend.
This craft is great for a quiet winter afternoon at home, a classroom activity, or an animal-themed craft session.
You can even experiment with different colors to make your penguin look completely unique.
So let’s get crafting!
Before moving on to the craft, we would appreciate it very much if you would check out our YouTube channel and subscribe to it.
We upload new easy craft tutorials there that are different from what we publish on the blog. Thank you!
What you’ll need
- Paper bag
- Black construction paper
- White paper
- Yellow paper
- Pink paper
- Scissors
- Glue
- Pencil
- Black marker
How to make a paper bag penguin
Step 1: Prepare the paper bag
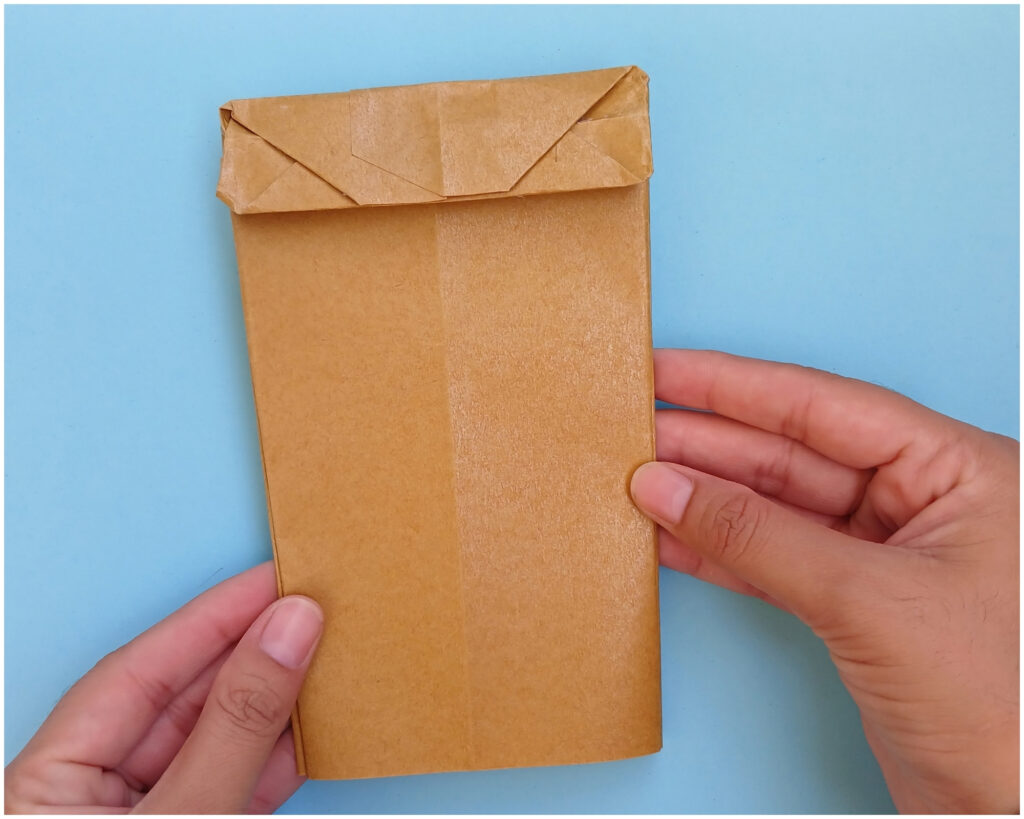
Take a paper bag and place it flat on your work surface with the folded flap at the top. This will form the basic body of your penguin.
StStep 2: Make the penguin’s head
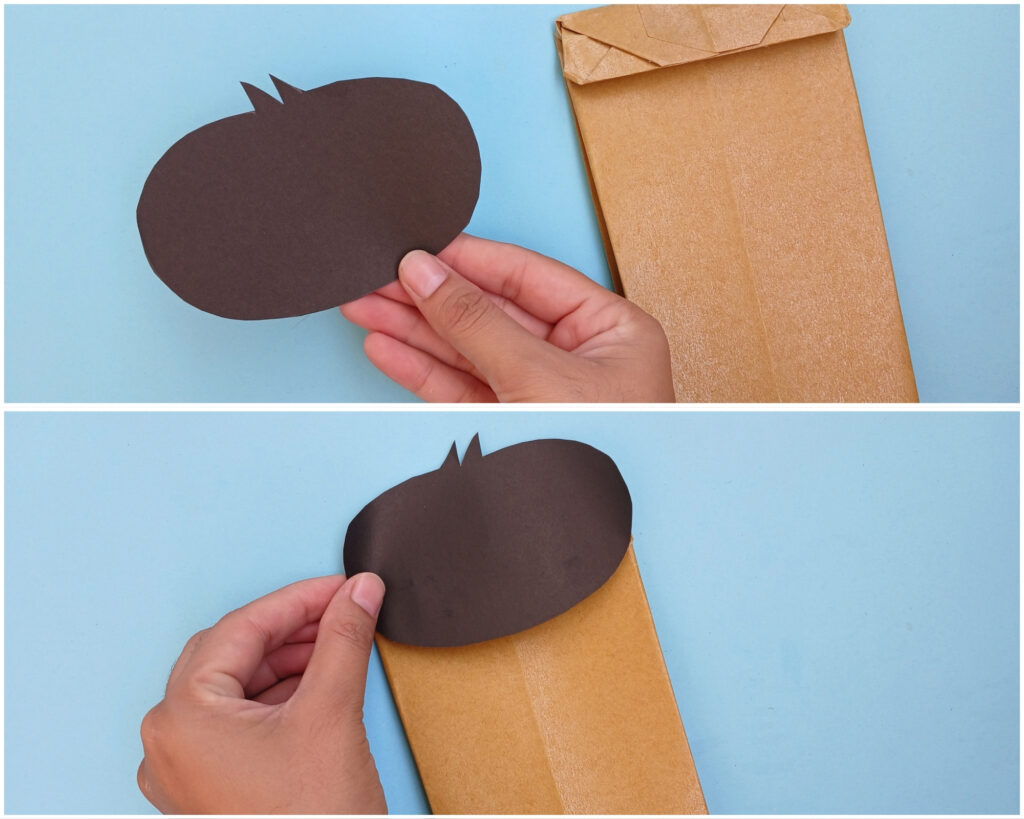
On black construction paper, draw the shape shown in the picture and carefully cut it out. Apply glue to the back and stick it onto the folded part of the paper bag to create the penguin’s head.
Step 3: Add the body
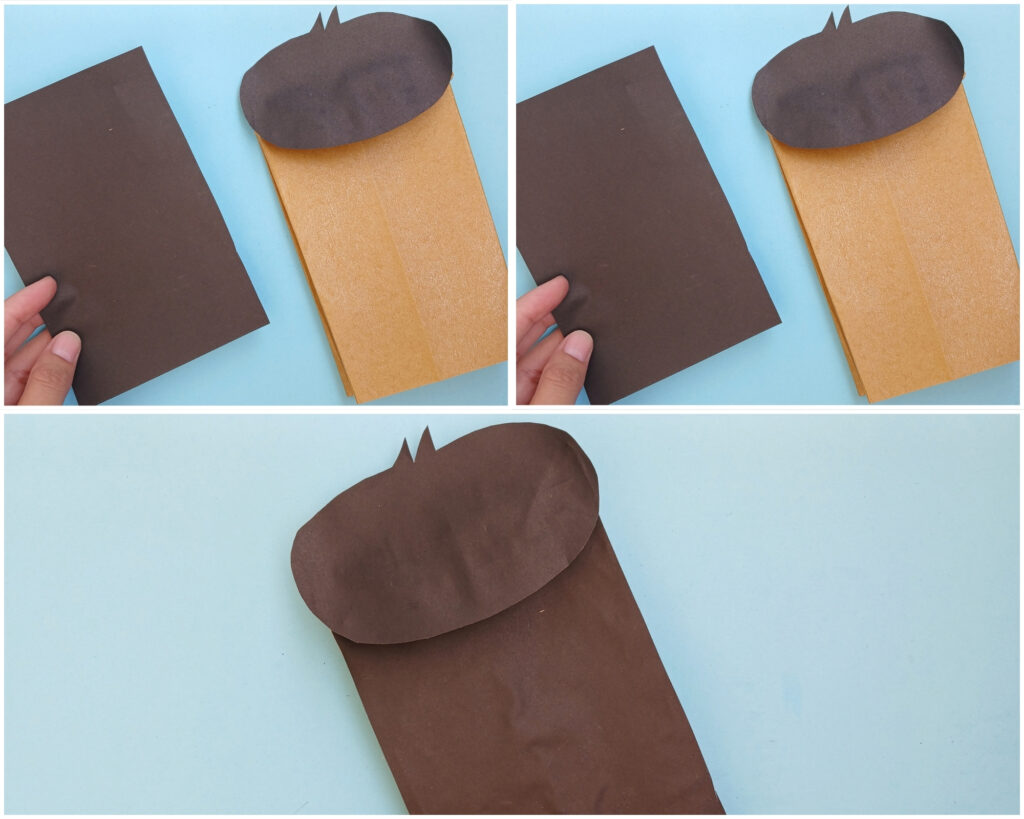
Cut a rectangle from black construction paper that is the same size as the main body of the paper bag.
Apply glue and stick it directly underneath the head, covering the front of the bag.
Step 4: Make the penguin’s face
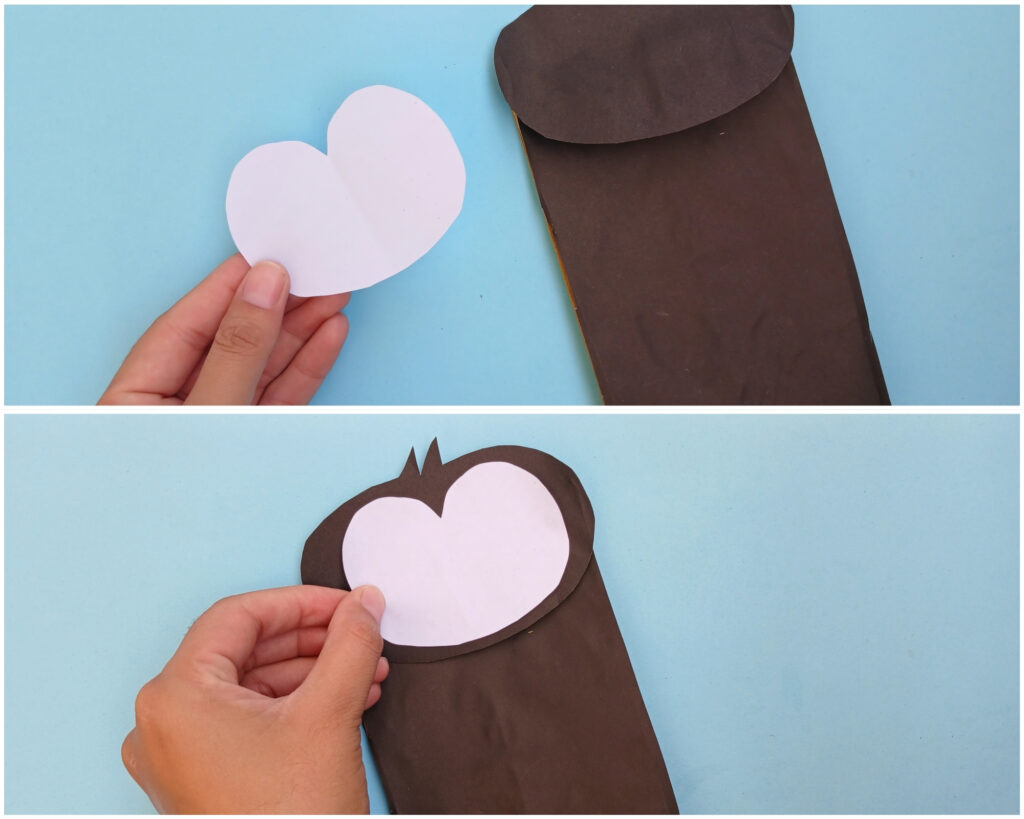
On white paper, draw and cut the shape shown in the picture. Apply glue and stick it onto the head portion of the penguin. This will form the penguin’s white face.
Step 5: Add the eyes
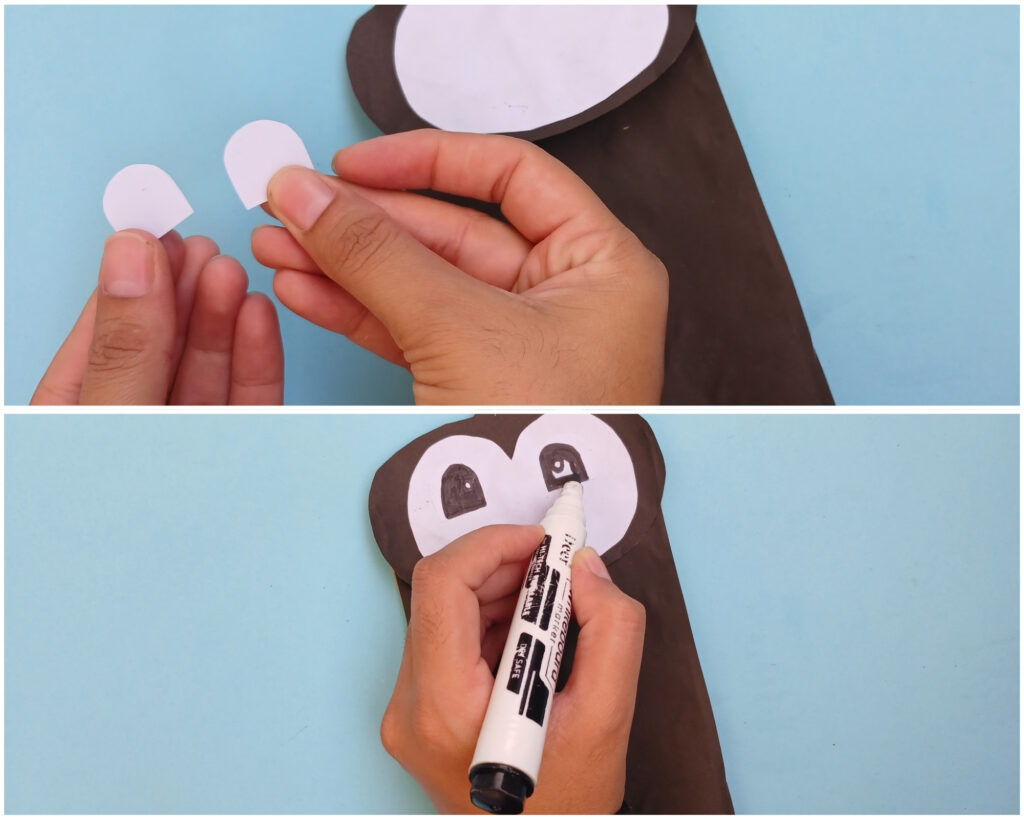
On white paper, draw and cut the eye shapes as shown in the picture. Stick them onto the penguin’s face.
Use a black sketch pen to color the eyes and give them a clear, expressive look.
Step 6: Add the beak and cheeks
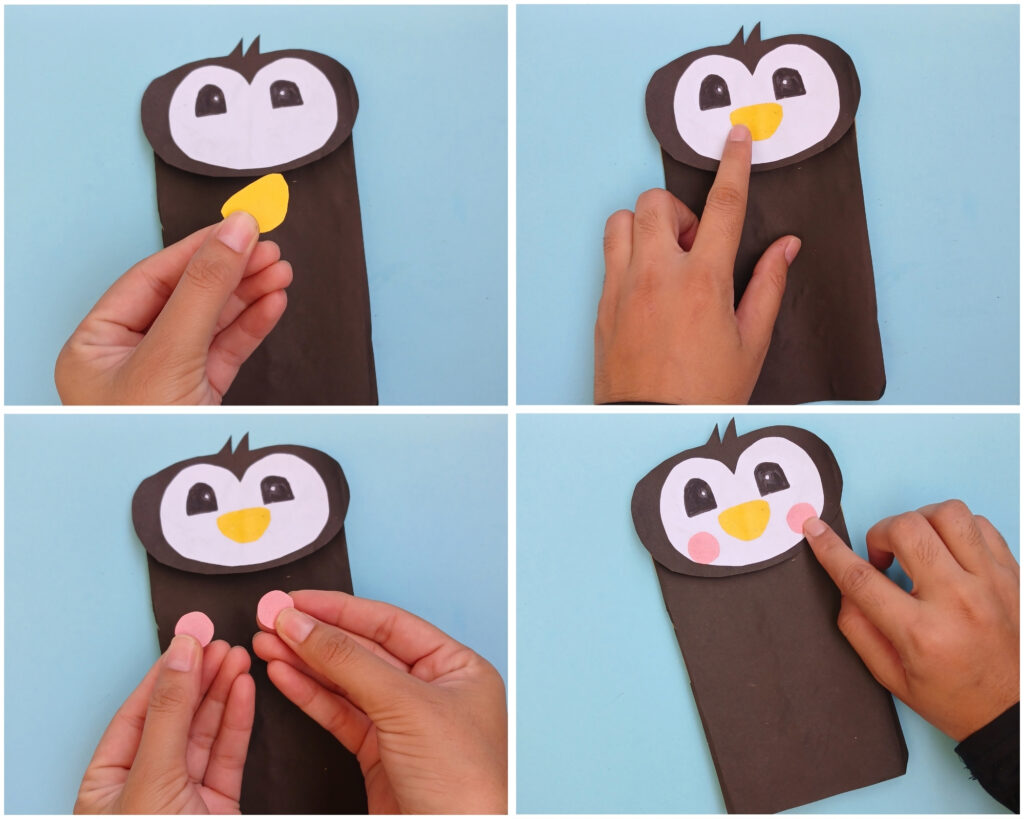
Cut a small beak shape from yellow paper and glue it onto the center of the face.
Then cut two small circles from pink paper for the penguin’s rosy cheeks. Stick one cheek on each side of the beak.
Step 7: Make the feet
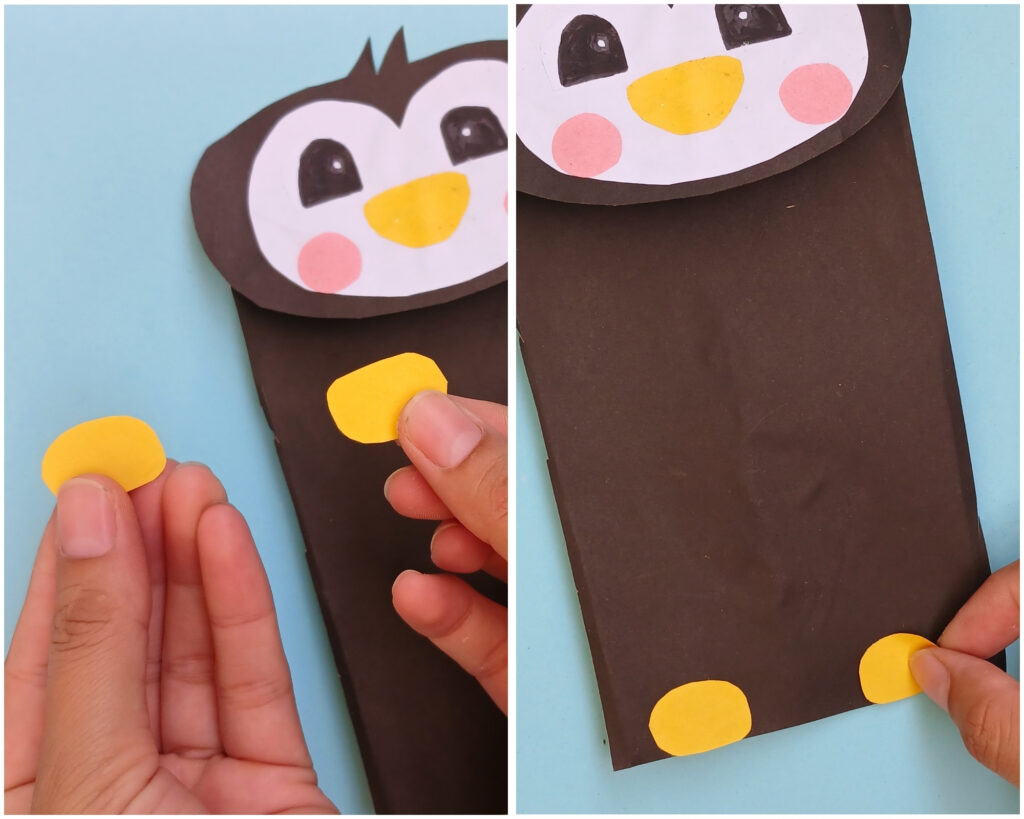
For the penguin’s legs and feet, draw the shapes shown in the picture on yellow paper. Carefully cut them out and glue them to the bottom of the penguin’s body.
Step 8: Add the belly and flaps
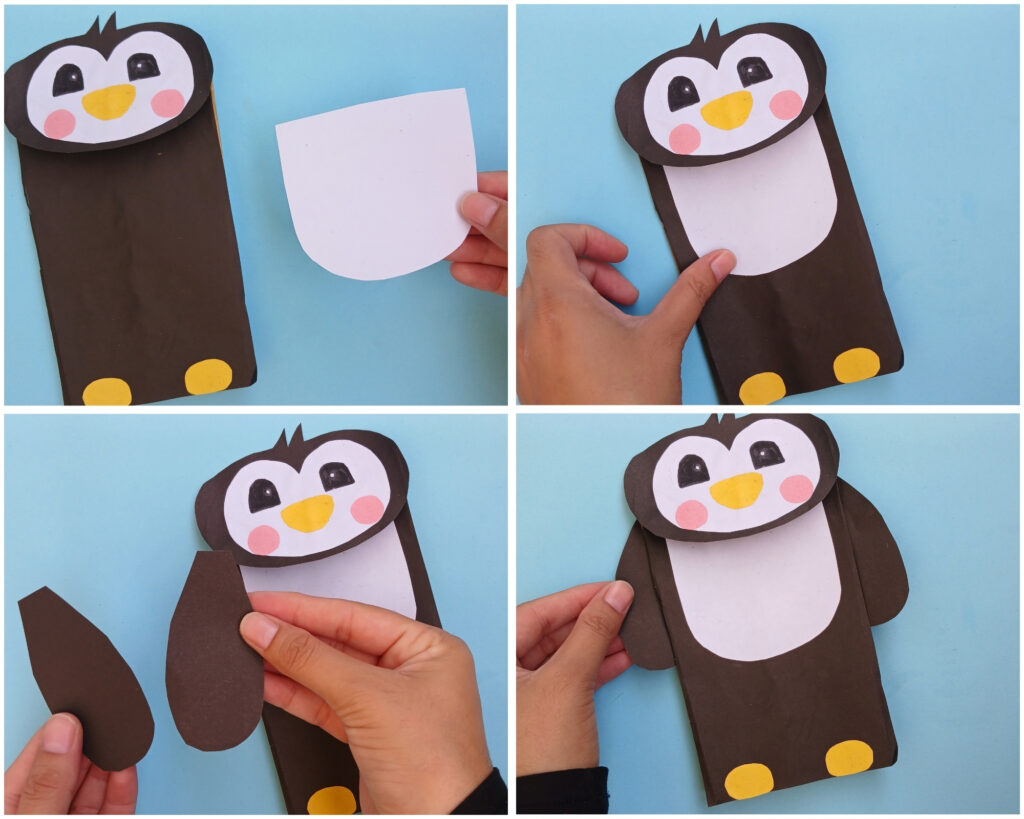
On white paper, draw the rounded body shape shown in the picture and cut it out.
Stick it onto the center of the penguin’s body.
Next, draw two flap shapes on black paper and carefully cut them out. Glue one flap onto each side of the penguin’s body.
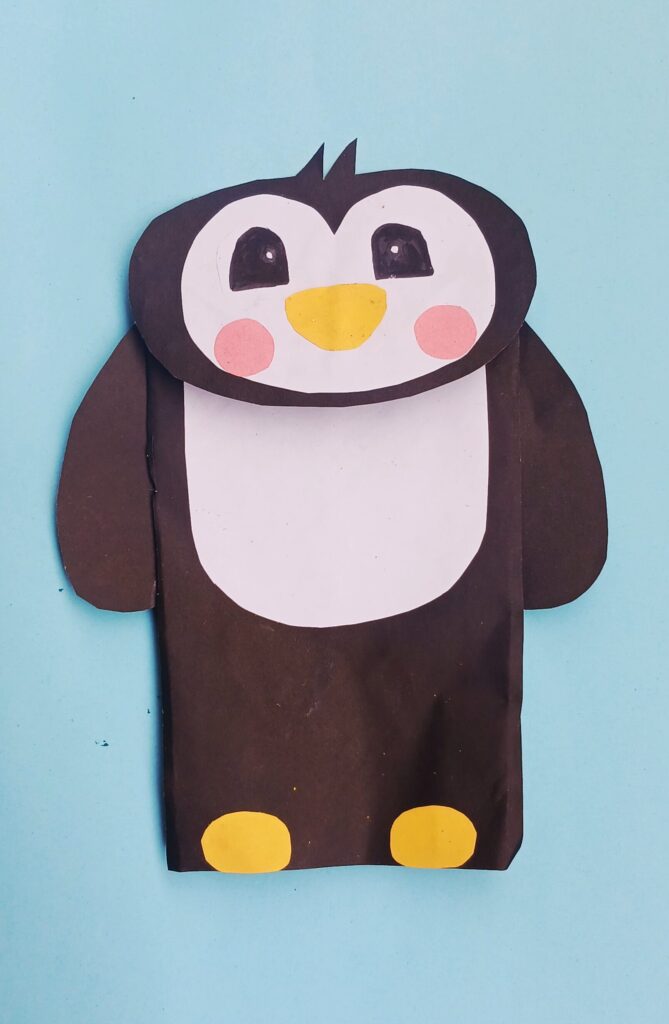
Your adorable paper bag penguin is ready!
Final thoughts
Your paper bag penguin is now complete and ready for some fun.
With its big eyes, bright yellow beak, little flippers, rosy cheeks, and tiny feet, this simple paper bag has transformed into an adorable little penguin.
Kids can make several penguins using different colors and even add their own expressions or decorations to give each one a unique personality.
This is a fun craft to try at home, in the classroom, or as part of an animal-themed activity.
So grab another paper bag and see what kind of penguin you can create next!
More Winter Crafts:
- Snowman name craft
- Paper plate snow globe craft
- Handprint penguin craft
- Paper Plate Winter Hat Craft
- Polar Bear Headband Craft (With free template)
- Cotton Ball Snowman Craft
- Popsicle Stick Snowflake Ornament Craft
- Paper Plate Reindeer Handprint Craft for Kids
- Reindeer Headband Craft for Kids (with free template)
- Puffy Paint Polar Bear Craft (Winter Craft for Kids)
- Paper Plate Penguin Craft (Easy Winter Craft for Kids)
- Snowman with a felt hat
- Hot chocolate with marshmallow craft idea for kids
- Easy snowman craft with paper and cotton (with free snowman template)
Browse our Christmas Crafts collection here!