Paper Plate Groundhog Craft
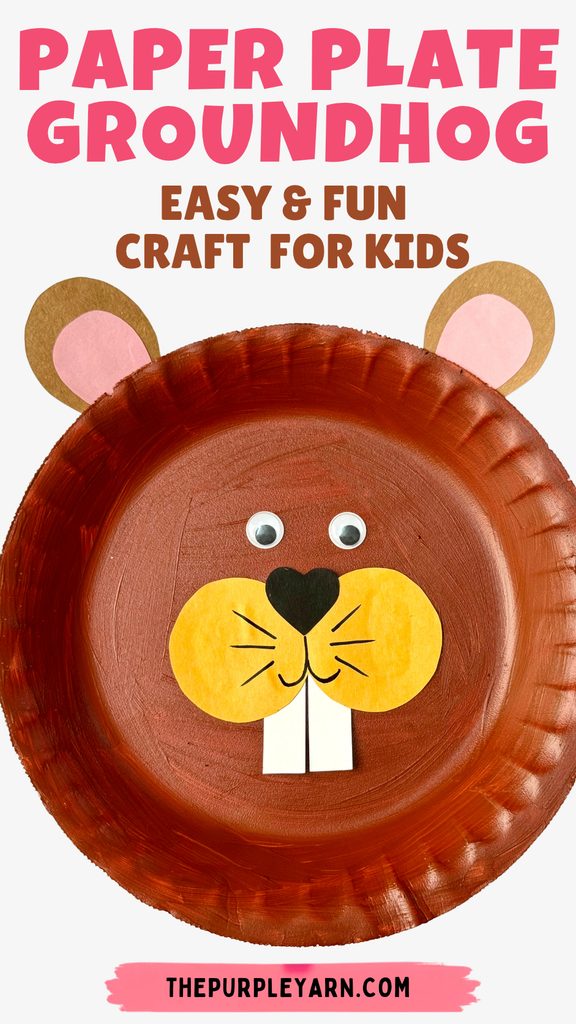
Let’s make the cutest little groundhog using a simple paper plate!
This Paper Plate Groundhog Craft is such a fun and easy project for kids.
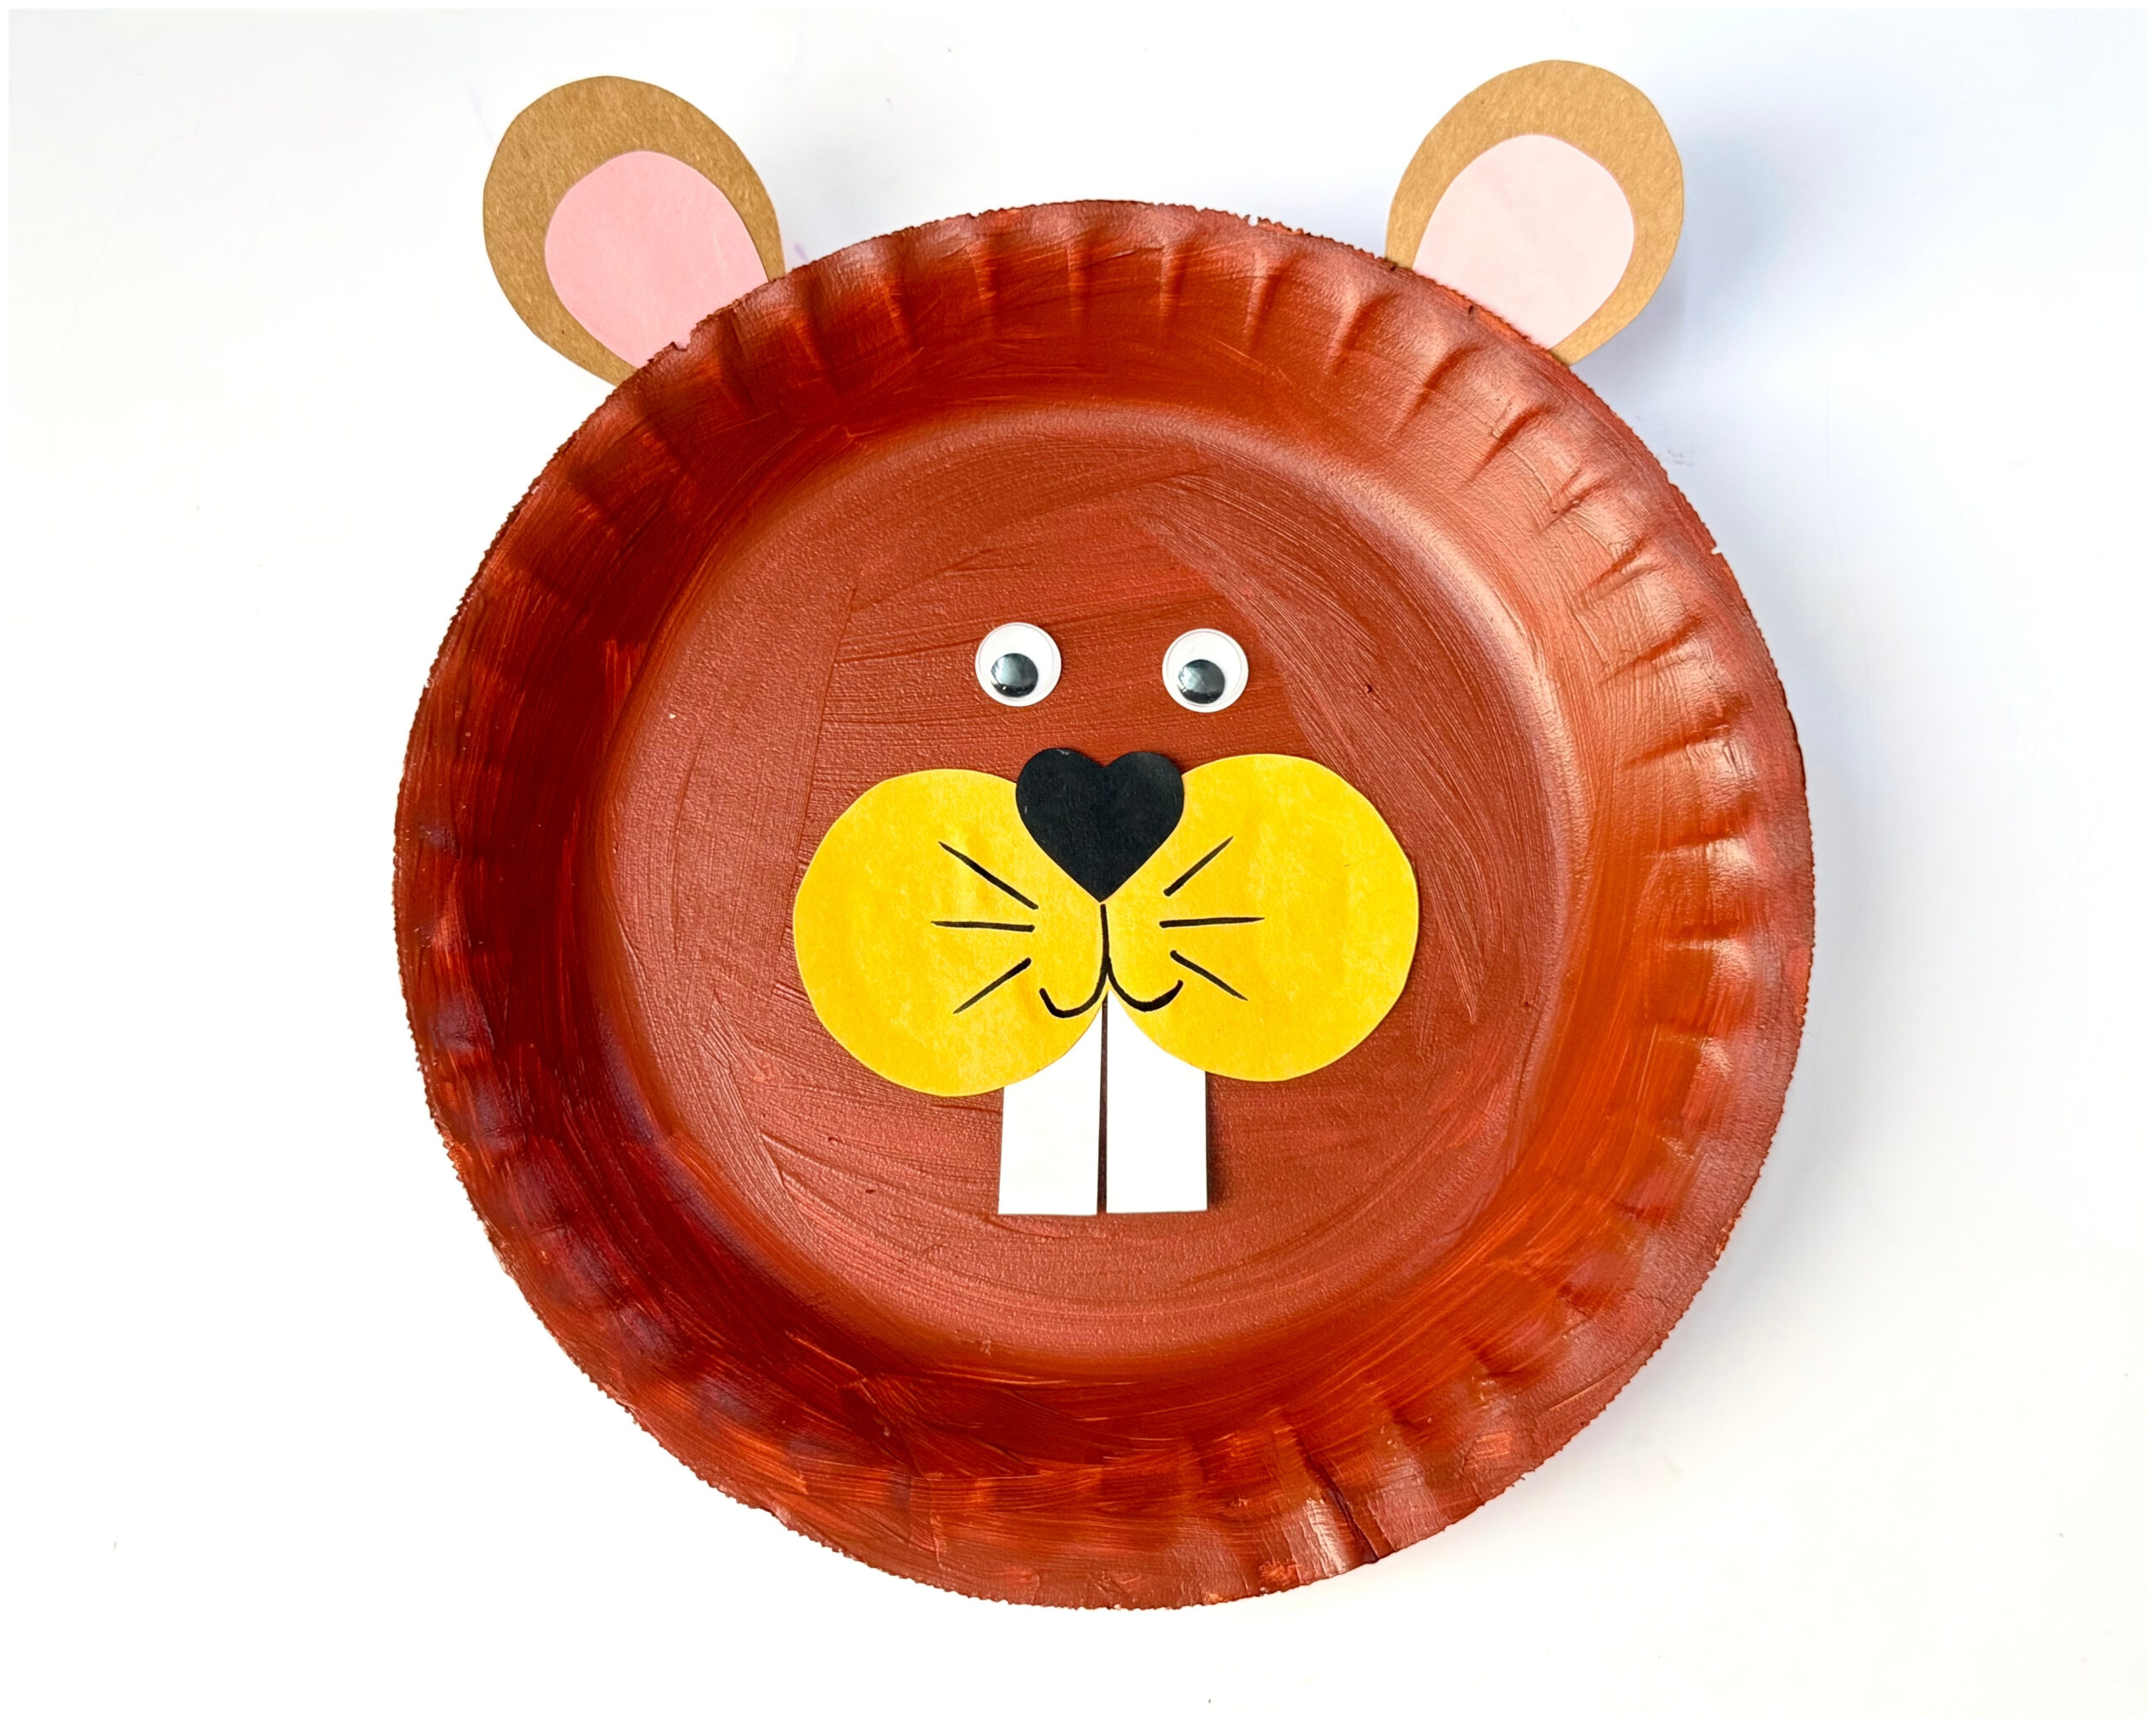
With its sweet little face, chubby cheeks, tiny front teeth, and adorable ears, this little groundhog is hard not to love!
Isn’t it amazing how a simple paper plate, some colorful paper, and a little paint can turn into such a cute woodland animal?
We are sure kids will have fun putting all the little details together and watching their groundhog take shape.
This craft is perfect for Groundhog Day, nature-themed activities, classroom projects, or a fun afternoon of crafting at home.
You can even make a few and display them together for a sweet woodland-themed decoration.
So, gather your paper plates and craft supplies, and let’s make this adorable little groundhog!
Before moving on to the craft, we would appreciate it very much if you would check out our YouTube channel and subscribe to it.
We upload new easy craft tutorials there that are different from what we publish on the blog. Thank you!
What you’ll need
- Paper plate
- Brown paint
- Brown construction paper
- Pink construction paper
- Yellow construction paper
- Black construction paper
- White paper
- Googly eyes
- Paintbrush
- Pencil
- Black marker
- Scissors
- Glue
How to make a paper plate groundhog
Step 1: Gather the materials
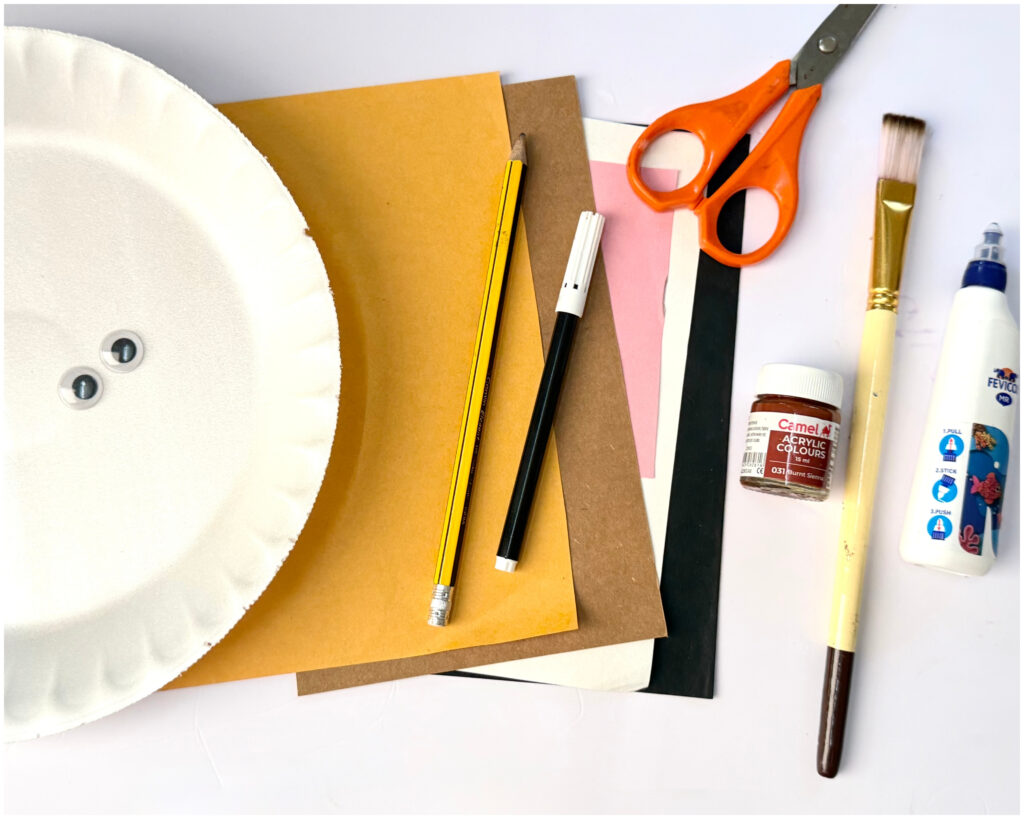
Start by gathering all the materials you will need to make your paper plate groundhog.
You will need a paper plate, brown paint, brown, pink, yellow, black, and white construction
paper, googly eyes, a paintbrush, a pencil, a black marker, scissors, and glue.
Once everything is ready, you can begin making your groundhog.
Step 2: Paint the paper plate
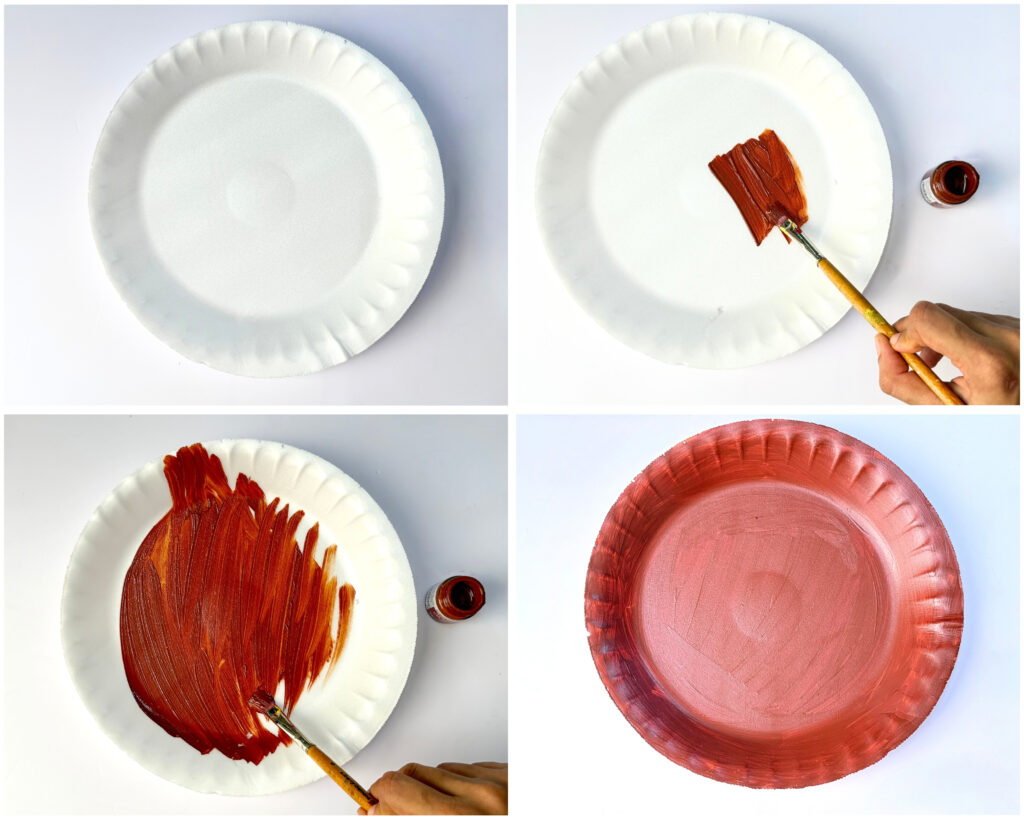
Take the paper plate and paint the entire surface brown using a paintbrush.
Make sure to cover the plate evenly with paint. Leave it aside and allow it to dry completely.
Step 3: Prepare the facial pieces and ears
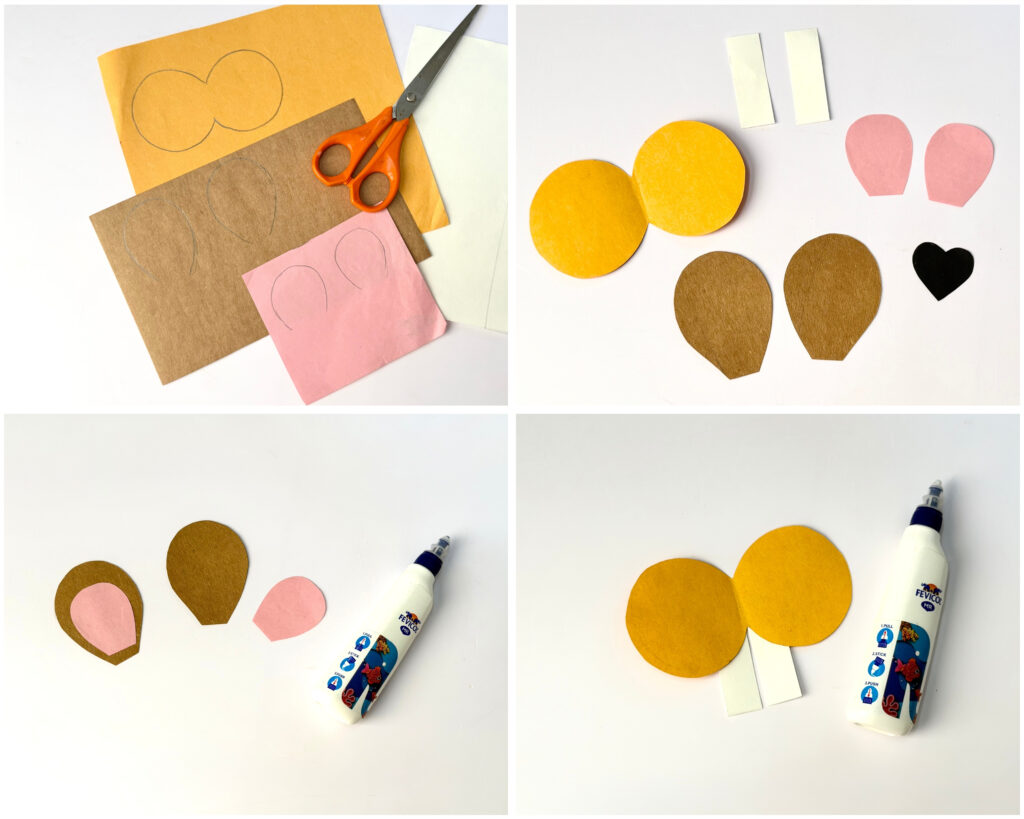
Take the colored construction paper and draw the different shapes needed for the groundhog’s face.
- On brown paper, draw and cut out two large ear shapes.
- On pink paper, draw and cut out two smaller ear shapes for the inner ears.
- On yellow paper, draw and cut out a connected double-circle shape for the muzzle.
The two circles should be joined together, rather than cut as separate pieces. - On black paper, draw and cut out a small heart shape for the nose.
- On white paper, cut out two small rectangles for the front teeth.
Glue each pink ear piece onto a brown ear piece to create the ears. Set them aside.
Next, take the yellow muzzle piece and attach the two white rectangles to its back, at the
bottom where the two circles meet.
Let the white pieces extend downwards to create the groundhog’s front teeth. Set all the
prepared pieces aside.
Step 4: Assemble the groundhog’s face
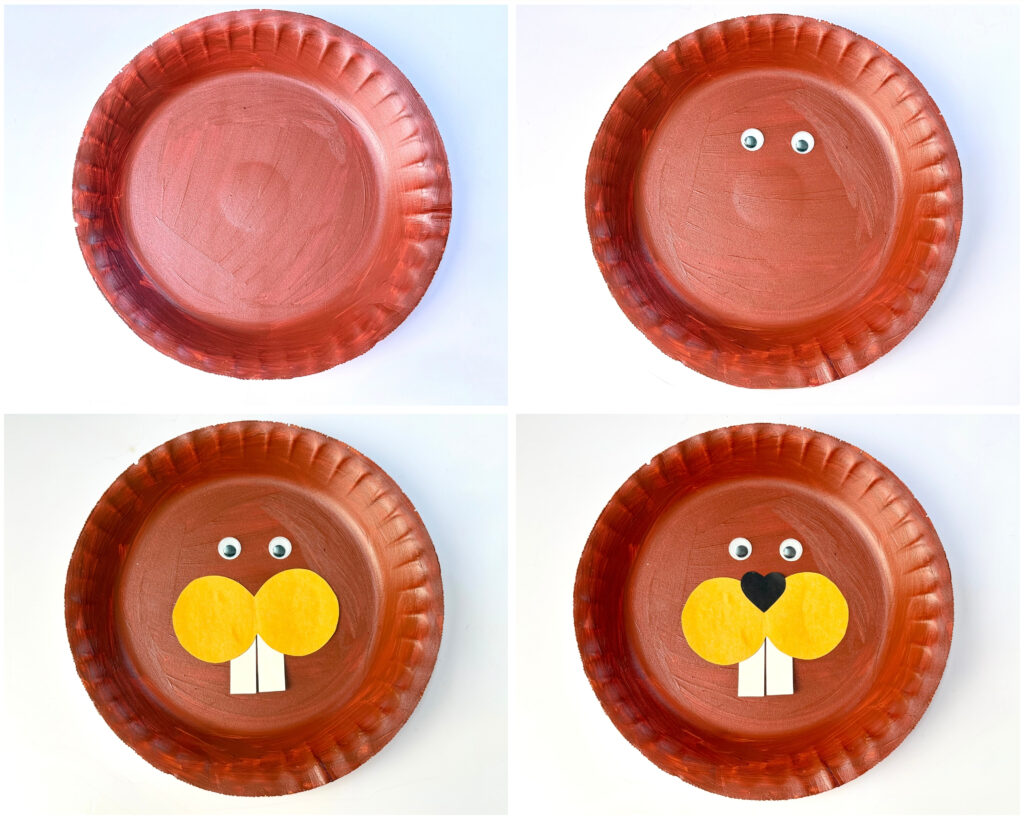
Take the dried brown paper plate and start putting together the face.
First, stick the two googly eyes near the upper middle part of the plate.
Next, glue the prepared yellow muzzle underneath the eyes, with the two white teeth pointing downwards. Then stick the black heart-shaped nose in the middle, just above the yellow
muzzle.
Step 5: Add the mouth, whiskers and ears
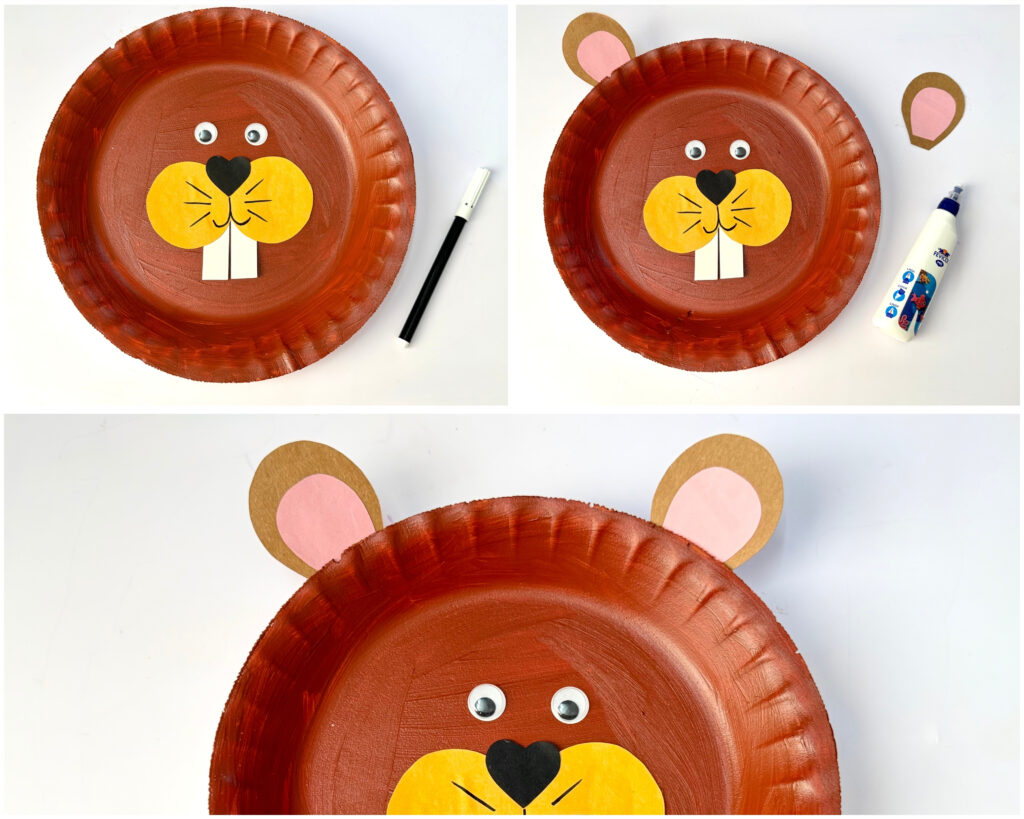
Take a black marker and draw a small mouth underneath the nose. Add a few thin whiskers
on either side of the yellow muzzle to complete the groundhog’s face.
Take the two prepared ears and glue them to the top back side of the paper plate, one on
each side.
Adjust them so they sit nicely above the groundhog’s face. Press gently to secure them in
place and allow the glue to dry.
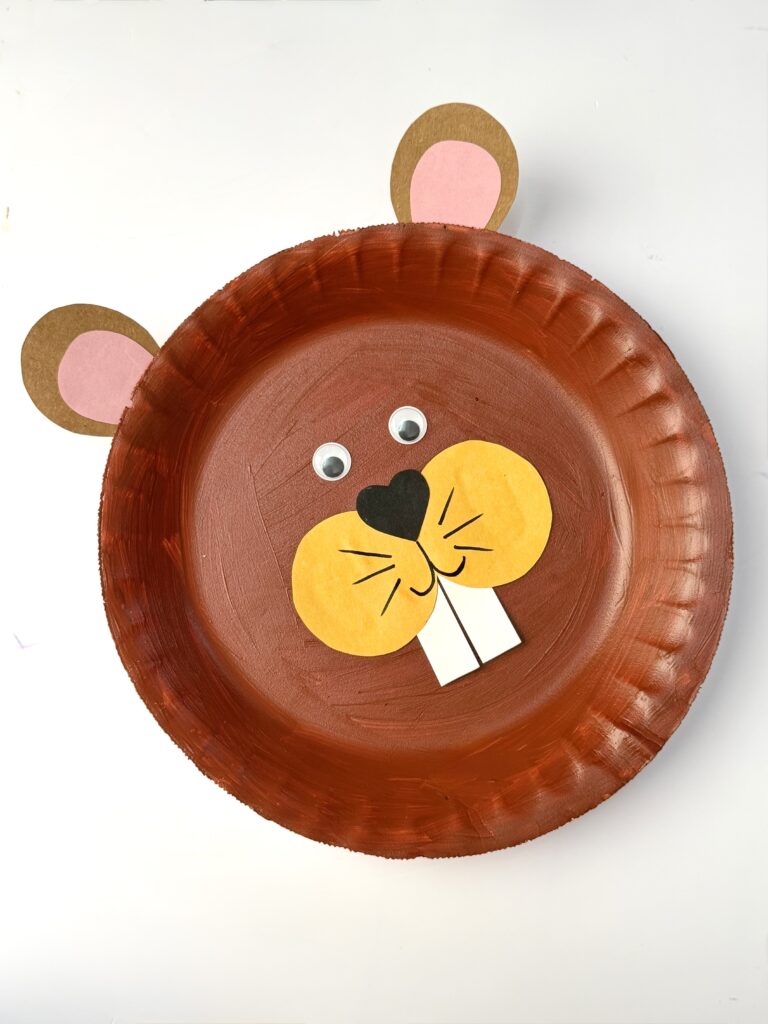
Your paper plate groundhog is done!
Final words
Well, look who popped up for a little crafting fun!
This paper plate groundhog is such a cute way to turn a few everyday craft supplies into something special.
Those little front teeth, round muzzle, and tiny whiskers give it so much character!
Make one for Groundhog Day, use it for a classroom display, or create a whole family of
groundhogs in different sizes. You can even add your own little touches to give each one a
different expression.
Happy crafting!
More Groundhog Day Crafts: